Viewing and editing user account details
NAVIGATION Administration > Configuration > Teams and Users > All Users > select a user
PERMISSIONS Administrator
From the All Users page, click a user in the list to access their User Account Details page.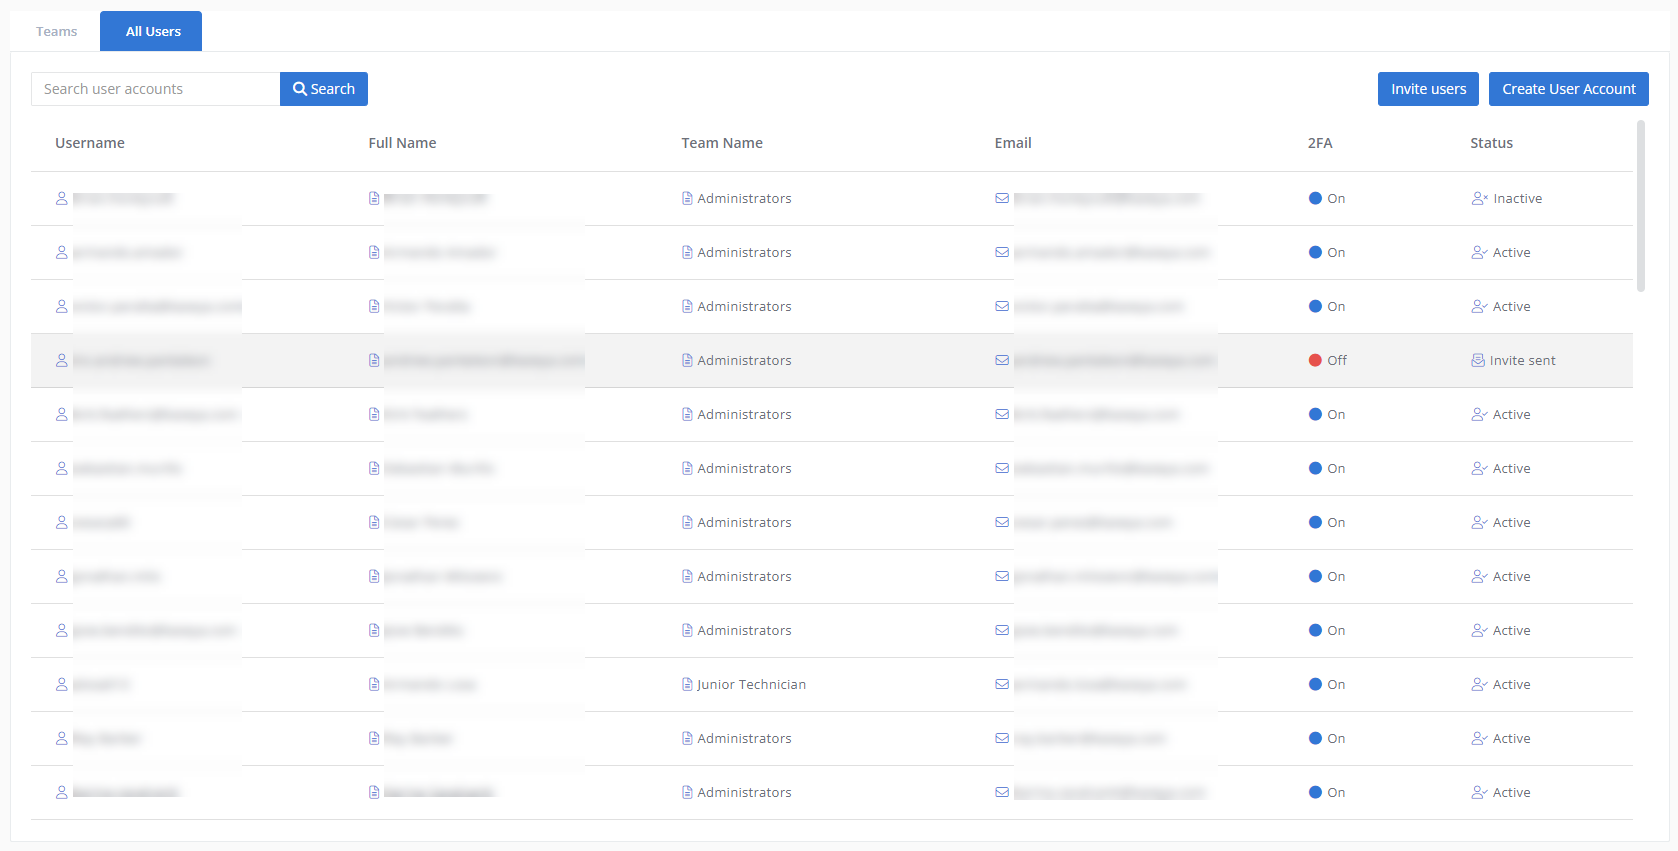
NOTE A prospect with the status Invite sent must complete account creation for their user account details to become available. Refer to Invited user account creation.
The top of the User Account Details page displays the user's full name, email address, and user ID.
Overview
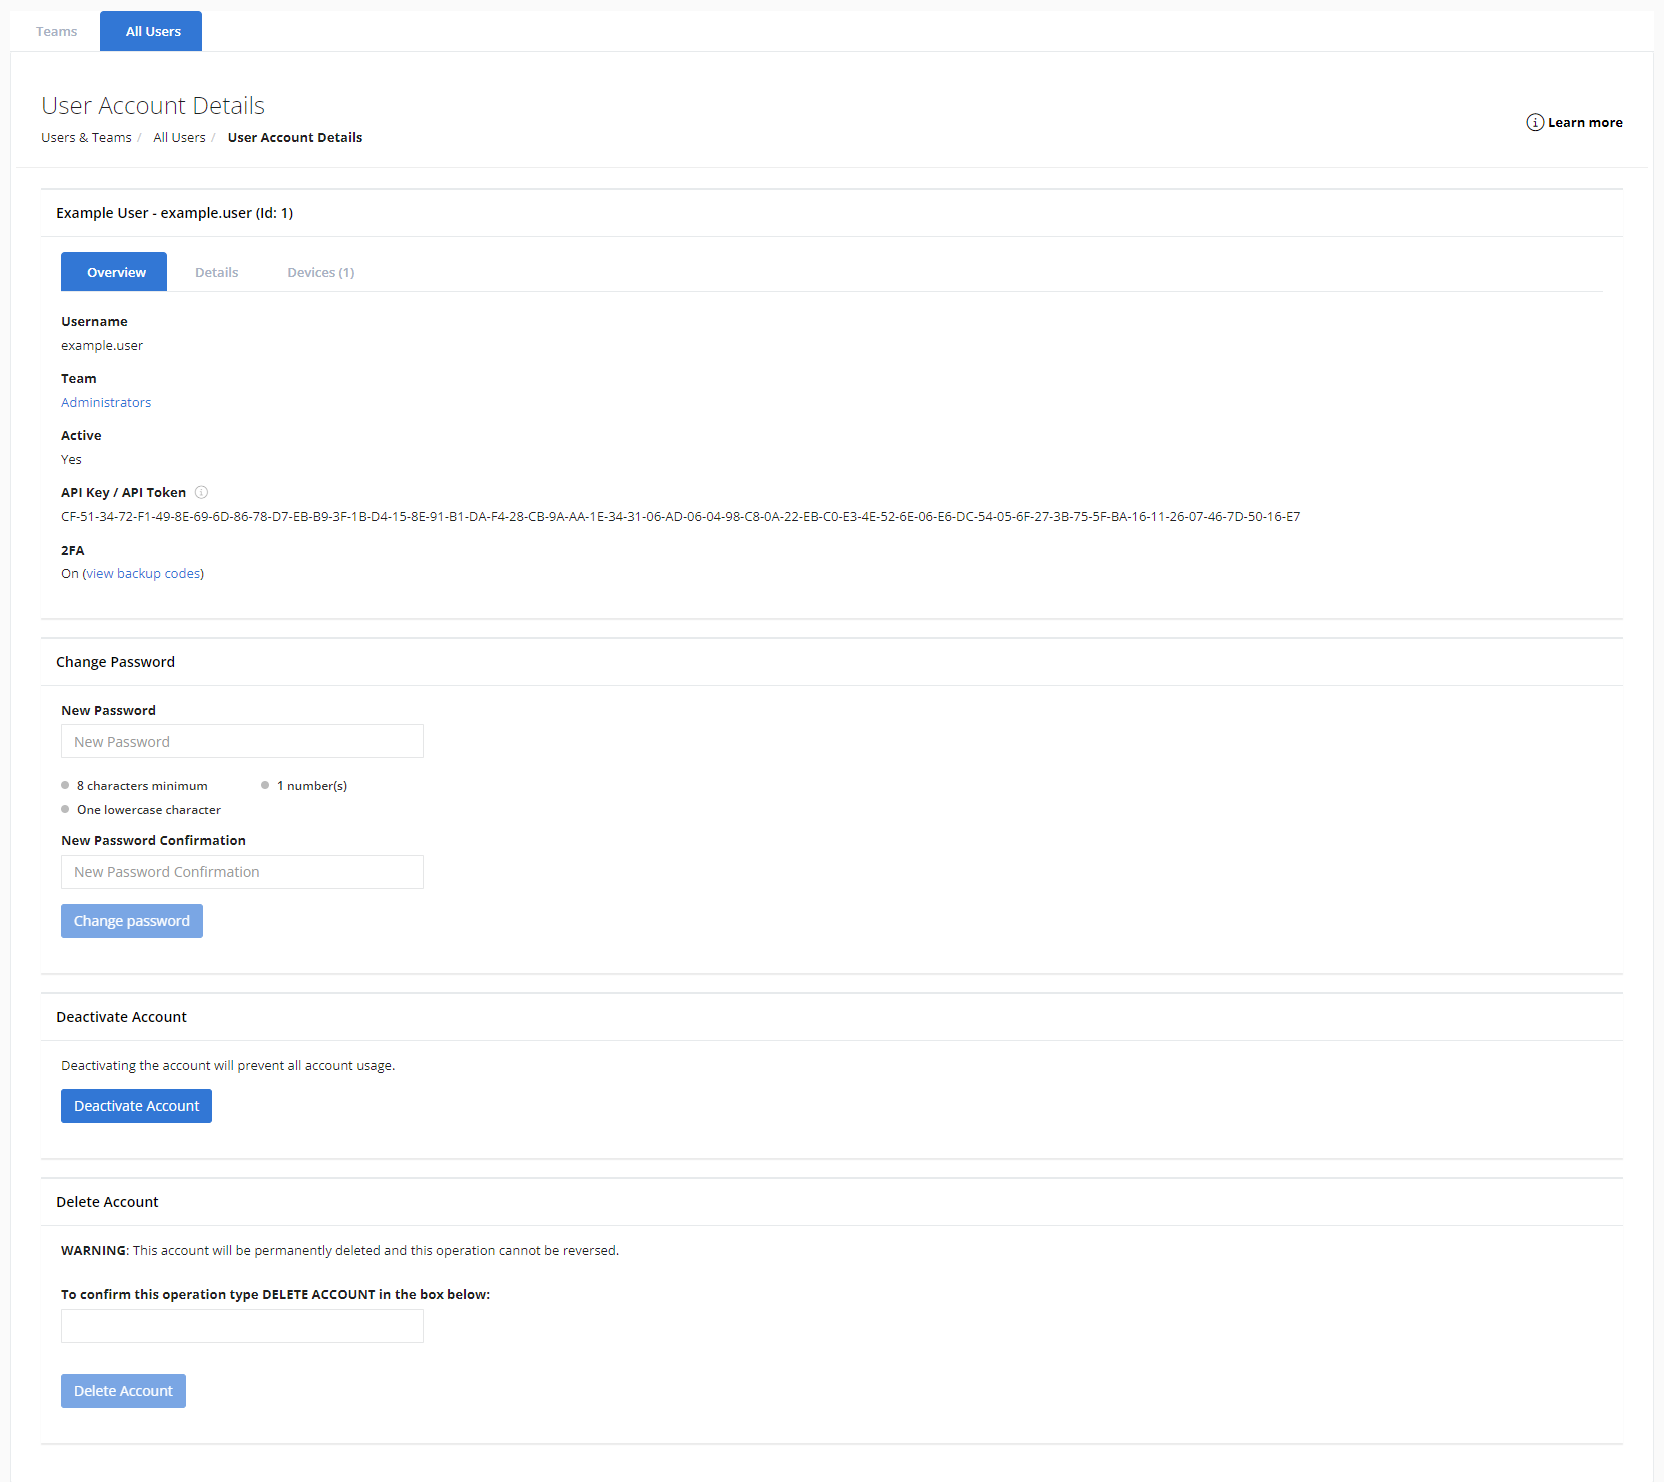
The Overview tab is displayed by default and includes the following user information:
| Field | Description |
|---|---|
| Username | The username is set during account creation and can be changed by the user via Account > My Settings. Refer to My Settings. If a user has been invited to create an account but has not edited their username, the username is prefixed with inv. followed by the prefix of the user's email address to which the invitation was sent. |
| Default Team | The default team the user is assigned to. Click the name to open the team page and details. Refer to Viewing or editing team details in Teams. |
| Active | Displays Yes if the user is active or No if the user is inactive. Refer to Status in All Users and Deactivate Account / Reactivate Account. |
| API Key / API Token | For details about this field, refer to Your API Key / API Token in My Settings. |
| 2FA |
Displays On if the user has configured their 2FA settings or Off if the user has not yet done so. Refer to Two-factor authentication. NOTE A 2FA status of Off indicates the user has not yet gained access to any area of VSA 10 other than Account > 2FA and is required to set up 2FA for account access. When an administrator is viewing another user's account details, the administrator has the option to click view backup codes to access the other user's active backup codes. This option is useful if the user needs to log in to their user account and is unable to execute other methods of 2FA or access their backup codes. Refer to Backup codes and Two-factor authentication. |
| Change Password | Allows an administrator to change their own or another user's password. Enter a new password in both the New Password and New Password Confirmation fields. Error notes and indicators will inform you if the fields do not match or if the value entered does not meet the strong password requirements. Refer to Strong password requirements. To execute the action, click Change password. The password will change immediately and must be used for your future logins. |
| Deactivate Account / Reactivate Account | Click Deactivate Account to block a user from logging in to their account while preserving their account details and status as an existing user. When deactivated, the Status of the user on the All Users page changes to Inactive. Refer to Status in All Users. To reactivate the user at any time and reenable their access, click Reactivate Account. |
| Delete Account |
IMPORTANT By deleting an account, the user details will be permanently deleted. This operation cannot be reversed. After deleting an account, a brand new account can be created for the user but must be configured from scratch. To confirm the operation and immediately execute the deletion, enter DELETE ACCOUNT and click Delete Account. |
Details
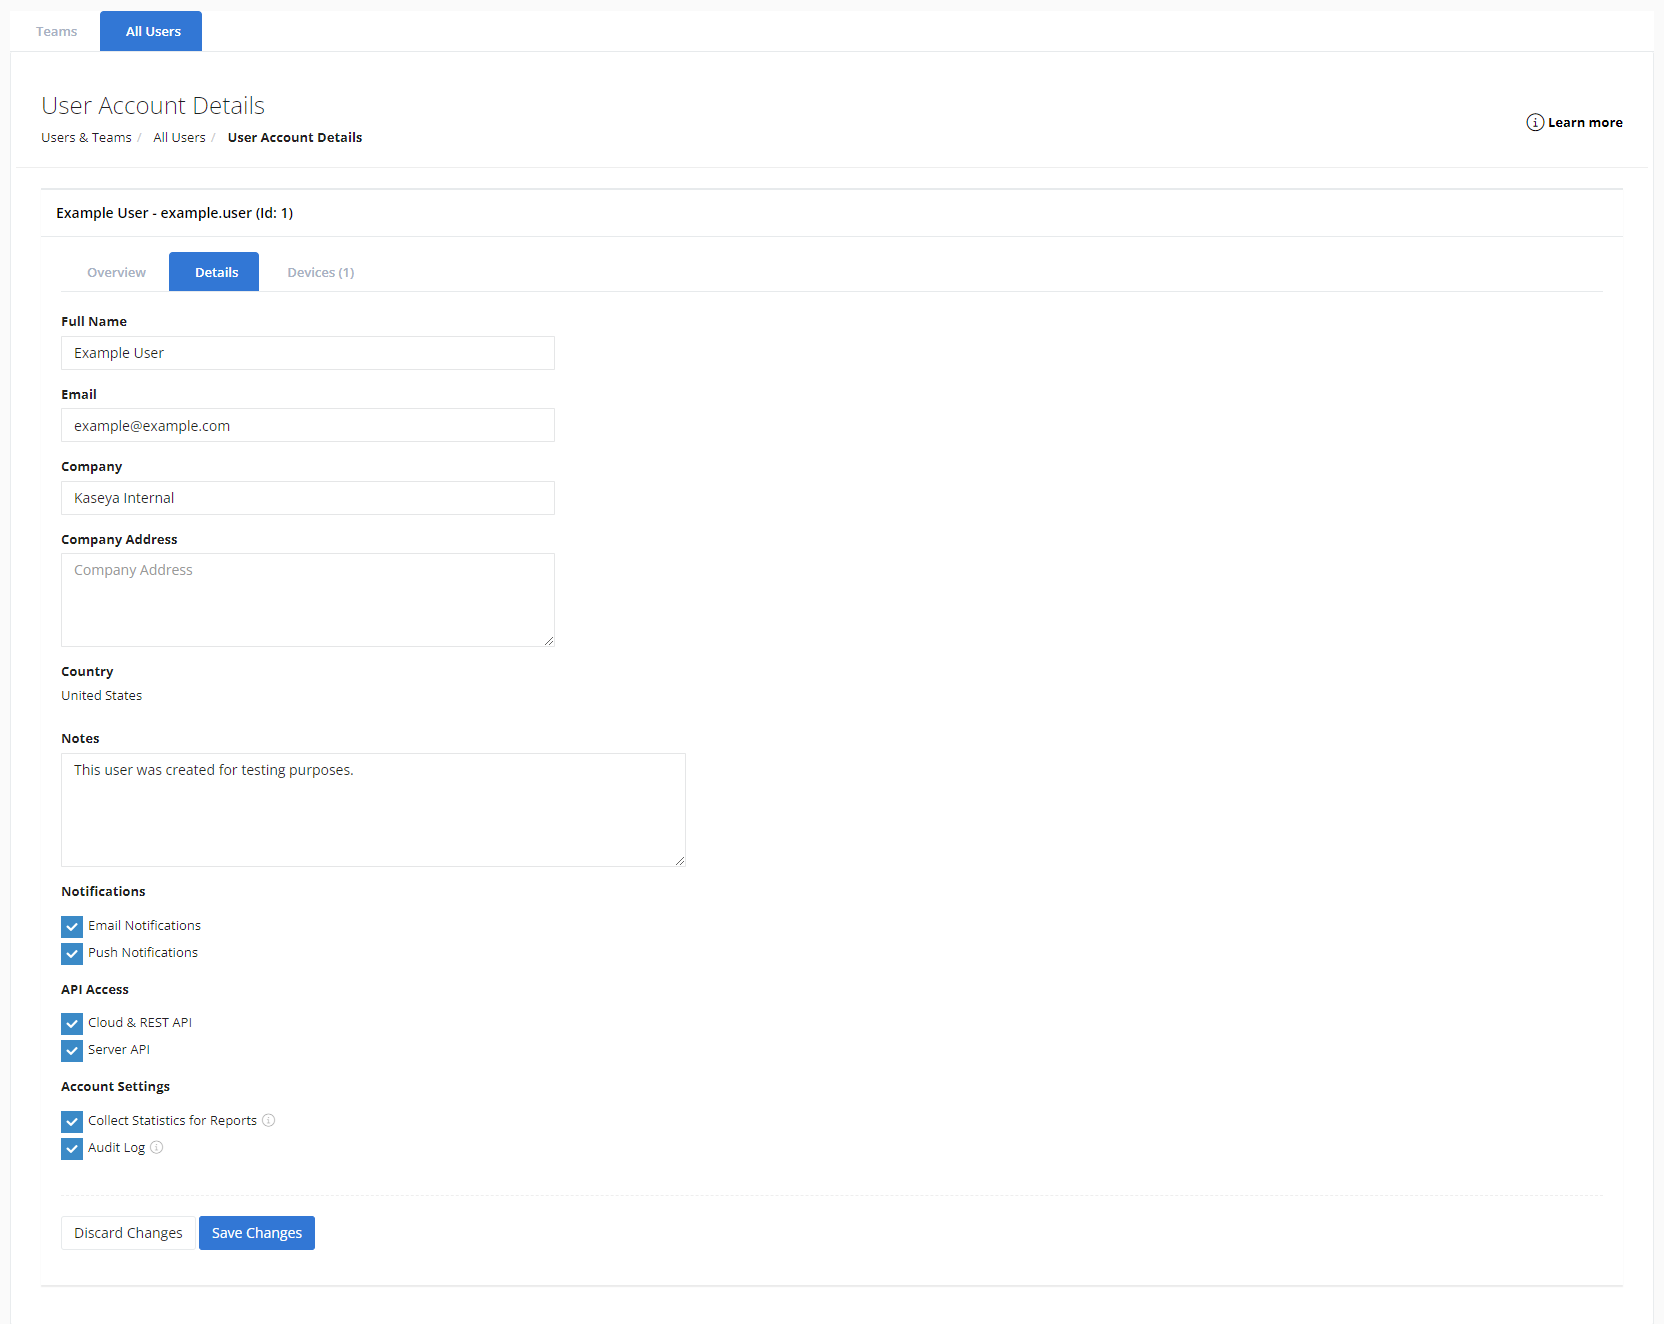
Click the Details tab to manage the following user information:
| Field | Description |
|---|---|
| Full Name | The full name is set during account creation and can be changed by the user via Account > My Settings or by any administrator in this field. Refer to My Settings. |
| The email address associated with the user's account and used for login. | |
| Company | The name of the company the user works for, which can be edited. |
| Company Address | The address of the company the user works for, which can be edited. |
| Country | The country in which the user resides, which can be set by the user. Refer to Country in My Settings. |
| Notes | This space is available to enter any notes relevant to the user, which will be visible to any administrator. |
| Notifications | Select or clear the check boxes to configure the types of notifications the user should receive. Refer to Receiving account notifications. |
| API Access | Select or clear the check boxes to configure the user's API access. Refer to VSA 10 API guide. |
| Account Settings | Select or clear the check boxes to indicate whether or not the user's data should be collected for reports and logged in the Audit Log. Refer to Audit Log. |
If you have made any changes, click Save Changes, or click Discard Changes to preserve the original configuration.
Teams
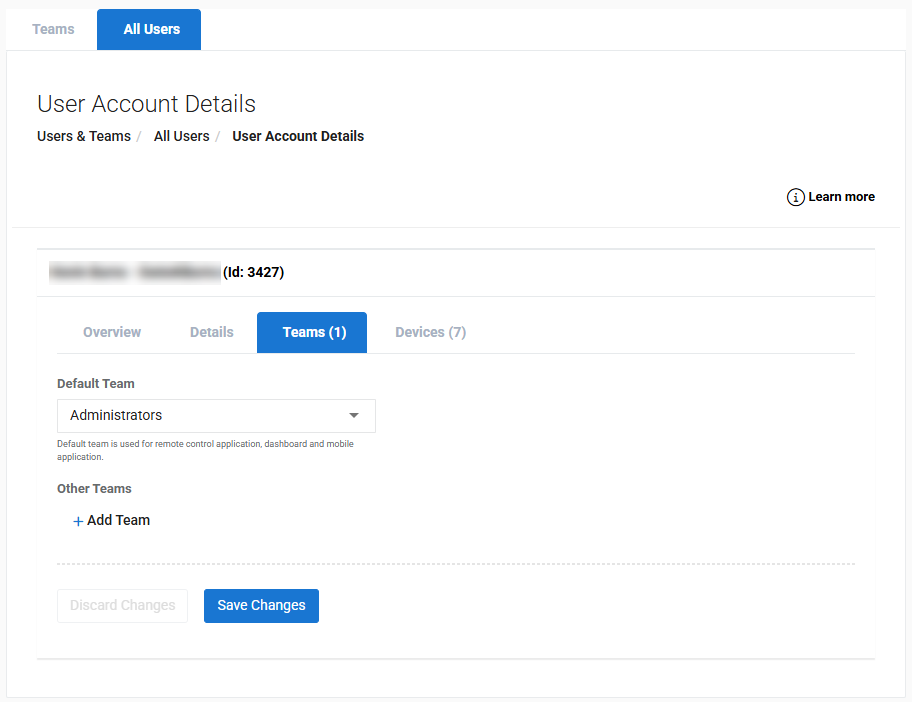
Click the Teams tab to manage the user's team membership.
There are two main settings on this tab:
| Field | Description |
|---|---|
| Default Team | The team that the user will be logged in to by default when accessing VSA 10. |
| Other Teams | Select the additional team or teams that the user can switch to after logging in. |
Devices
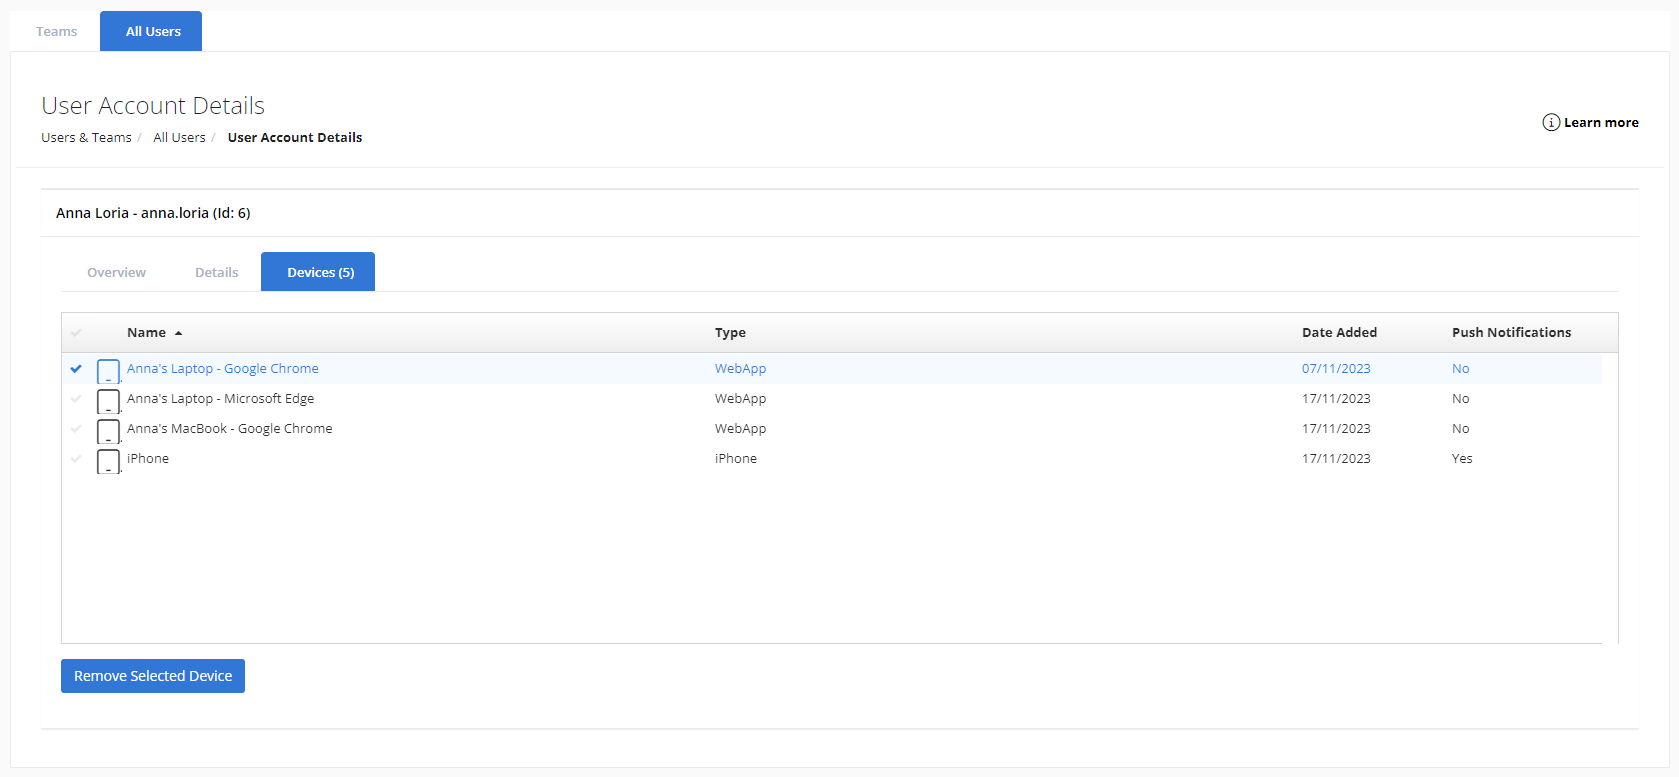
Click the Devices tab to view a list of the user's registered devices/browsers. For details about how devices are registered, refer to Managing user account device access. An administrator has the option to delete any registered devices/browsers of another user. Select the check mark next to the device/browser you wish to delete and click Remove Selected Device. The user will be required to re-register that device/browser.


