Managing teams and users
NAVIGATION Administration > Configuration > Teams and Users
PERMISSIONS Administrator
Each user in a VSA 10 account is assigned to one or more teams. The built-in Administrators team that grants full access to the environment, and User Defined teams can be created by administrators to give only the access needed for other users. Administrators can configure any number of user-defined teams, including the team membership, the members' access to systems, and the members' various permissions.
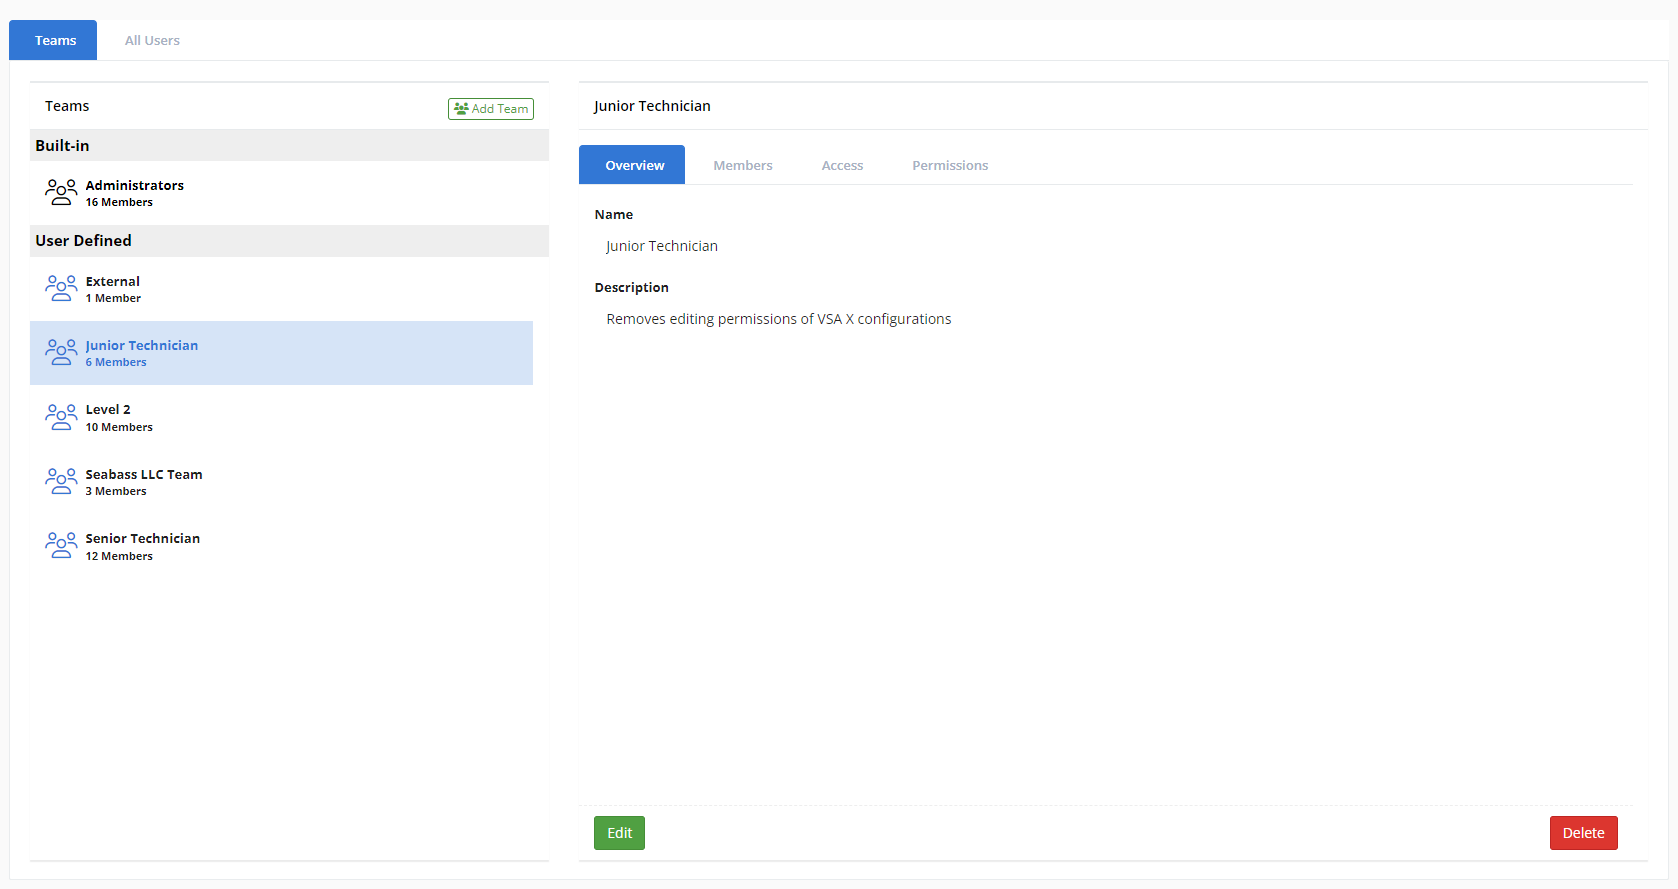
The Teams and Users page features two tabs: Teams and All Users.
Teams
The Teams tab displays all teams in the account and the number of users assigned to each team. 
NOTE Users can be assigned to multiple teams.
Types of teams
- Built-in: The preconfigured Administrators team cannot be edited other than its membership. Users assigned to this team are considered account administrators and have all access privileges to all systems and full permissions in the environment.
- User Defined: Administrators can manually create and configure any number of additional teams that are open to modifications. User-defined teams can be used to grant certain users more limited access privileges to systems and more limited permissions in the environment.
Click a team to view its details on the right side of the page.
Click Edit in the lower-left corner of the section to edit any of the following team settings:
| Tab | Team type | Description | ||||||
|---|---|---|---|---|---|---|---|---|
| Overview | Built-in (Administrators), User Defined | Allows you to view and edit the team Name (required) and Description. NOTE The default name and description for the Administrators team cannot be edited. |
||||||
| Members | Built-in (Administrators), User Defined | Allows you to view a list of any existing members (users) in this team, move members from different teams to this team, and move existing members in this team to different teams. To move a member from a different team to this team, click Move In in the upper-right corner of the section and select a user from the drop-down menu. The membership configuration and any changes to it are depicted for review before they are executed, as follows:
When ready to execute membership changes, click Save. Otherwise, click Cancel to restore the original configuration. |
||||||
| Access | User Defined | Allows you to grant users in this team specific levels of access to specific organizations, sites, and agent groups. Refer to Organizations. The section displays a nested list of all organizations, sites, and agent groups in the account. Three different levels of access privileges are available to assign to each entity:
For a site, select Inherit to assign the site to the same priority level assigned to its organization. When ready to execute access level changes, click Save. Otherwise, click Cancel to restore the original configuration. |
||||||
| Permissions | User Defined | Allows you to grant or deny specific permissions to/from the users in this team. For descriptions of each of the available permissions, refer to User functions and permissions. Select individual check boxes to grant those permissions, or you can select the check box of a permission heading to grant all of the associated permissions at once. When ready to execute permission changes, click Save. Otherwise, click Cancel to restore the original configuration. |
||||||
| Navigation | User Defined | Allows you to grant or deny visibility of the pages in the left navigation menu to/from the users in this team. The options mirror the pages of the left navigation menu. Your selections determine whether those pages will be visible to or hidden from members of the user-defined team. This tab does not control the team members' functionality permissions, which are managed in the Permissions tab. NOTE Some pages cannot be selected for visibility because they require Administrator permissions or because they are visible to all users by default. When hovered over, the info tooltip next to any disabled check box indicates why it is not selectable. |
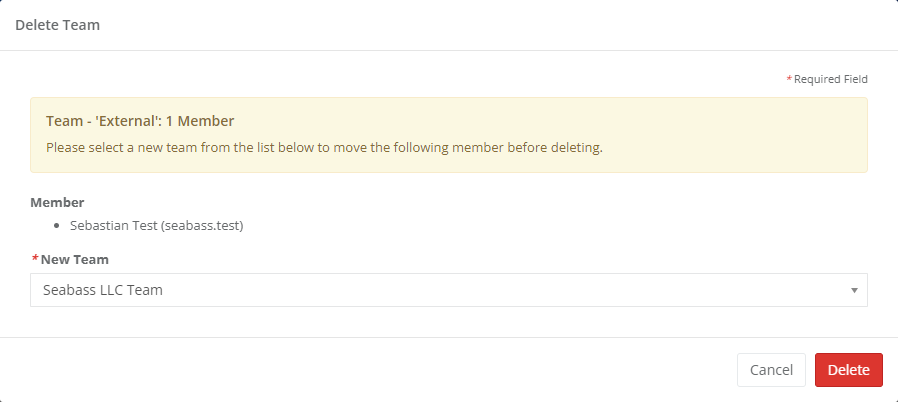
Click a team and click Delete in the lower-right corner of the page. If one or more users are currently assigned to the team, you will be prompted to reassign the user(s) to another existing team by selecting a different team from the New Team drop-down menu. Click Delete to execute the membership reassignment and team deletion or Cancel to close out of the dialog box.
NOTE Upon deleting a team with multiple existing members, you must reassign all members to the same alternative team. However, you can assign any individual user to any different team via the Members tab. Refer to Members.
All Users
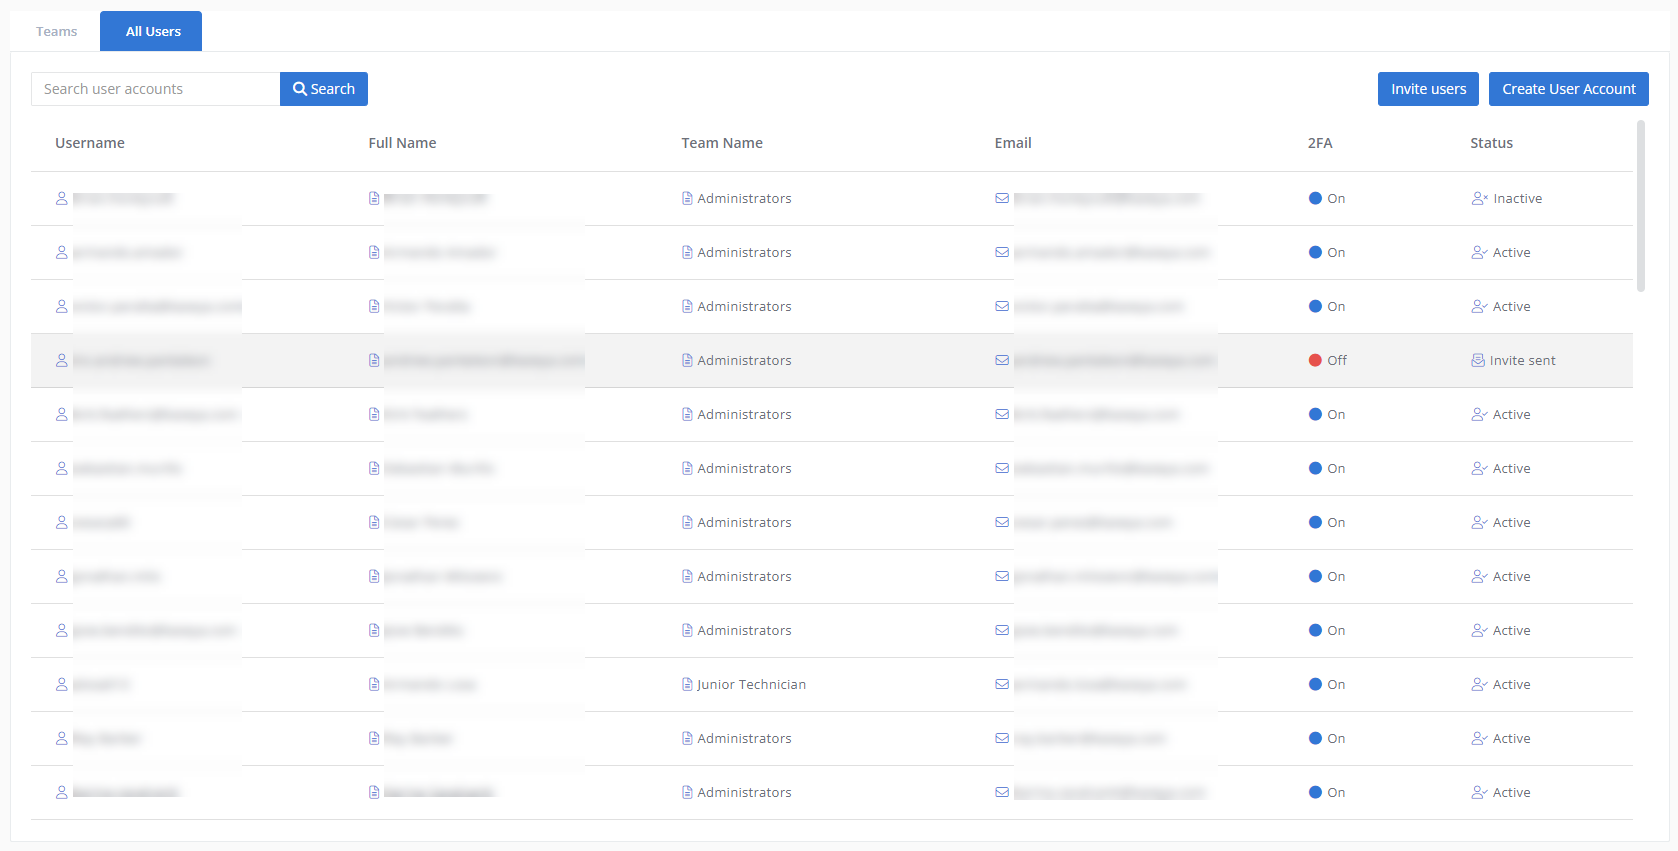
The All Users tab displays a list of all active users, inactive (deactivated but not deleted) users, and prospects who have been invited to create a user account. Deleted users are not included in the list.
To search for a specific user, enter their user ID or all or part of their username, full name, or email address in the Search user accounts bar. Press Enter on your keyboard or click Search to execute the search.
The list displays the following user details:
| Field | Description |
|---|---|
| Username | The username is set during account creation and can be changed by the user via Account > My Settings. Refer to My Settings. If a user has been invited to create an account but has not edited their username, the username is prefixed with inv. followed by the prefix of the user's email address to which the invitation was sent. |
| Full Name | The full name is set during account creation and can be changed by the user via Account > My Settings or by any administrator via Configuration > Teams and Users > All Users > select a user. Refer to My Settings and Full Name in Viewing and editing user account details. |
| Default Team | The team that the user will be authenticated with when they log in. Refer to Teams. |
| Other Teams | One or more additional teams that the user can switch to during a login session. Refer to Teams. |
| The email address associated with the user's account and used for login. | |
| 2FA |
Displays On if the user has configured their 2FA settings or Off if the user has not yet done so. Refer to Two-factor authentication. NOTE A 2FA status of Off indicates the user has not yet gained access to any area of VSA 10 other than Account > 2FA and is required to set up 2FA for account access. |
| Status | Each user has one of the following statuses:
|
Adding users
To learn about inviting new users or creating user accounts, refer to Inviting users to the account and Creating user accounts.
Accessing user account details
Click a user in the list to access their User Account Details page. For details about this page, refer to Viewing and editing user account details.


