Managing general account settings
NAVIGATION Administration > Configuration > Settings
PERMISSIONS Administrator
The Settings page allows administrators to configure general settings for the VSA 10 account.
The following sections are available on the page:
| Field | Description |
|---|---|
| Systems Offline Check Interval in Minutes | The minimum amount of time a system must be offline before a notification of the category System offline is triggered. NOTE To disable the notifications for offline systems, enter 0. |
| Default Language | From the drop-down menu, select the default language for the account: English or German. NOTE For each user, the language selection on the My Settings page overrides the default language selection for the account. Refer to Language in My Settings. |
| Send an email notification when new devices are added to the account | Select the check box for users who are configured to receive account email notifications to receive an email when new systems are registered to the account. Refer to Receiving account notifications. |
| Enable agent diagnostic logging on device card | Select the check box to enable agent diagnostic logging in the device details pane. Refer to Device details pane in Viewing device details. |
In the lower-right corner of the page, click Save.
Clicking the Security section expands a drop-down menu that includes the following security settings:
Refer to Controlling account 2FA settings in Two-factor authentication.
In the lower-right corner of the page, click Save.
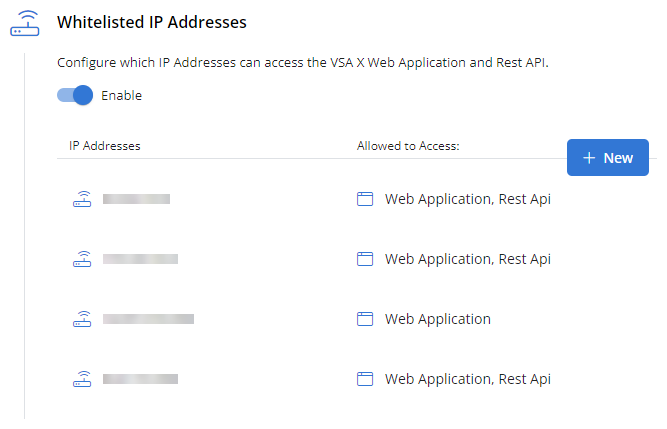
With the Enable toggle turned on in this section, you can restrict access to the VSA 10 account to certain IP addresses or IP address ranges. You can turn the toggle off to disable IP address restrictions.
If IP address restrictions are enabled, a user whose current IP address is not included in the allowlist will be blocked from logging in.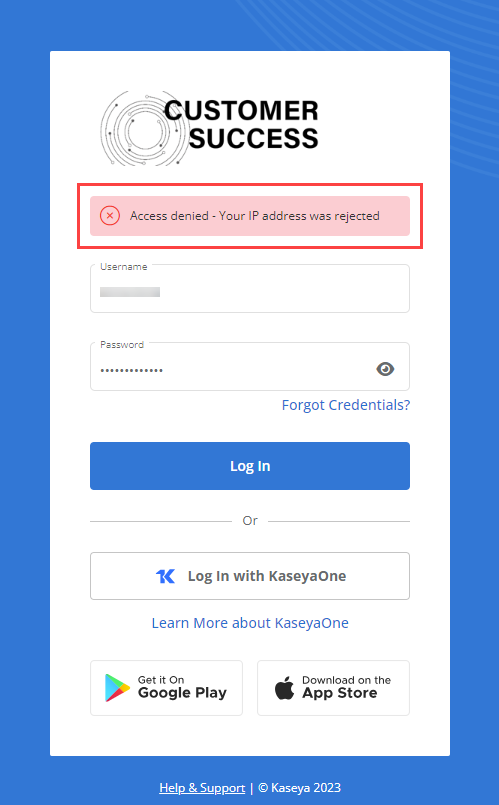
NOTE Selected teams and users can be configured to bypass IP restrictions. Refer to the next section, Bypass IP Restrictions.
To add an IP address or range of IP addresses to the allowlist for the VSA 10 account, complete the following steps:
- Ensure the Enable toggle is turned on.
- Click New.
- Select either Single IP or IP Range to add either a single IP address or a range of IP addresses to the allowlist, respectively. If you enter a range, enter both the starting IP address and ending IP address in the range, and you will be informed if the range is not valid.
- Select or clear the Web Application and Rest Api check boxes to specify if the entered IP address/range should have access to the VSA 10 web application for the account, the VSA 10 API for the account, both, or neither.
- Click Save in the window to add the entry to the allowlist.
- In the lower-right corner of the page, click Save.
To immediately remove an entry from the allowlist, click the Remove icon ![]() in the row. To edit the entry, click the Edit icon
in the row. To edit the entry, click the Edit icon ![]() in the row.
in the row.
Bypass IP Restrictions
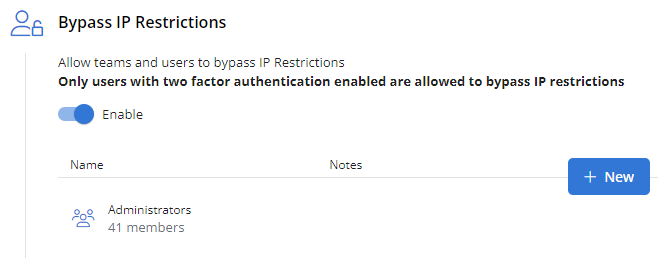
With the Enable toggle turned on in this section, you can specify teams and users who are permitted to bypass IP restrictions. To learn about IP restrictions, refer to the preceding section, Whitelisted IP Addresses.
Only users who have their two-factor authentication settings configured are allowed to bypass IP restrictions. Refer to Setting up and executing user-level 2FA.
To specify any teams and users that should be permitted to bypass IP restrictions, complete the following steps:
- Ensure the Enable toggle is turned on.
- Click New.
- All teams in the account are listed first, followed by all users in the account. Refer to Managing teams and users. Teams are denoted by a team icon while users are denoted by a user icon.
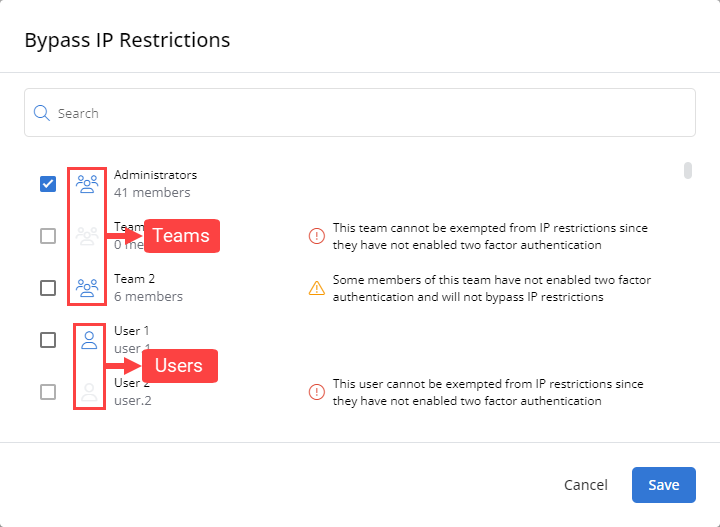
Select or clear a check box to allow a team or user to bypass IP restrictions or to prevent a team or user from bypassing IP restrictions, respectively. The following circumstances will limit the options for selection:- A team will be grayed out and not available to select if it contains no members or if all of its members do not have two-factor authentication configured.
- A team will be available to select if some but not all of its members have two-factor authentication configured, but the users in the team who do not have two-factor authentication configured will not be granted permission to bypass IP restrictions.
- A user will be grayed out and not available to select if the user does not have two-factor authentication configured.
To learn how these users can configure their two-factor authentication settings, which would allow them to be granted permission to bypass IP restrictions, refer to Setting up and executing user-level 2FA.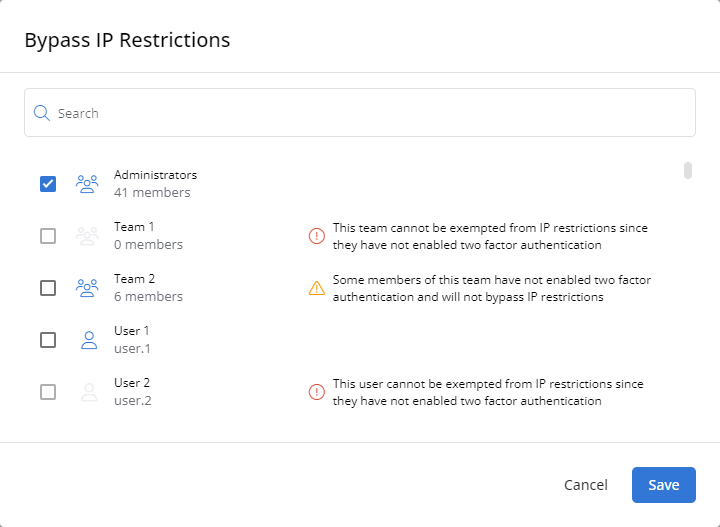
- Click Save in the window to add any selected teams and users to the list of those that are permitted to bypass IP restrictions.
- In the lower-right corner of the page, click Save.
The default minimum password requirements for VSA 10 are as follows:
- Must be at least eight characters long.
- Must contain at least one digit.
Using the available fields in this section, you have the option to enforce more complex password requirements, such as more characters, more digits, at least one uppercase letter, and a certain number of special characters (symbols). In the lower-right corner of the page, click Save.
The configured password requirements are displayed when users create or change passwords. An entered password will not be accepted until all requirements are met.

If users have already created passwords, and an administrator elevates the minimum password requirements in this section, any user whose password does not already meet the new requirements will be automatically prompted to change their password at their next login (following 2FA).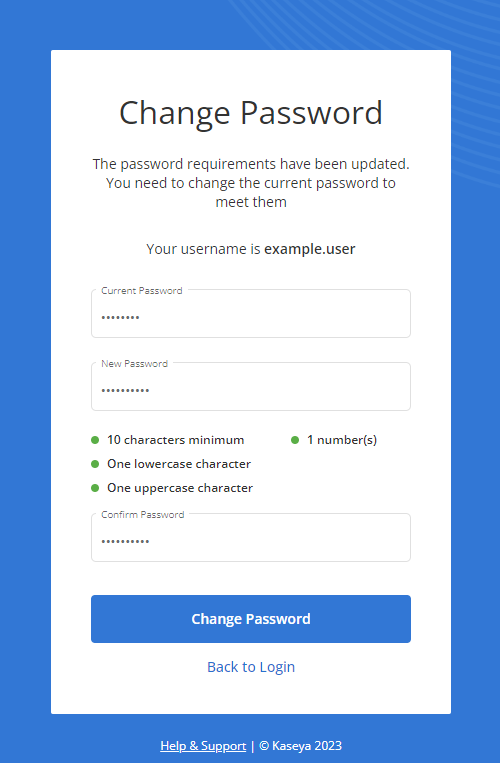
Upon entering a valid new password, the user will then be prompted to log in with their new password.
In the lower-right corner of the page, click Save.
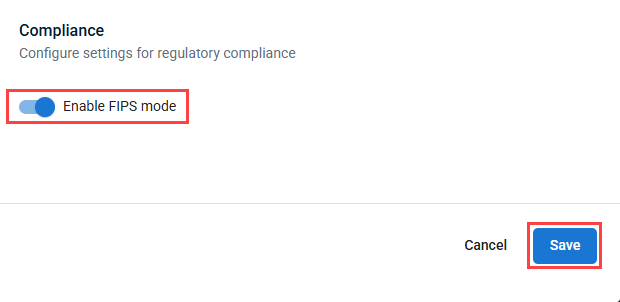
This section allows you to enable FIPS mode. With this enabled, agents and client applications such as remote desktop and the VSA X mobile app will be instructed to connect to your VSA 10 instance using FIPS 140-3 compliant cryptography.
Below is a representation how FIPS mode will add cryptographic boundaries in the communication pathways between your VSA 10 platform and your agents and other client applications.

To turn on FIPS compliance, enable the Enable FIPS mode toggle, and click Save at the bottom of the page.
NOTE Enabling FIPS mode will increase resource consumption by the VSA Agent and client applications such as remote desktop and the VSA X mobile app.
Once enabled, FIPS mode (on or off) will also be exposed in the Overview section of the Device Card, and optionally in the Devices > Device Management grid with a selectable column. An informational event will be written to the Audit Log when an administrator enables or disables FIPS mode.
Additionally, while FIPS mode is enabled, an exception will be written to the Audit Log if any device or application connects to the platform without the FIPS module.
NOTE If any device or client application is unable to connect in FIPS mode, it will connect in non-FIPS mode and an exception will be logged in Administration > Server Admin > Audit Log in the Compliance category.
Clicking the Email section expands a drop-down menu that includes the following email settings:
Select your preferred VSA 10 email account setting: SMTP (Simple Mail Transfer Protocol) or OAuth (Open Authorization). Fill in the associated fields as required.
In the lower-right corner of the page, click Save.
For OAuth instructions, refer to OAuth 2.0 setup: Microsoft 365 with VSA 10.
NOTE A default email server is not provided for SMTP configuration. One will have to be provided in order for it to function.
This section provides you the option to customize the email template for your account, such as adding your company logo, name, and custom links. To create a custom template, select the Use Custom Template check box. If this check box is not selected, a generic default template will be applied to emails sent from your account, and the Template HTML editor will not be editable.
Note the following requirements when adding custom code to the Template HTML editor:
- A footer announcement message must be added to the next section of the Email menu in order to be added to the email template. Refer to Footer HTML Announcement Message.
- The body of your custom HTML template must include the
$TAG_BODY$tag. When a notification is sent, the tag will be automatically replaced by the actual notification message.
EXAMPLE <html> <body> <img src="http://your_company_image_url"> $TAG_BODY$ </body> </html>
In the lower-right corner of the page, click Save.
Footer HTML Announcement Message
Optionally, enter the content to appear in the footer of the email template for your account, which will be added to your custom HTML template.
In the lower-right corner of the page, click Save.
This section allows you to upload custom logos and a support icon for your application in place of the default VSA 10 logo and icon.
Select the Use custom logo check box to upload the following custom logos:
- The Light background logo will be used for the web application and mobile application. Click Change Light Logo to upload the logo saved on your device. Ensure the logo will on a light background.
- The Dark background logo will be used for the dashboard application. Click Change Dark Logo to upload the logo saved on your device.
NOTE Consider a logo color that will not clash with the background color.
Adhere to the following image specifications:
- 4:1 aspect ratio
- Transparent background
- PNG file format
NOTE Larger images will be automatically resized to 400 x 100 pixels.
NOTE If not uploaded as a .png file, the image will be automatically converted to PNG.
Select the Use custom tray icon check box to upload the icon to display for end user support inquiries.
Adhere to the following image specifications:
- 256 x 256 pixels
- ICO file format
NOTE If not uploaded as a .ico file, the image will be automatically converted to ICO.
Select the check box to display your VSA 10 Support team contact details to end users and fill in the fields as required.
In the lower-right corner of the page, click Save.
Enter a 1-Click credentials account name for the Remote Control tool. Refer to Launch a new VSA X RDP Session and 1-Click in Remote Control.
In the lower-right corner of the page, click Save.
Remote Control on Demand
Refer to Set a maximum session duration in minutes in Remote Control on Demand.

