OAuth 2.0 setup: Microsoft 365 with VSA 10
NAVIGATION Administration > Configuration > Settings > Email > Server Settings > OAuth
Overview
Support for OAuth 2.0 is available for VSA 10 users with an Office 365 mailbox as their outbound ID for email notifications.
When using the deprecated basic authentication, the application sends a username and password with every request, and the Exchange service account is granted access to relevant mailboxes using the Application Impersonation role. With modern authentication, full access to all mailboxes permission is granted to the RMM application as part of the consent flow. Modern authentication is based on the OAuth 2.0 protocol, which is a token-based authentication. This design ensures your global administrator credentials are never stored in the RMM for mail parsing.
With token-based authentication, users enter their username and password to get a token. This token provides access to the resource for a specific time period. The token is automatically renewed as long as the credentials entered in the parser settings remain valid.
Setup in Microsoft Azure
To connect your mailbox using OAuth 2.0 in VSA 10, you will set up the RMM app in your Azure portal.
Step 1: App registration
- Log in to the Azure portal using your global administration credentials.
- In the Azure services section on the home page, click Microsoft Entra ID.

- From the left navigation menu, navigate to Manage > App registrations.
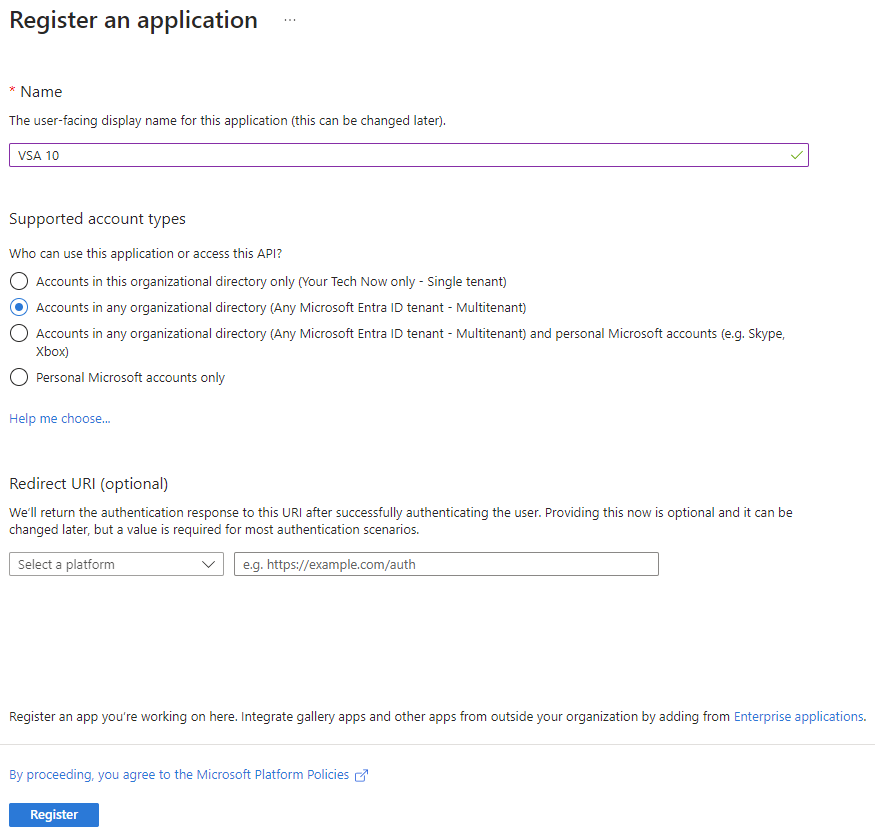
- Enter a name for the app in the Name field.
- In the Supported account types section, select Accounts in any organizational directory (Any Microsoft Entra ID tenant - Multitenant).
- Because you are not performing any OAuth authentication on the RMM interface, you can leave the optional Redirect URI section empty.
- Click Register.

- Copy the Application (client) ID and Directory (tenant) ID from the confirmation page and save them to any accessible notes app on your device. You will paste these tokens in VSA 10 later on.

Next, you will provide authentication and API permissions for this app registration to access the mailboxes.
Step 2: Authentication
- From the left navigation menu, navigate to Manage > Authentication.
- In the Advanced settings section, for Enable the following mobile and desktop flows, select Yes.

- Click Save.
Step 3: API permissions
- From the left navigation menu, navigate to Manage > API permissions.
- Click Add a permission.
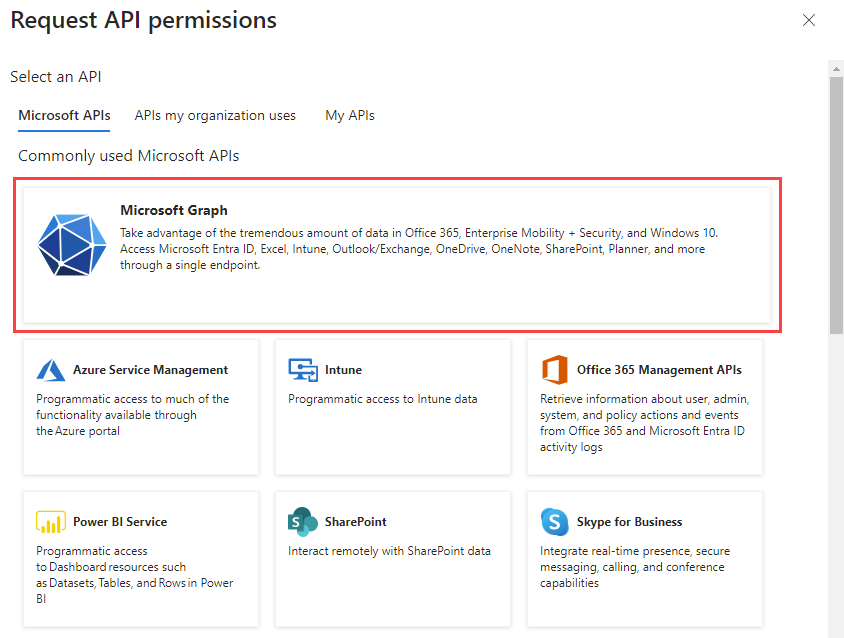
- In the Request API permissions pane that opens, select Microsoft Graph.

- Select Delegated permissions.
- In the Mail section, the following permission must be selected: Mail.Send
- Click Grant admin consent for a user, and the status for all the permissions will be active.
Setup in VSA 10
IMPORTANT OAuth 2.0 does not support MFA-enabled accounts because the Microsoft Graph API does not support this.
- From the left navigation menu in VSA 10, navigate to Configuration > Settings.
- Expand the Email drop-down menu and select Server Settings.
- Select OAuth to set up the email parser for Microsoft 365.
- In the respective fields, enter the application ID and directory ID you saved during app registration in step 1.
- Save and test your connection.
Upon successful connection, basic authentication can be turned off. With basic authentication, the parser uses a username and password every time it tries to download an email. With modern authentication, the parser will present a token for the session instead of a username and password. With the combination of credentials stored, the application ID and directory ID parser will generate a token from Microsoft 365, and the email dispatch activities will be done based on the token. The system will automatically generate a new token when it expires.


