Site Maps
NAVIGATION Modules > Devices > Site Maps
PERMISSIONS Device Management > Add Devices
PERMISSIONS Device Management > Delete Devices
The Site Maps page allows you to create maps of devices on a network, configure device settings, and enable and configure SNMP monitoring for those devices.
When configuring a site map, you nominate a device as a probe, define network scanning ranges, and configure notifications for when a device joins the network, and/or when a device on the network has been offline for a period of time.
This article describes the page's layout and functions.Overview
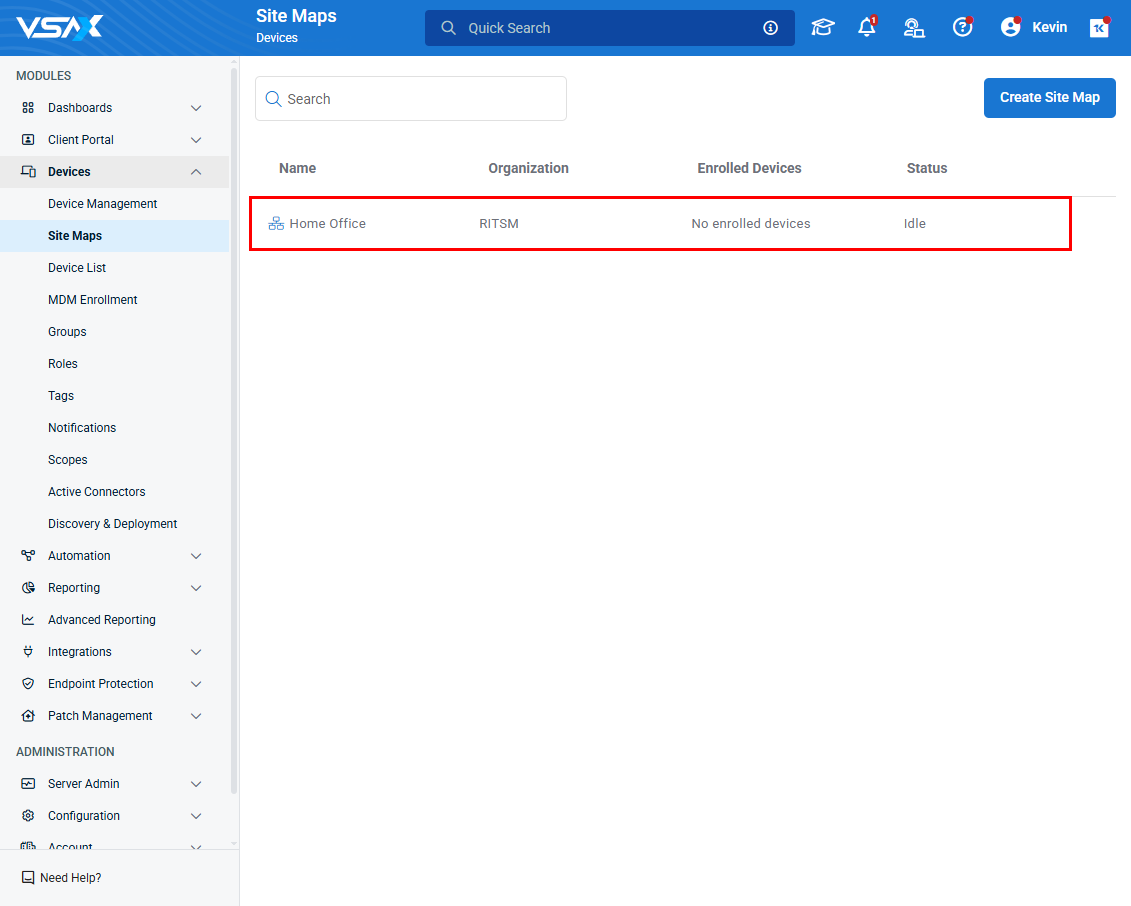
- From the left navigation menu in VSA 10, navigate to Devices > Site Maps.
- You'll see a list of site maps created by users, if any have been created, and the Create Site Map button.
How to...
NOTE You can only create a site map for a network that has at least one device that has the VSA 10 agent installed.
In order to create a site map of a network, perform the following steps:
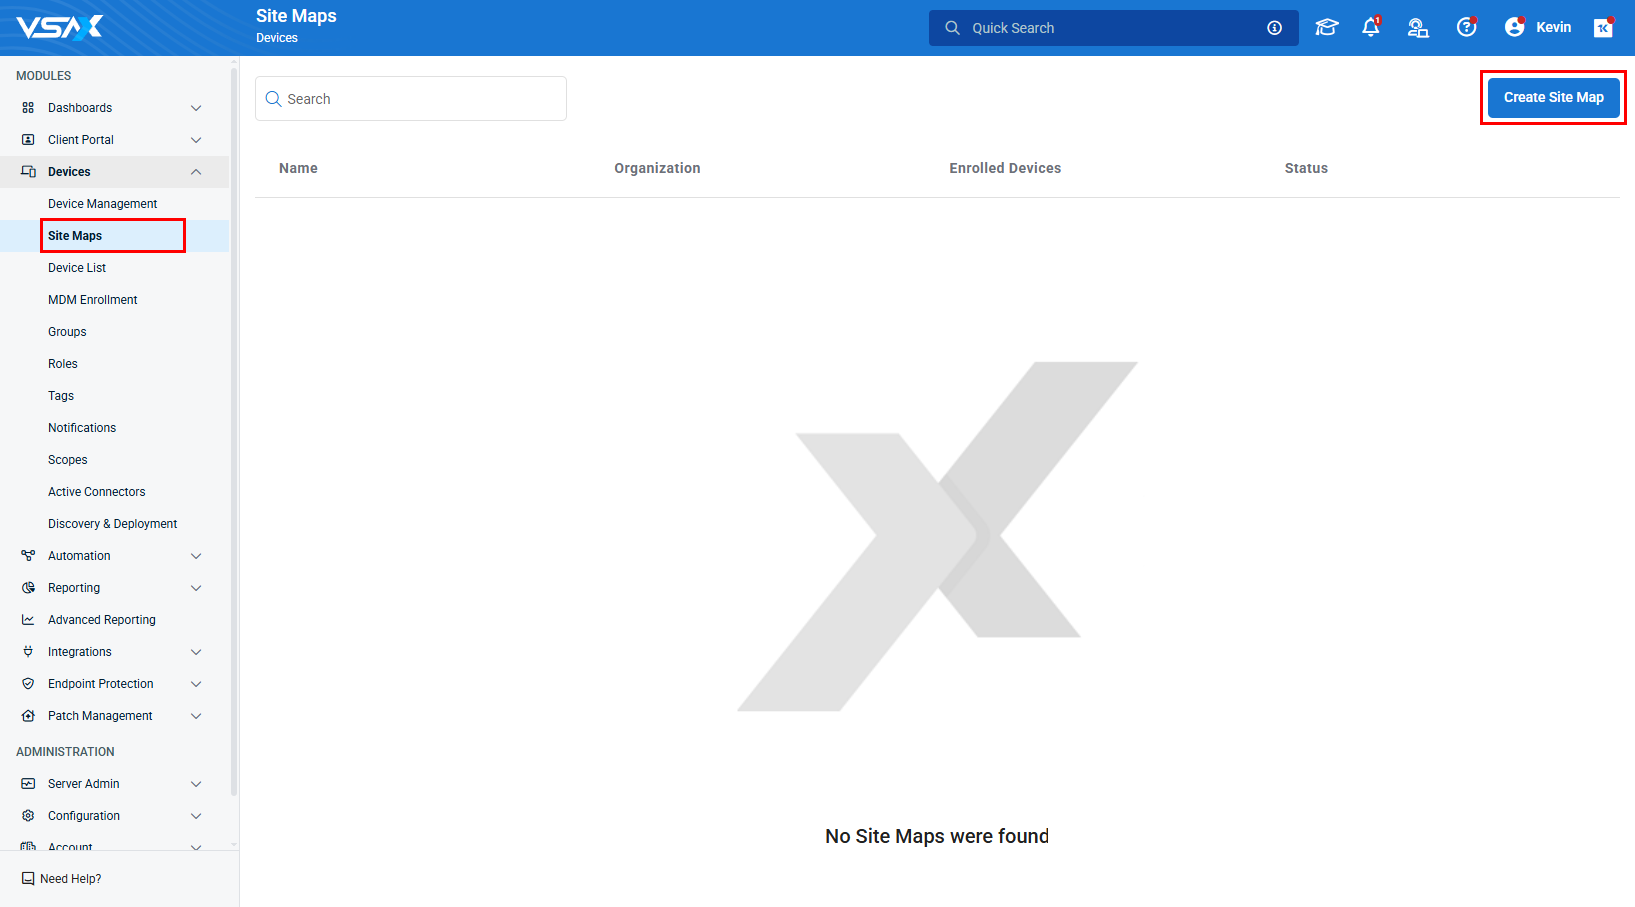
- Navigate to Devices > Site Maps.
- Click the Create Site Map button in the upper right hand corner.
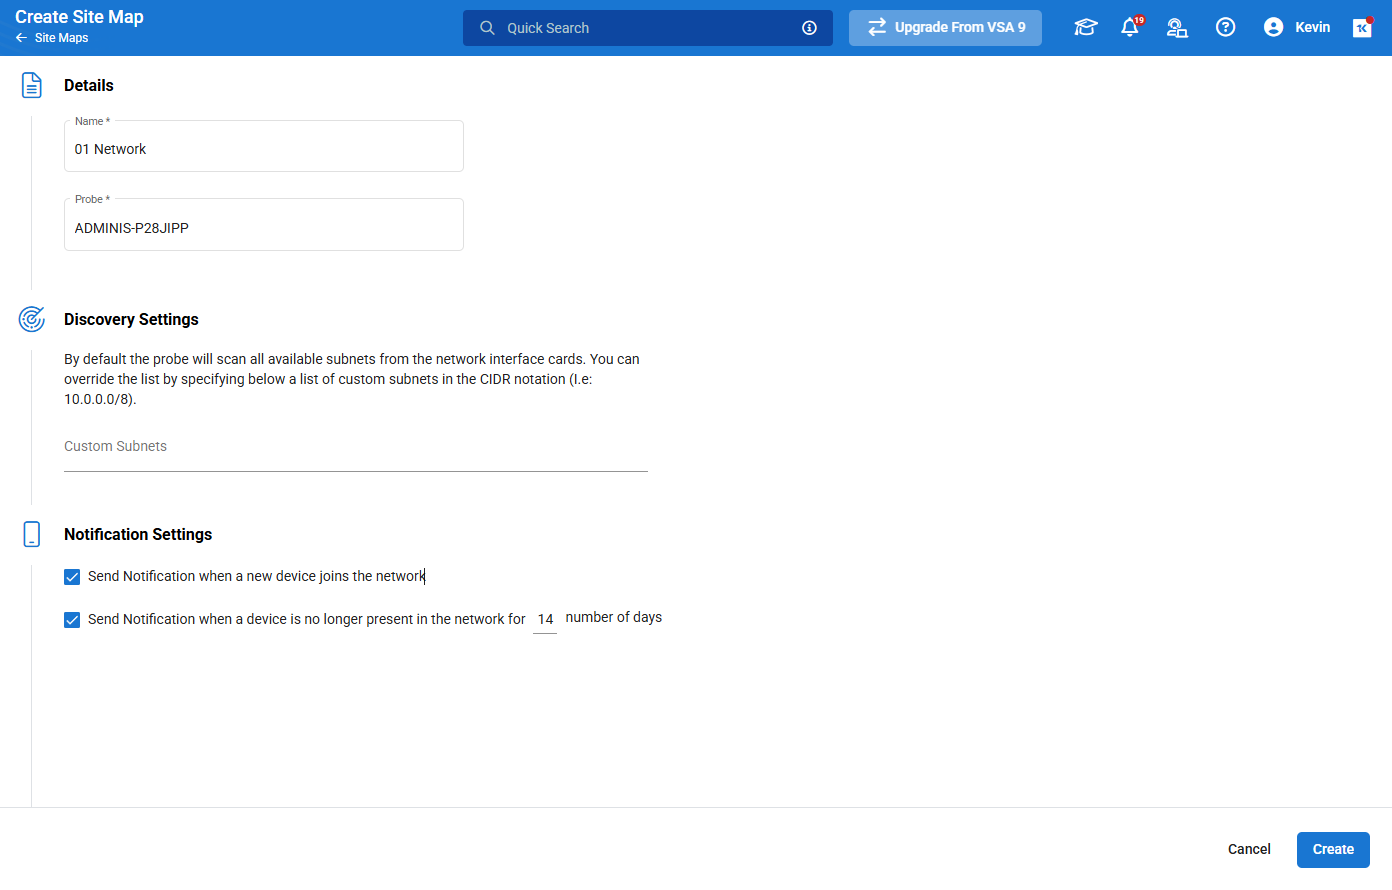
- In the Create Site Map screen, configure the following details:

- Name: Enter the name you want to assign to the site map.
Probe: Type in this box to search or use the drop-down to find a device to assign as the probe. The assigned probe will scan the network to build and maintain the site map. It is recommended that the device assigned as the probe is online most if not all of the time, especially if utilizing the notification function of Site Maps.
NOTE Designating a device as a probe will trigger the automatic installation of Npcap OEM, Microsoft Visual C++ 2013 Redistributable (x86), Microsoft Visual C++ 2015, Python 3, and Network Glue (Script) on the probe device. These programs are necessary in order to conduct NMAP scans for device discovery.
- Discovery Settings: By default, the probe you assign will scan all available subnets from the network interface cards (NICs) on a device. You can override that list in this section by specifying a list of custom subnets in Classless Inter-Domain Routing (CIDR) notation. For example: "10.0.0.0/8" would add all IP addresses from 10.0.0.1 to 10.0.0.8 to the scan range of the probe.
NOTE Only scanned devices that return a MAC address will show in the site map. When scanning additional subnets, devices will not return a MAC address unless the probe is configured with a NIC that resides on that subnet.
NOTE Only subnets that are reachable by the probe will be able to return results.
- Notification Settings: Check one or both of the options available in this section if you want to be alerted to changes in the network. The available options are:
- Send Notification when a new device joins the network: When enabled, will trigger a notification if a new device is detected by the probe when scanning assigned subnets.
- Send Notification when a device is no longer present in the network for X number of days: When enabled, will trigger a notification if a device on the network that was previously online has not been detectable by the probe for a number of days that you configure. The default is 14 days.
- Click Create to save the site map configuration.
NOTE Site Map creation can take several seconds, please be patient after clicking Create.
For site maps that have previously been configured, you will be able to view the Network Topology Map of the network, make changes to existing site maps, and gain information on and enroll discovered devices.
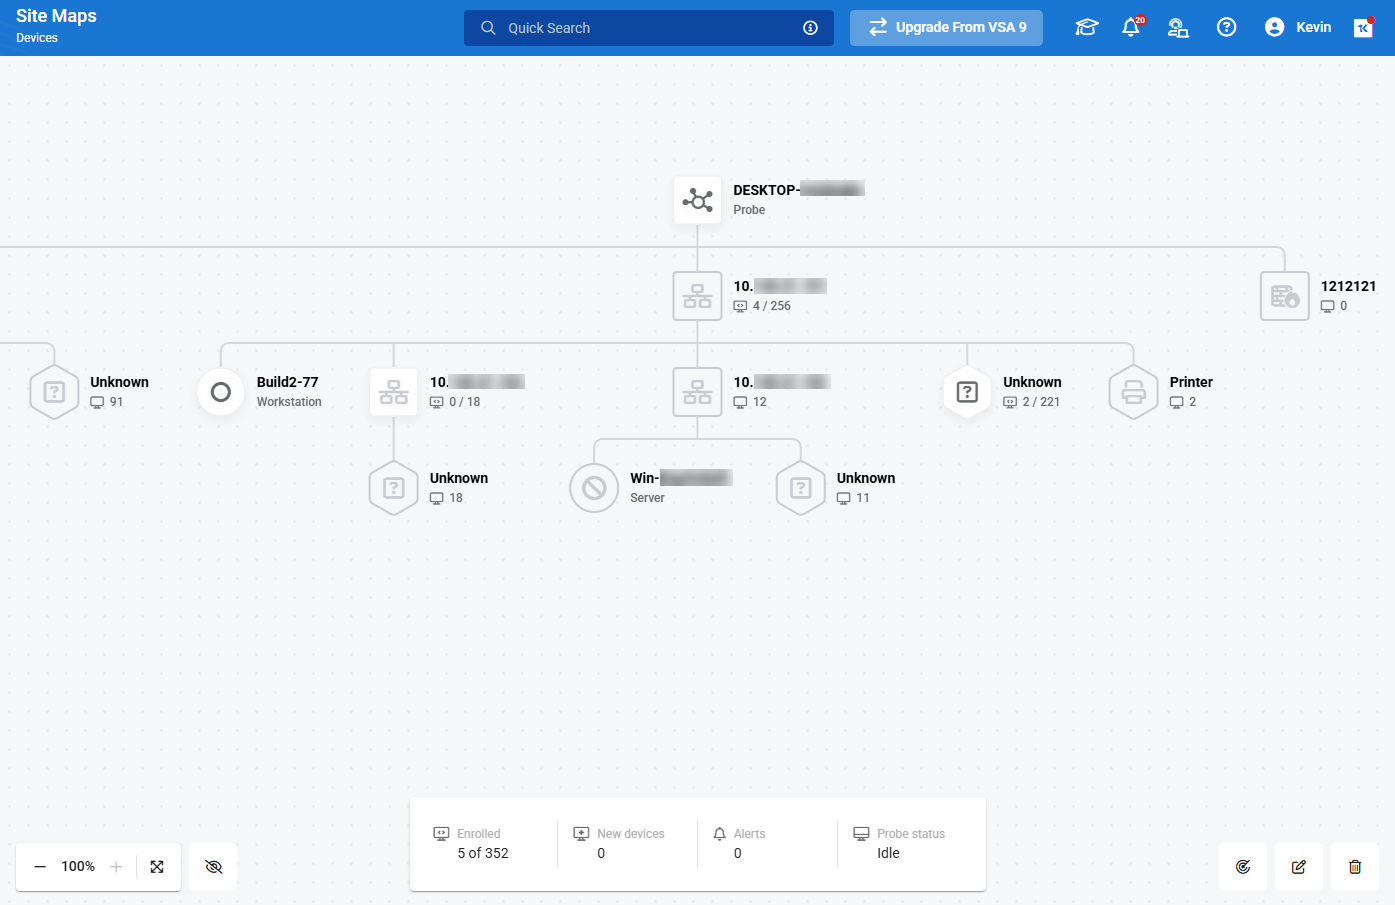
Once a Site Map is created and the probe has had a chance to run device discovery, the Network Topology Map is generated.
In order to view the Network Topology Map, on the Devices > Site Maps page, click the Site Map name.
The Network Topology Map includes summary information at the bottom of the screen, in addition to the following action buttons on the bottom right:
 Start discovery: Trigger the designated probe to scan the network for changes and new devices.
  Edit: Edit the Site Map configuration.
  Delete: Delete the Site Map.
Interacting with devices
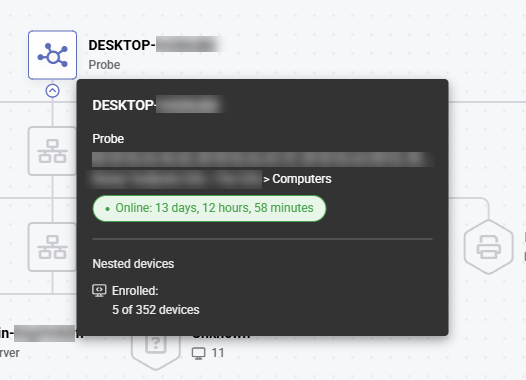
For all devices that appear on the map, you can hover your mouse over them to get summary information on that device.
This information includes information such as whether the device is online, how long it has been online, and the number of alerts related to that device, as well as other relevant summary data.
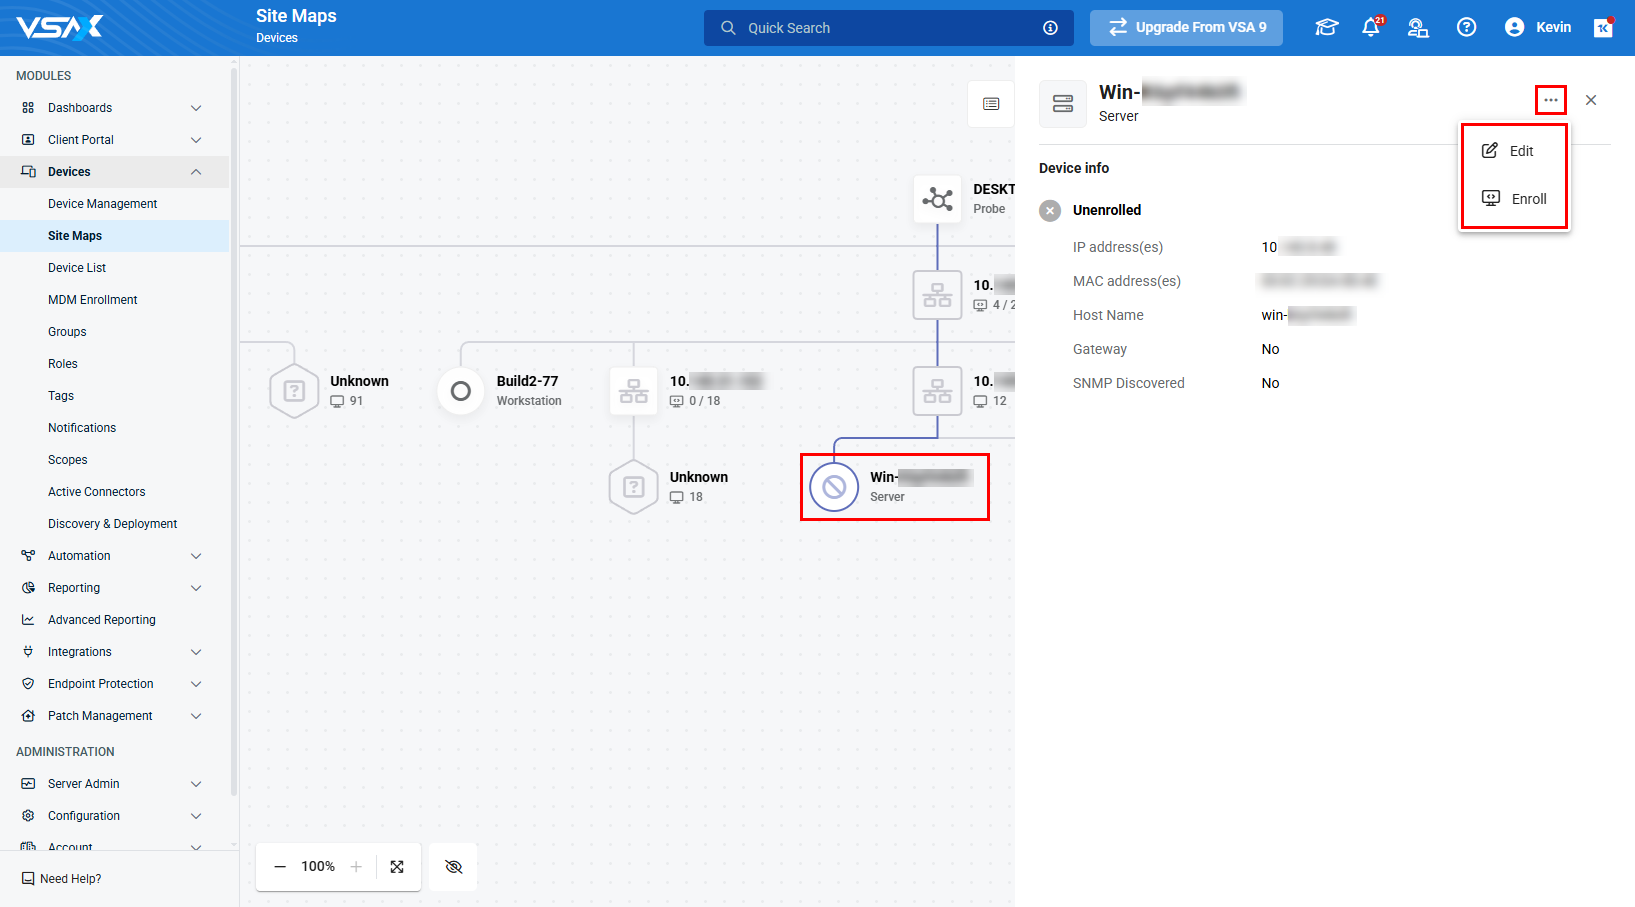
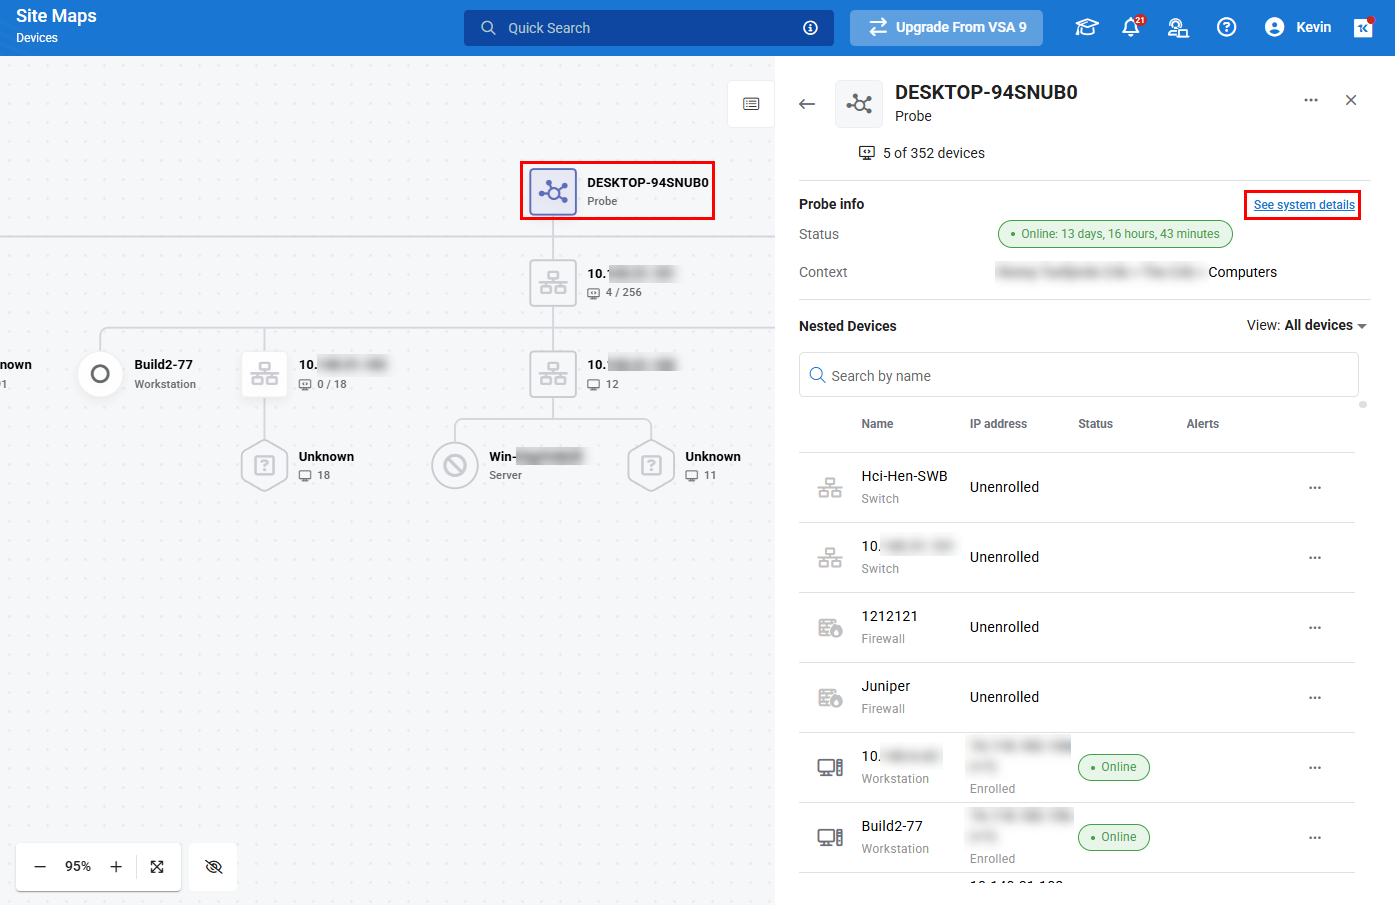
On clicking on the probe (or any device in the site map), the Device info panel opens up with the device details. There will be different options available depending on the device type, enrollment status, and whether it is the designated probe. Enrolled devices and probes will also allow you to view system details.
Please review the sections below to review the available options.
NOTE Options will be grayed out if the probe is in the discovery process.
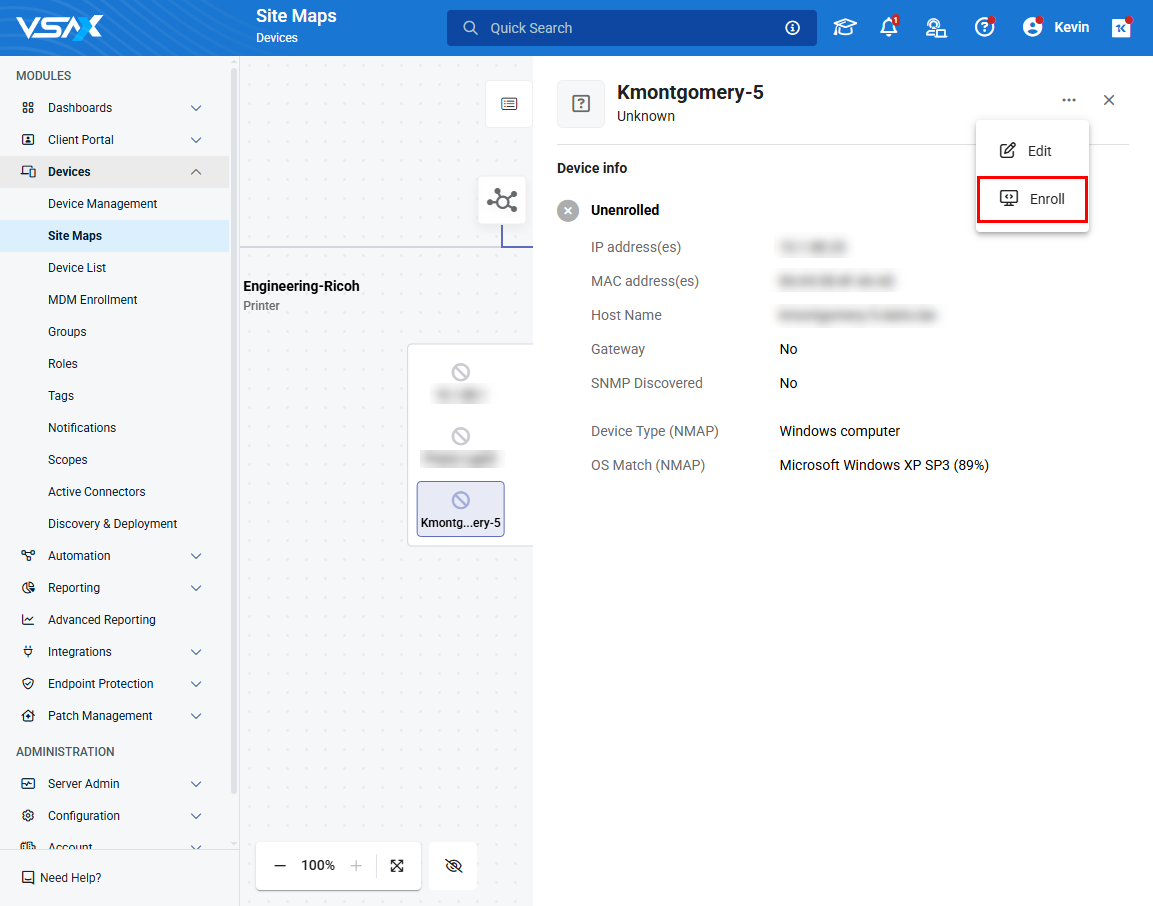
Devices that have been detected but not yet enrolled to be managed with VSA 10 will display basic information, and two configuration options:
- Edit: Change the device name and type.
- Enroll: opens the Enroll device modal. Refer to Enroll discovered devices.
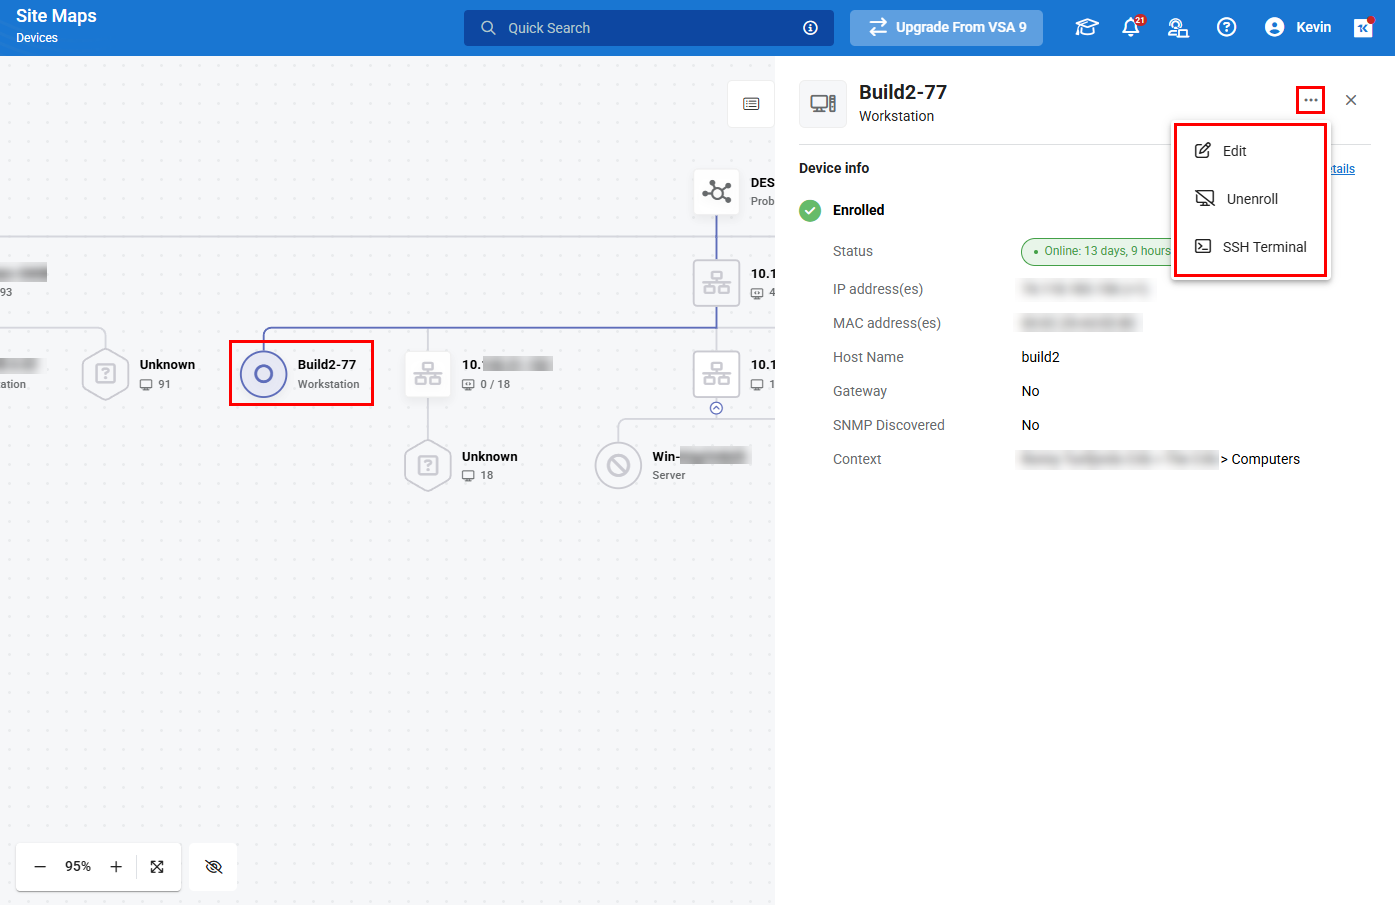
Devices that have been enrolled will display basic information, and a subset of these available configuration options:
- Edit: Change the device name and type.
- Unenroll: Removes the device from managed device enrollment.
- SSH Terminal (Linux/Unix devices only): Opens an SSH connection to the device.
- Add custom device (clusters/probe only): Allows a user to add a device manually to a cluster. This is useful in cases where a device is not discoverable by scan, or waiting for a scan on a newly added device is not feasible.
NOTE To ensure that the custom device is audited during the next scan, make sure to configure the MAC address.
In addition to the above options, you can view the device details for enrolled devices by clicking See system details.
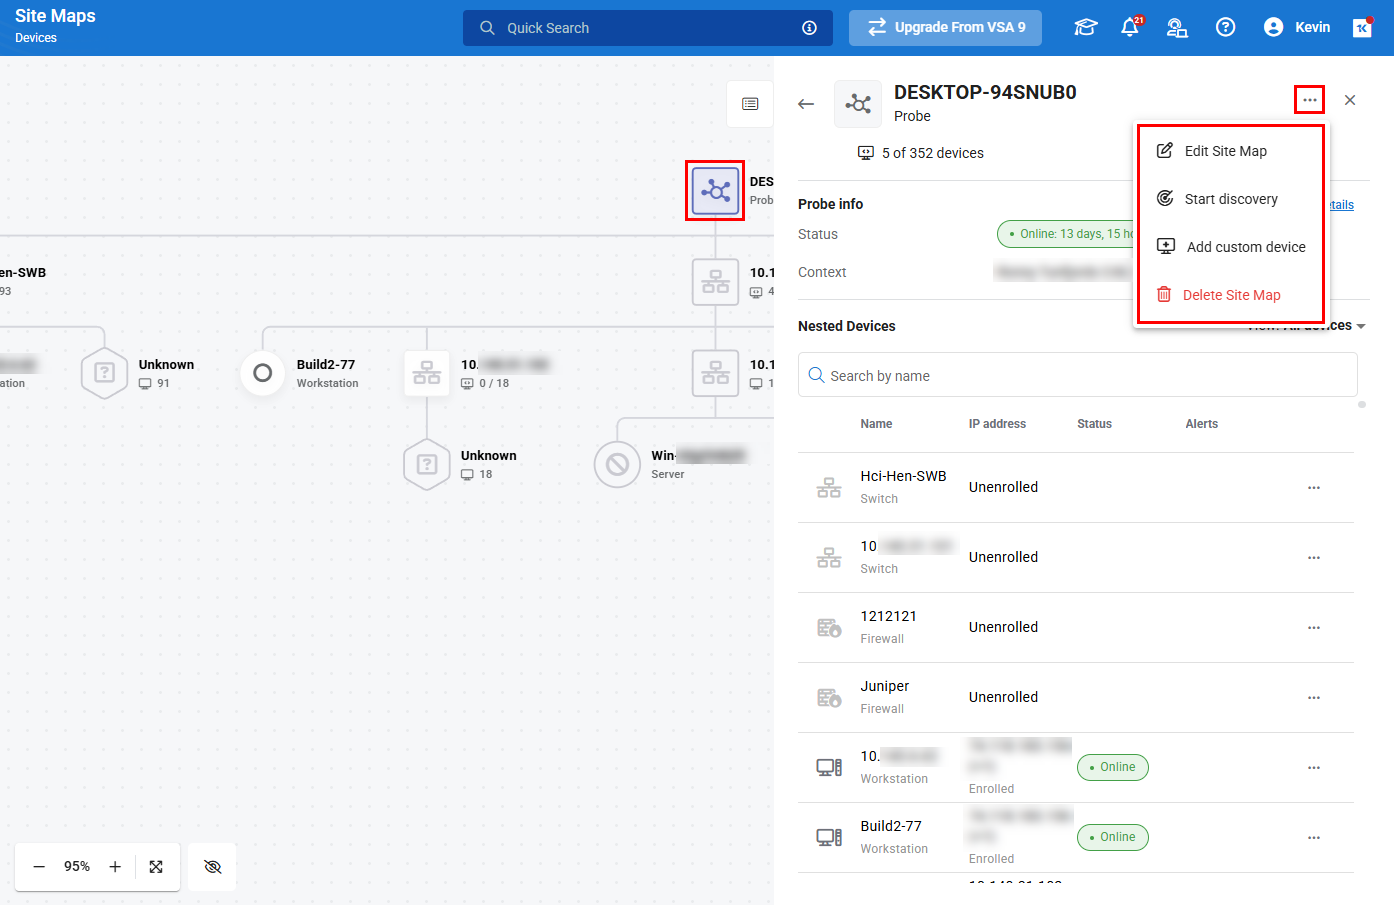
Probe devices will have all applicable options it would have as an enrolled device, as well as the following additional options:
- Edit Site Map: Edit the Site Map configuration.
- Start discovery: Trigger the probe to scan the network for changes and new devices.
- Delete Site Map: Prompts you to confirm that you want to delete the Site Map. If you click Delete on the confirmation, the site map will be deleted.
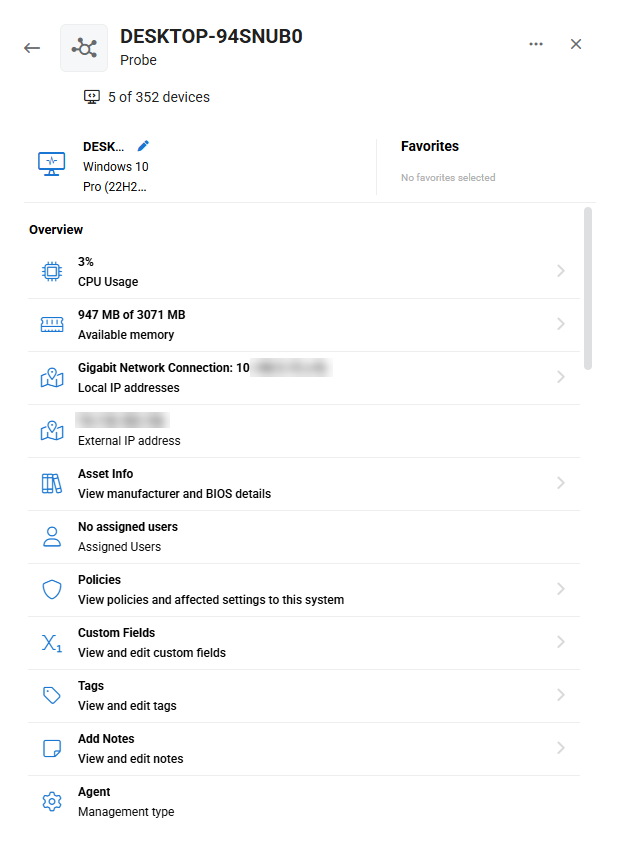
Available for all enrolled devices, clicking See system details will load the device details pane for that device, and allow you to interact with that device in the same way that you can from the Devices > Device List page. Refer to the Device details pane.
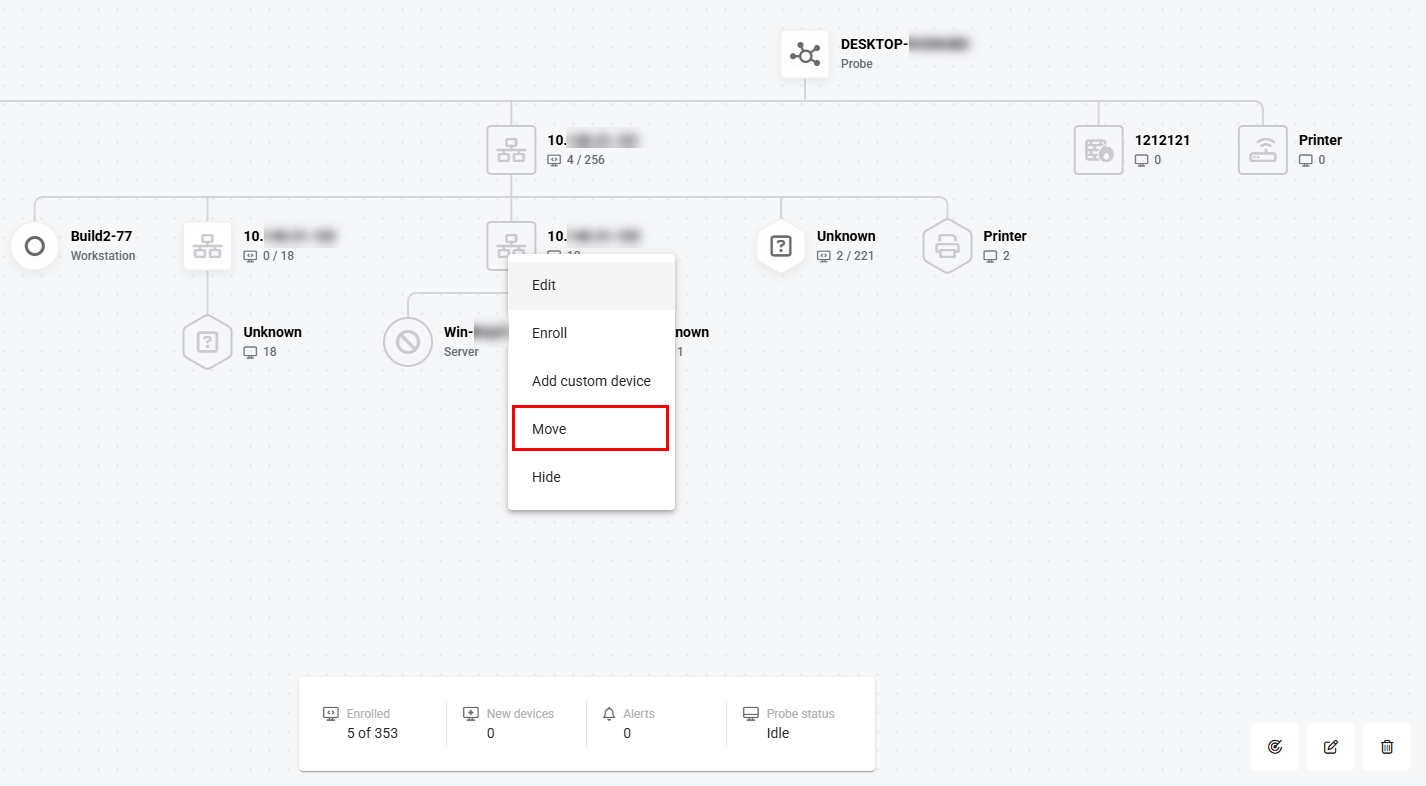
One of the key principles of the Site Maps function is to give users the capability to cluster or group the nodes on the Network Topology Map in the way that makes most business sense to them.
Every networking tool builds topology maps based on the way that the network information is presented to the system that is scanning the network. However, these maps are do not always represent the way that the network is actually laid out.
Because of this, Site Maps allow users to customize the nesting of devices.
EXAMPLE For example, let’s say there is a wireless router for each floor of an office, and each router is meant to be accessed by all the workstations on that floor. In this case, when a scan of the building's network is completed, all wireless routers will be clustered together, the workstations will be grouped into another cluster and so on. However, a user can choose to nest all the workstations by floor under the wireless router on that particular floor, mimicking their physical setup, and making it easier to find devices in the map.
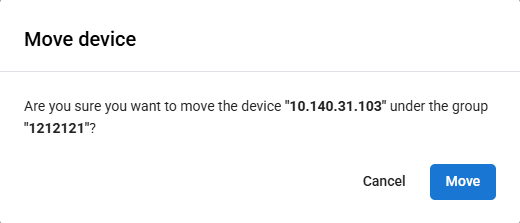
To move a device:
One of the main benefits of setting up a Site Map is that you can discover devices on a network that you do not yet manage. By enrolling discovered devices in VSA 10, you will be able to access more functions within the Site Map, as well as Device Management functions.
NOTE Enrolling a device in will use an Endpoint license. Ensure you have enough licenses before enrolling new devices by reviewing your License Information.
To enroll a discovered device in VSA 10:
- Navigate to Devices > Site Maps
- Click to select the Site Map where the devices you want to enroll are located.
- In the Network Topology Map, click on a device that has not been enrolled, and choose the Enroll option from the configuration options.
- In the Enroll Device screen, configure the following options:
- Details: configure the device's Name, Description, and Device Type.
- Organizational Structure: Displays the Organization and Site where the device will be located, based on the probe's location, and allows you to select which Agent Group the device will belong to.
- MAC Address: Dislpay's the device's detected MAC address. If more than one MAC address is associated with that device, you can select which MAC address you want to set as the primary by using the drop-down menu.
- Custom IP Address: For devices with static IPs, configure what IP address they should always be under. If this is configured, the probe will not attempt to detect IP changes on this device.
- Ports: Allows you to configure alerts for if a port is opened or closed on the device.
- SNMP Configuration: Enable and configure SNMP monitoring for that device. For more information, refer to Configuring devices for SNMP monitoring.
- SSH: Enable and configure options for SSH connections to the device. This allows you to set which Port you want to use for connection, your Username, Authentication Type, and Password or Private Key, depending on your authentication type.
- Notification Settings: If you want to be alerted when a device is unreachable, check the box next to Send a notification when a device goes offline.
NOTE It is recommended that the offline notification be enabled only for critical devices, and the probe. This is because if the probe goes offline, any device connected to that probe will also go offline, and thus send a device offline notification.
Unknown Devices
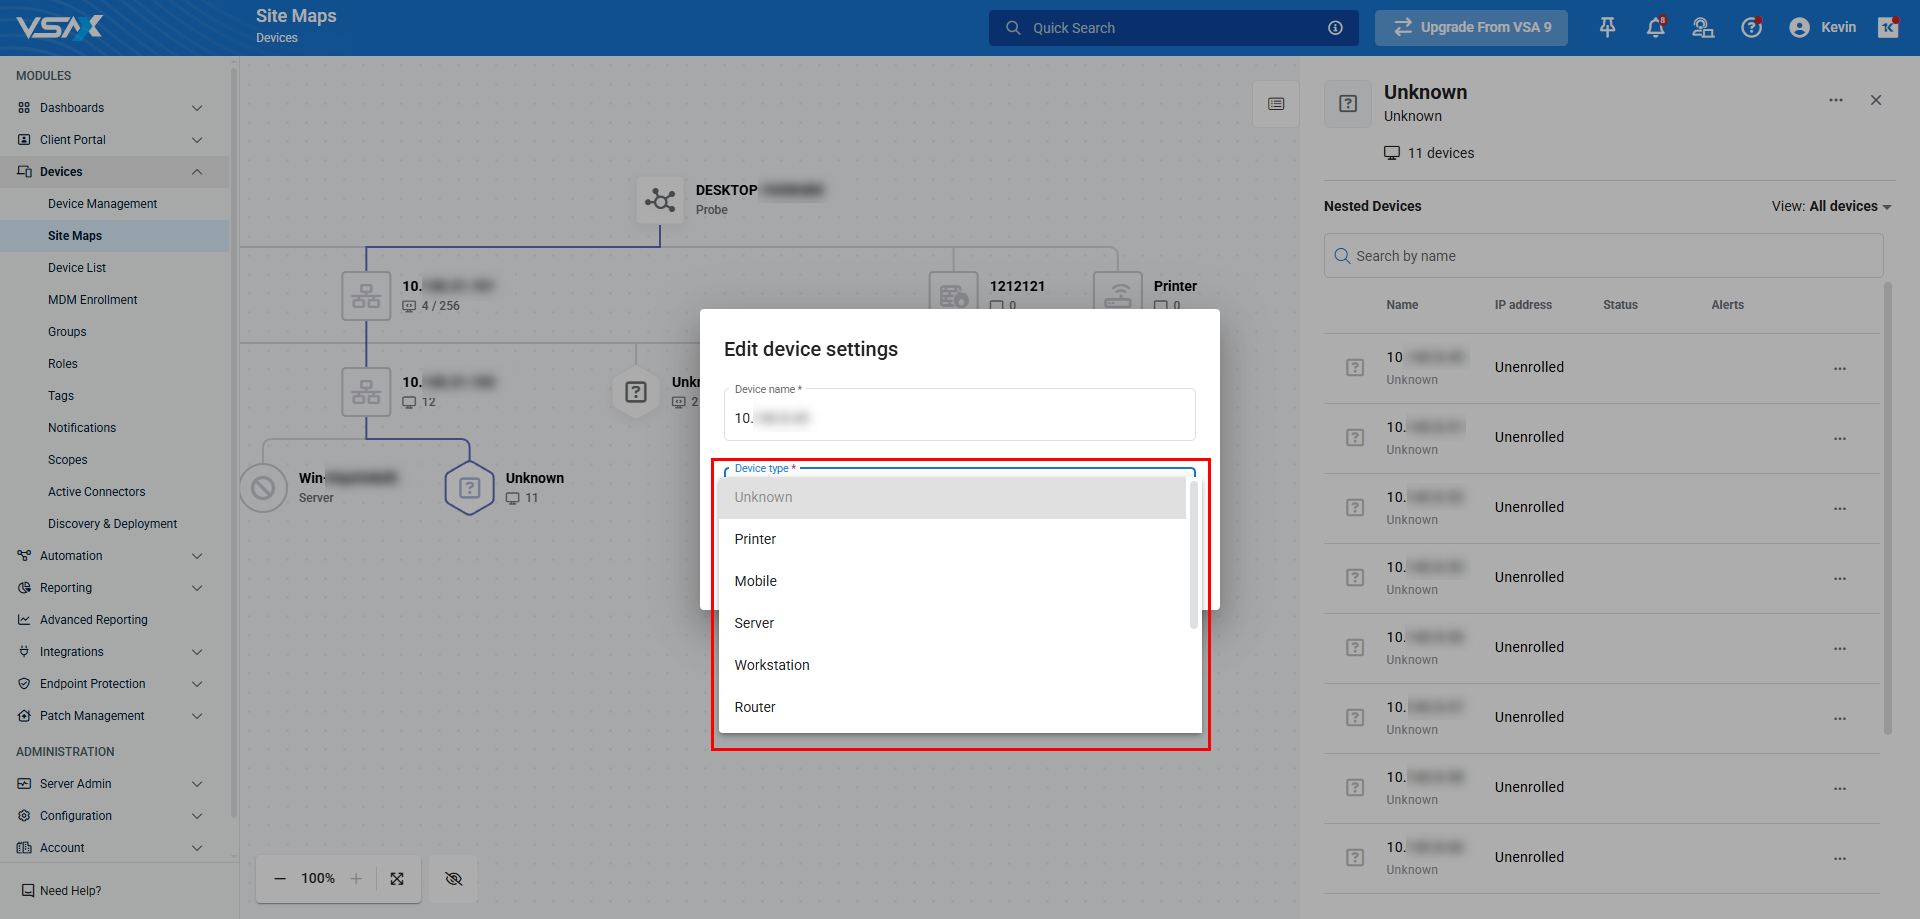
If a device is added and is not recognized as a certain device type, it is classified as an Unknown device, and groups all unknown devices together. For each unknown device, a user will have to define the device type manually, by right-clicking on the device, choosing Edit, and modifying the Device Type field.
Once a device is classified into a known device type by a user, it gets automatically added to the respective cluster.
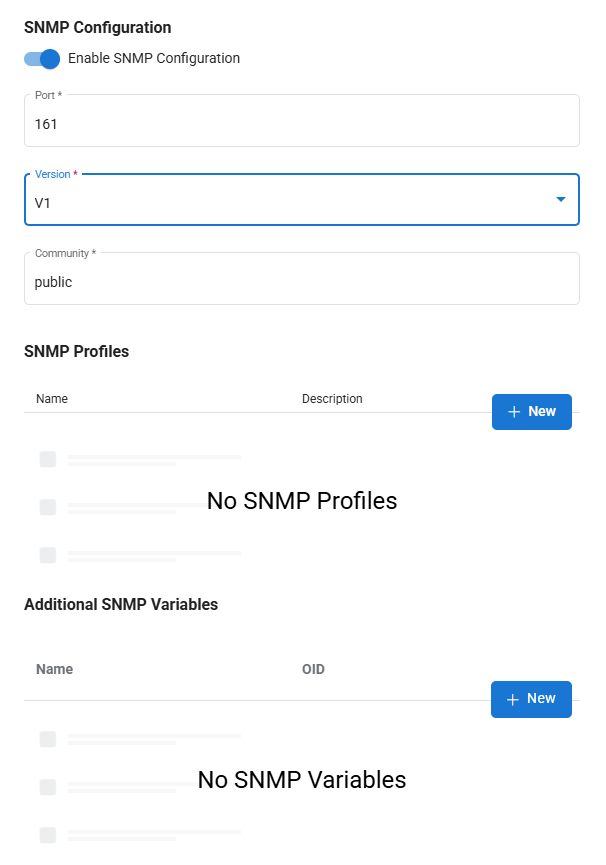
When enrolling or editing a device, you can choose to set up a device to be monitored via SNMP by enabling Enable SNMP Configuration.
When this is enabled, you have access to configure the following options:
- Port: Enter the port number that SNMP communication should be done through. By default this is set to 161.
- Version: Choose the version of SNMP that the device will use to authenticate. By default, this is set to V1.
- Community/Authentication Level: If the version is set to V1 or V2, you will be asked to fill in the community string, which is set to public by default. If using V3, you will need to select and configure the authentication level.
- SNMP Profiles: Select which of your existing SNMP monitoring profiles you want to apply to this device. Refer to SNMP profiles for information on configuring monitoring profiles for SNMP devices.
- Additional SNMP Variables: If there are any unique SNMP monitors you want to set up for a device, you can configure them here. For more information on how to configure these, refer to SNMP Variables.
Once this is configured, finish device enrollment or save your changes to the device you're editing to apply the new monitors.
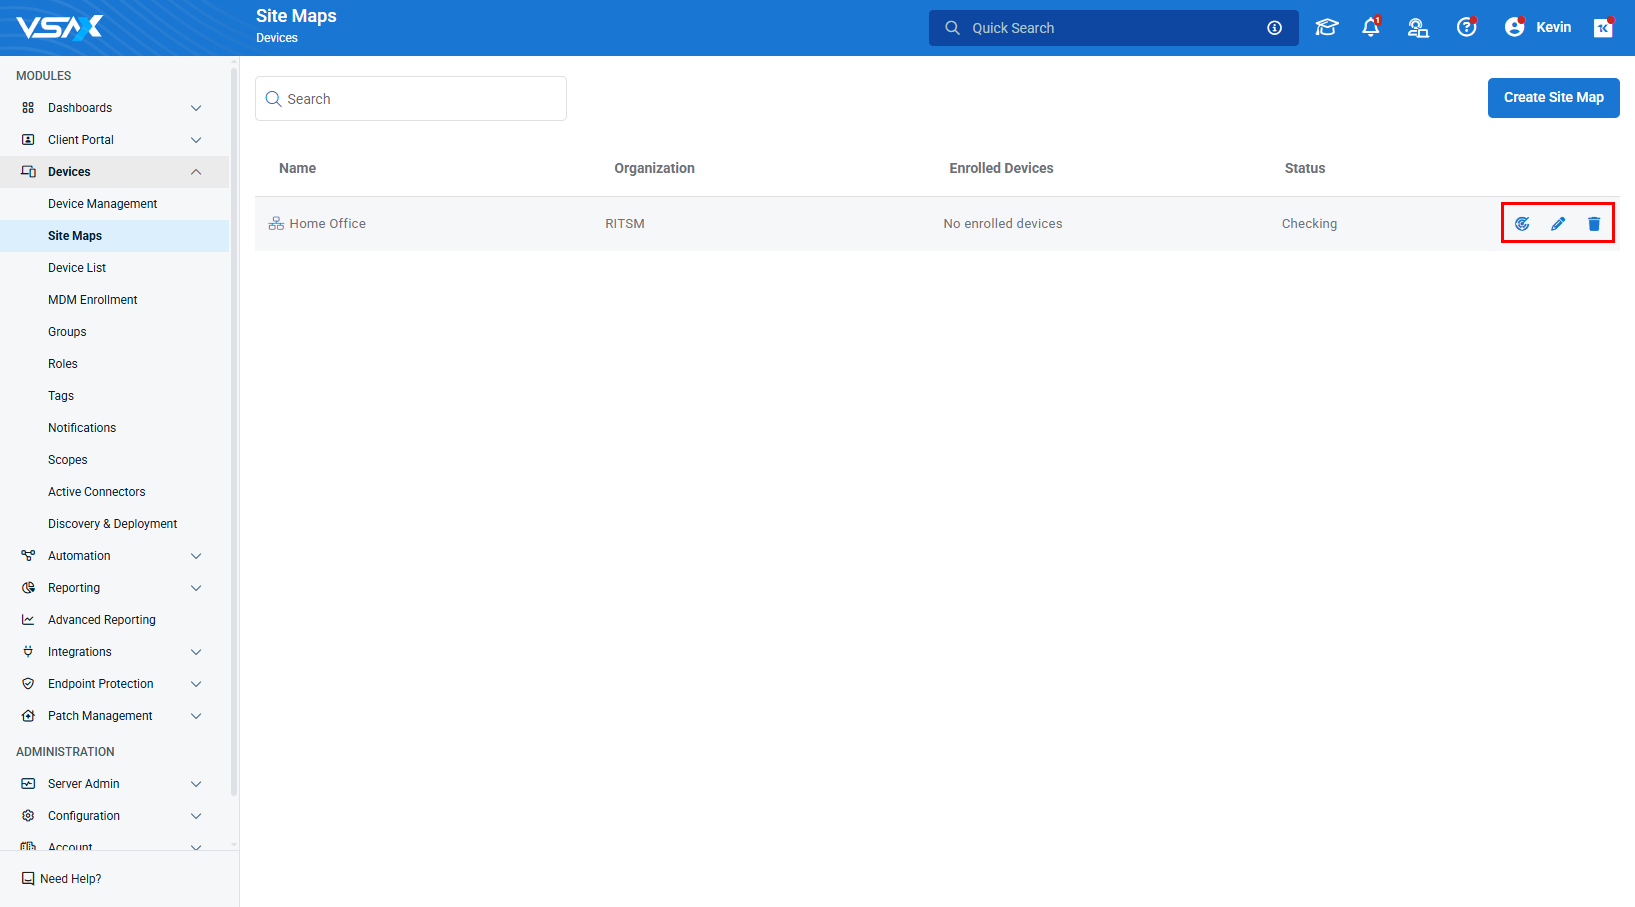
 Start discovery: Trigger the designated probe to scan the network for changes.
  Edit: Edit the Site Map configuration.
  Delete: Delete the Site Map.