Client Portal troubleshooters
NAVIGATION Modules > Client Portal > Troubleshooters
PERMISSIONS All users
The Client Portal troubleshooter function allows you to create automated resolution workflows that can be as simple or as complex as you need. These automations allow you to collect important information from users, and potentially resolve issues before a technician even talks to end users.
This article describes the process to create, view, and manage your troubleshooters.
Overview
Issue identification
- The troubleshooter function begins by identifying the problem or issue. This can be done through user-reported incidents, device alerts, or other monitoring mechanisms. Additionally, a troubleshooter can be configured to ask clarifying questions and/or allow the user to initiate a conversation with a technician.
Automated resolution
- Users or administrators can use troubleshooters to automate resolution of common technical issues using Scripts and Tasks. These can be triggered at any point in a troubleshooter, such as if a user confirms their issue by answering a question, and/or as the result of other conditions being met.
NOTE Scripts and Tasks run as part of a troubleshooter will run in the context of the logged in user on the device.
Conditional logic
- Troubleshooters include conditional logic, allowing for different actions based on specific conditions or criteria. This ensures flexibility in handling various scenarios.
User interaction
- Depending on the complexity of the issue, the troubleshooter may involve user interaction. For example, it might prompt users for additional information or confirmation in the form of asking a multiple choice question before taking certain actions, or prompt a user to initiate a conversation with a technician.
Scalability
- The troubleshooter function is scalable to handle a variety of issues across different parts of a device or organization.
Troubleshooters page
From the left navigation menu in VSA 10, navigate to Client Portal > Troubleshooters.
The Troubleshooters page displays a list of all troubleshooters created by all users in your environment, sorted by the date last modified.
Click any header to sort the displayed records in ascending or descending order by the column's value.
| Field | Description |
|---|---|
| Title | Displays the title of the troubleshooter. |
| Profile | Displays the profile the troubleshooter belongs to. If the troubleshooter is included in more than one profile, +[number of additional profiles] is displayed. Refer to Add troubleshooters to a profile. |
| Status | Displays the status of the troubleshooter: Active or Inactive. |
| Last Modified Date | Displays when the troubleshooter was last modified by a user. |
Actions
Hover over any item in the list to access its management options.
| Action | Description |
|---|---|
| New Troubleshooter | Click New Troubleshooter to create a new automated resolution workflow. Refer to Creating and editing troubleshooters. |
|
|
The Edit icon opens the troubleshooter editor. Refer to Creating and editing troubleshooters. |
|
|
The Delete icon deletes the troubleshooter. Refer to Deleting a troubleshooter. |
Troubleshooter configuration
- From the left navigation menu, navigate to Client Portal > Troubleshooters.
- Click New Troubleshooter to create a new troubleshooter, or hover over an existing troubleshooter and click the Edit icon
 to open the editor.
 - On the Details page, populate the following fields:
Field Description Name Enter a name for the troubleshooter. Description Optionally, enter a brief description for the troubleshooter. Status Turn the toggle on or off to make the troubleshooter active or inactive, respectively.
An active troubleshooter will be available to end customers. Only administrators can activate or make changes to active troubleshooters.
- Click Next to proceed to the Troubleshooter configuration page.
- Click New Step to open the Choose an action pane on the right side of the page.
- The following actions are available:
- Condition. Refer to Creating a condition.
- Run Script. Refer to Running a script.
- Run Task. Refer to Running a task.
- Send Summary. Refer to Sending a summary.
- Show Message. Refer to Showing a message.
- End Troubleshooter. Refer to Ending the troubleshooter.
- Start Conversation. Refer to Starting a conversation.
- Ask Question. Refer to Asking a question.
- Click Create to create the new troubleshooter or Save to update the existing troubleshooter with the new configuration.
The selected action is configured as a step.
You can add multiple steps using the New Step button.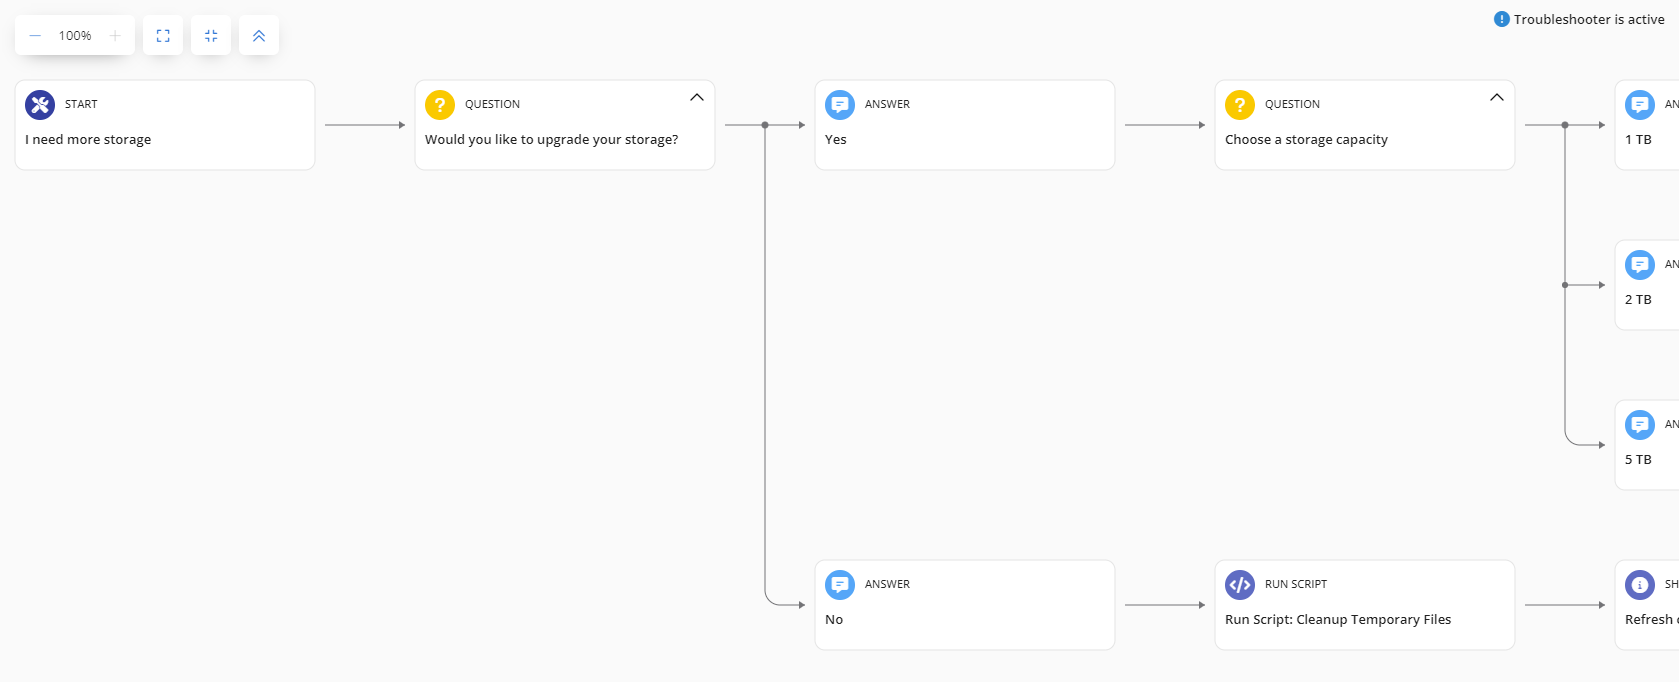
Newly created troubleshooters are added to the list of troubleshooters on the Troubleshooters page.
Configuration page indicators
At the bottom of configuration pages, the indicators display the configuration statuses, as follows:
| Indicator | Status |
|---|---|
| This configuration page is currently open for the first time. | |
| This configuration page is not currently open and has not been configured yet. | |
| This configuration page is currently open, and all required fields are complete. | |
| This configuration page is not currently open, and all required fields are complete. | |
| This configuration page is currently open, and required fields must be populated before saving. | |
| This configuration page is not currently open, and required fields must be populated before saving. |
The following actions can be configured in your troubleshooter:
On the Troubleshooter configuration page, click New Step. From the Choose an action pane, click Condition.
A condition allows you to add rules to define which organizations, sites, agent groups, and devices the troubleshooter will target.
Click Add Rule to define the target based on the following parameters:
- Organization
- Site
- Agent Group
- System
After selecting parameters, use the drop-down menus to select the specific organizations, sites, agent groups, and/or devices to target.
This action triggers a script to run as part of the troubleshooter process. Refer to Scripts.
On the Troubleshooter configuration page, click New Step. From the Choose an action pane, click Run Script.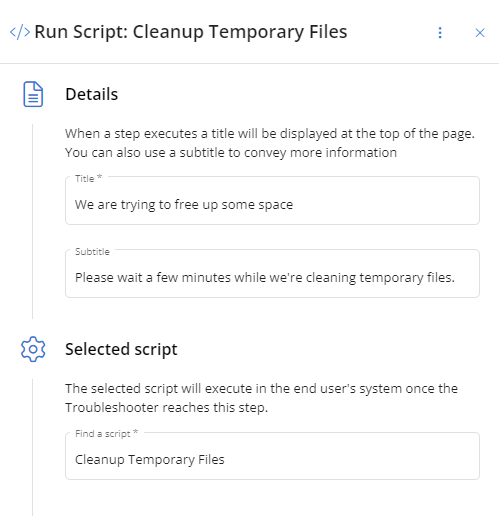
Populate the following fields:
| Field | Description |
|---|---|
| Title | Enter the title that will be displayed at the top of the page when a step is executing. |
| Subtitle | Optionally, enter the subtitle that will be displayed to convey additional information. |
| Find a script | Select a script to be executed on the end user's device once the troubleshooter reaches this step. Refer to Scripts. |
Click Confirm.
The Run Script pane is closed and the action is configured as a step in your troubleshooter.
Editing a Run Script step
To edit, click the existing step.
In the upper-right corner of the Run Script pane, click the ![]() icon to access the following options:
icon to access the following options:
- Move to: Move the action to a different step with or without its child nodes.
- Copy to: Copy the action to another step with or without its child nodes.
- Rename: Rename the action title.
- Delete: Delete the step.
This action triggers a task to run as part of the troubleshooter process. Refer to Tasks.
On the Troubleshooter configuration page, click New Step. From the Choose an action pane, click Run Task.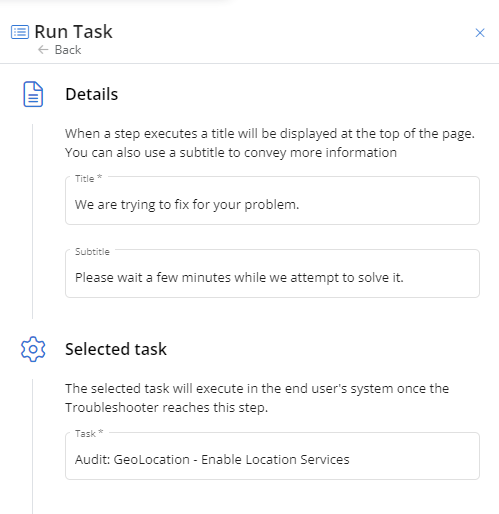
Populate the following fields:
| Field | Description |
|---|---|
| Title | Enter the title that will be displayed at the top of the page when a step is executing. |
| Subtitle | Optionally, enter the subtitle that will be displayed to convey additional information. |
| Task | Select a task to be executed on the end user's device once the troubleshooter reaches this step. Refer to Tasks. |
Click Confirm.
The Run Task pane is closed and the action is configured as a step in your troubleshooter.
Editing a Run Task step
To edit, click the existing step.
In the upper-right corner of the Run Task pane, click the ![]() icon to access the following options:
icon to access the following options:
- Move to: Move the action to a different step with or without its child nodes.
- Copy to: Copy the action to another step with or without its child nodes.
- Rename: Rename the action title.
- Delete: Delete the step.
This action triggers an email summary to be sent to any email address(es) as part of the troubleshooter process.
On the Troubleshooter configuration page, click New Step. From the Choose an action pane, click Send Summary.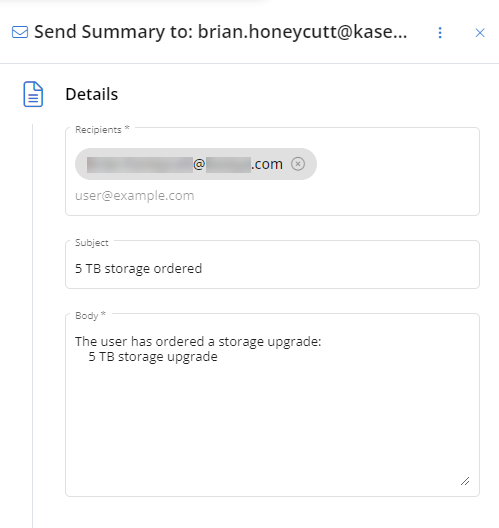
Populate the following fields:
| Field | Description |
|---|---|
| Recipients | Enter one or more email addresses to receive the message when the step is executing. |
| Subject | Enter a subject line for the email. |
| Body | Enter the text for the body of the email. |
Click Confirm.
The Send Summary pane is closed and the action is configured as a step in your troubleshooter.
Editing a Send Summary step
To edit, click the existing step.
In the upper-right corner of the Send Summary pane, click the ![]() icon to access the following options:
icon to access the following options:
- Move to: Move the action to a different step with or without its child nodes.
- Copy to: Copy the action to another step with or without its child nodes.
- Rename: Rename the action title.
- Delete: Delete the step.
This action triggers a message to be displayed as part of the troubleshooter process.
On the Troubleshooter configuration page, click New Step. From the Choose an action pane, click Show Message.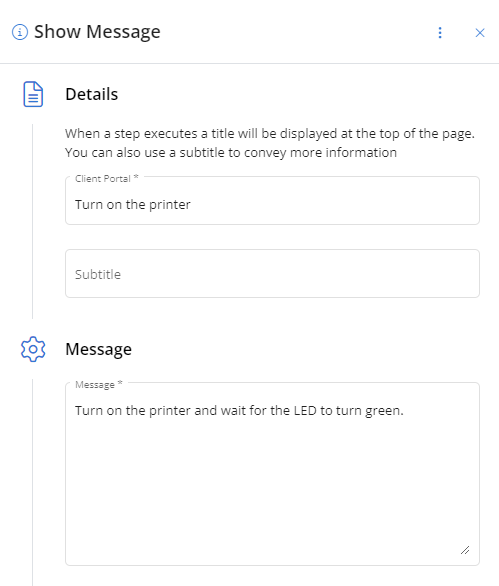
Populate the following fields:
| Field | Description |
|---|---|
| Title | Enter the title that will be displayed at the top of the page when a step is executing. |
| Subtitle | Optionally, enter the subtitle that will be displayed to convey additional information. |
| Message | Enter the text that will be displayed in the message that appears. |
Click Confirm.
The Show Message pane is closed and the action is configured as a step in your troubleshooter.
Editing a Show Message step
To edit, click the existing step.
In the upper-right corner of the Show Message pane, click the ![]() icon to access the following options:
icon to access the following options:
- Move to: Move the action to a different step with or without its child nodes.
- Copy to: Copy the action to another step with or without its child nodes.
- Delete: Delete the step.
This action ends the troubleshooter process, allowing for submissions of user feedback.
On the Troubleshooter configuration page, click New Step. From the Choose an action pane, click End Troubleshooter.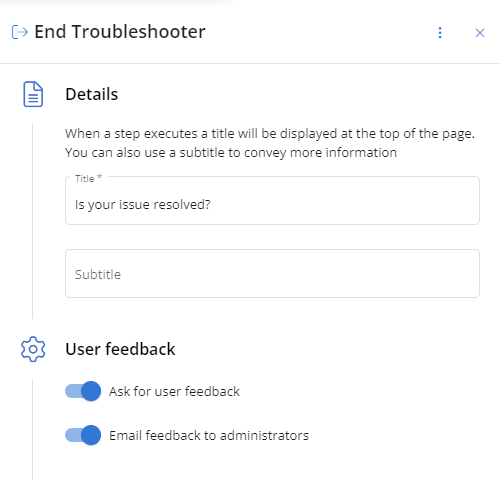
Populate the following fields:
| Field | Description |
|---|---|
| Title | Enter the title that will be displayed at the top of the page when a step is executing. |
| Subtitle | Optionally, enter the subtitle that will be displayed to convey additional information. |
| User feedback | Turn the Ask for user feedback toggle on to prompt users to submit feedback on the troubleshooter experience. If that toggle is turned on, the Email feedback to administrators toggle becomes available to turn on, which sends the user-submitted feedback to administrator users in your account via email, if enabled. |
Click Confirm.
The End Troubleshooter pane is closed and the action is configured as a step in your troubleshooter.
Editing a End Troubleshooter step
To edit, click the existing step.
In the upper-right corner of the End Troubleshooter pane, click the ![]() icon to access the following options:
icon to access the following options:
- Move to: Move the action to a different step with or without its child nodes.
- Copy to: Copy the action to another step with or without its child nodes.
- Delete: Delete the step.
This action triggers a user chat session as part of the troubleshooter process. Refer to Client Portal conversations.
On the Troubleshooter configuration page, click New Step. From the Choose an action pane, click Start Conversation.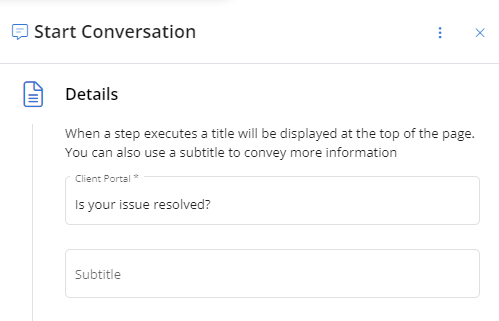
Populate the following fields:
| Field | Description |
|---|---|
| Title | Enter the title that will be displayed at the top of the page when a step is executing. |
| Subtitle | Optionally, enter the subtitle that will be displayed to convey additional information. |
Click Confirm.
The Start Conversation pane is closed and the action is configured as a step in your troubleshooter.
Editing a Start Conversation step
To edit, click the existing step.
In the upper-right corner of the Start Conversation pane, click the ![]() icon to access the following options:
icon to access the following options:
- Move to: Move the action to a different step with or without its child nodes.
- Copy to: Copy the action to another step with or without its child nodes.
- Rename: Rename the action title.
- Delete: Delete the step.
This action triggers a question to be displayed and prompts the user to reply Yes or No as part of the troubleshooter process.
On the Troubleshooter configuration page, click New Step. From the Choose an action pane, click Ask Question.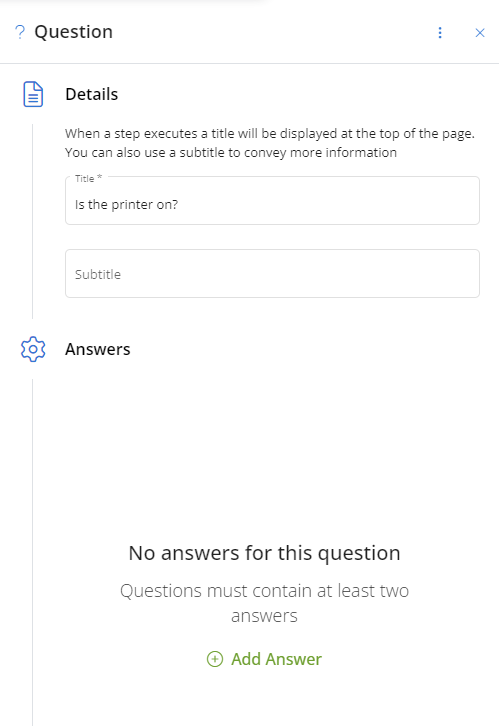
Populate the following fields:
Details
This information appears as a Question step.
| Field | Description |
|---|---|
| Title | Enter the title that will be displayed at the top of the page when a step is executing. |
| Subtitle | Optionally, enter the subtitle that will be displayed to convey additional information. |
Answers
This information appears as two Answer steps: one step dedicated to the Yes response and one step dedicated to the No response.
Yes
| Field | Description |
|---|---|
| Title | Enter the title that will be displayed at the top of the page when the response to the question is Yes. |
| Subtitle | Optionally, enter the subtitle that will be displayed to convey additional information. |
No
| Field | Description |
|---|---|
| Title | Enter the title that will be displayed at the top of the page when the response to the question is No. |
| Subtitle | Optionally, enter the subtitle that will be displayed to convey additional information. |
Click Confirm.
The pane is closed and the action is configured as three steps for your troubleshooter: Question, Answer (Yes), and Answer (No).
Editing a Question step or Answer step
To edit, click the existing step.
In the upper-right corner of the Question pane or Answer pane, click the ![]() icon to access the following option:
icon to access the following option:
- Delete: Delete the step.
Hover over an existing troubleshooter in the list and click the Delete icon ![]() .
.
The Delete Troubleshooter dialog box is displayed.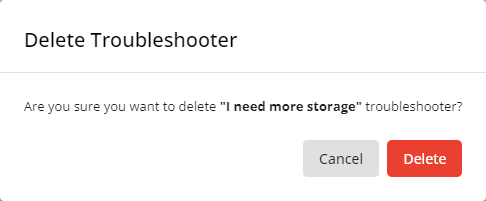
Click Delete to execute the action or Cancel to close out of the dialog box.


