Scripts
NAVIGATION Modules > Automation > Automation Hub
PERMISSIONS Automation > View Tasks & Scripts
PERMISSIONS Automation > Edit Tasks & Scripts
In addition to the device management and analysis tools included with VSA 10, the Scripts page enables you to create your own scripts to deploy to endpoints as automation tasks. This article describes the process to view and manage your scripts.
NOTE To learn how to create and deploy scripts and tasks to managed devices, refer to Tasks.
Overview
Scripts can be accessed in the Automation Hub. From the left navigation menu in VSA 10, navigate to Automation > Automation Hub.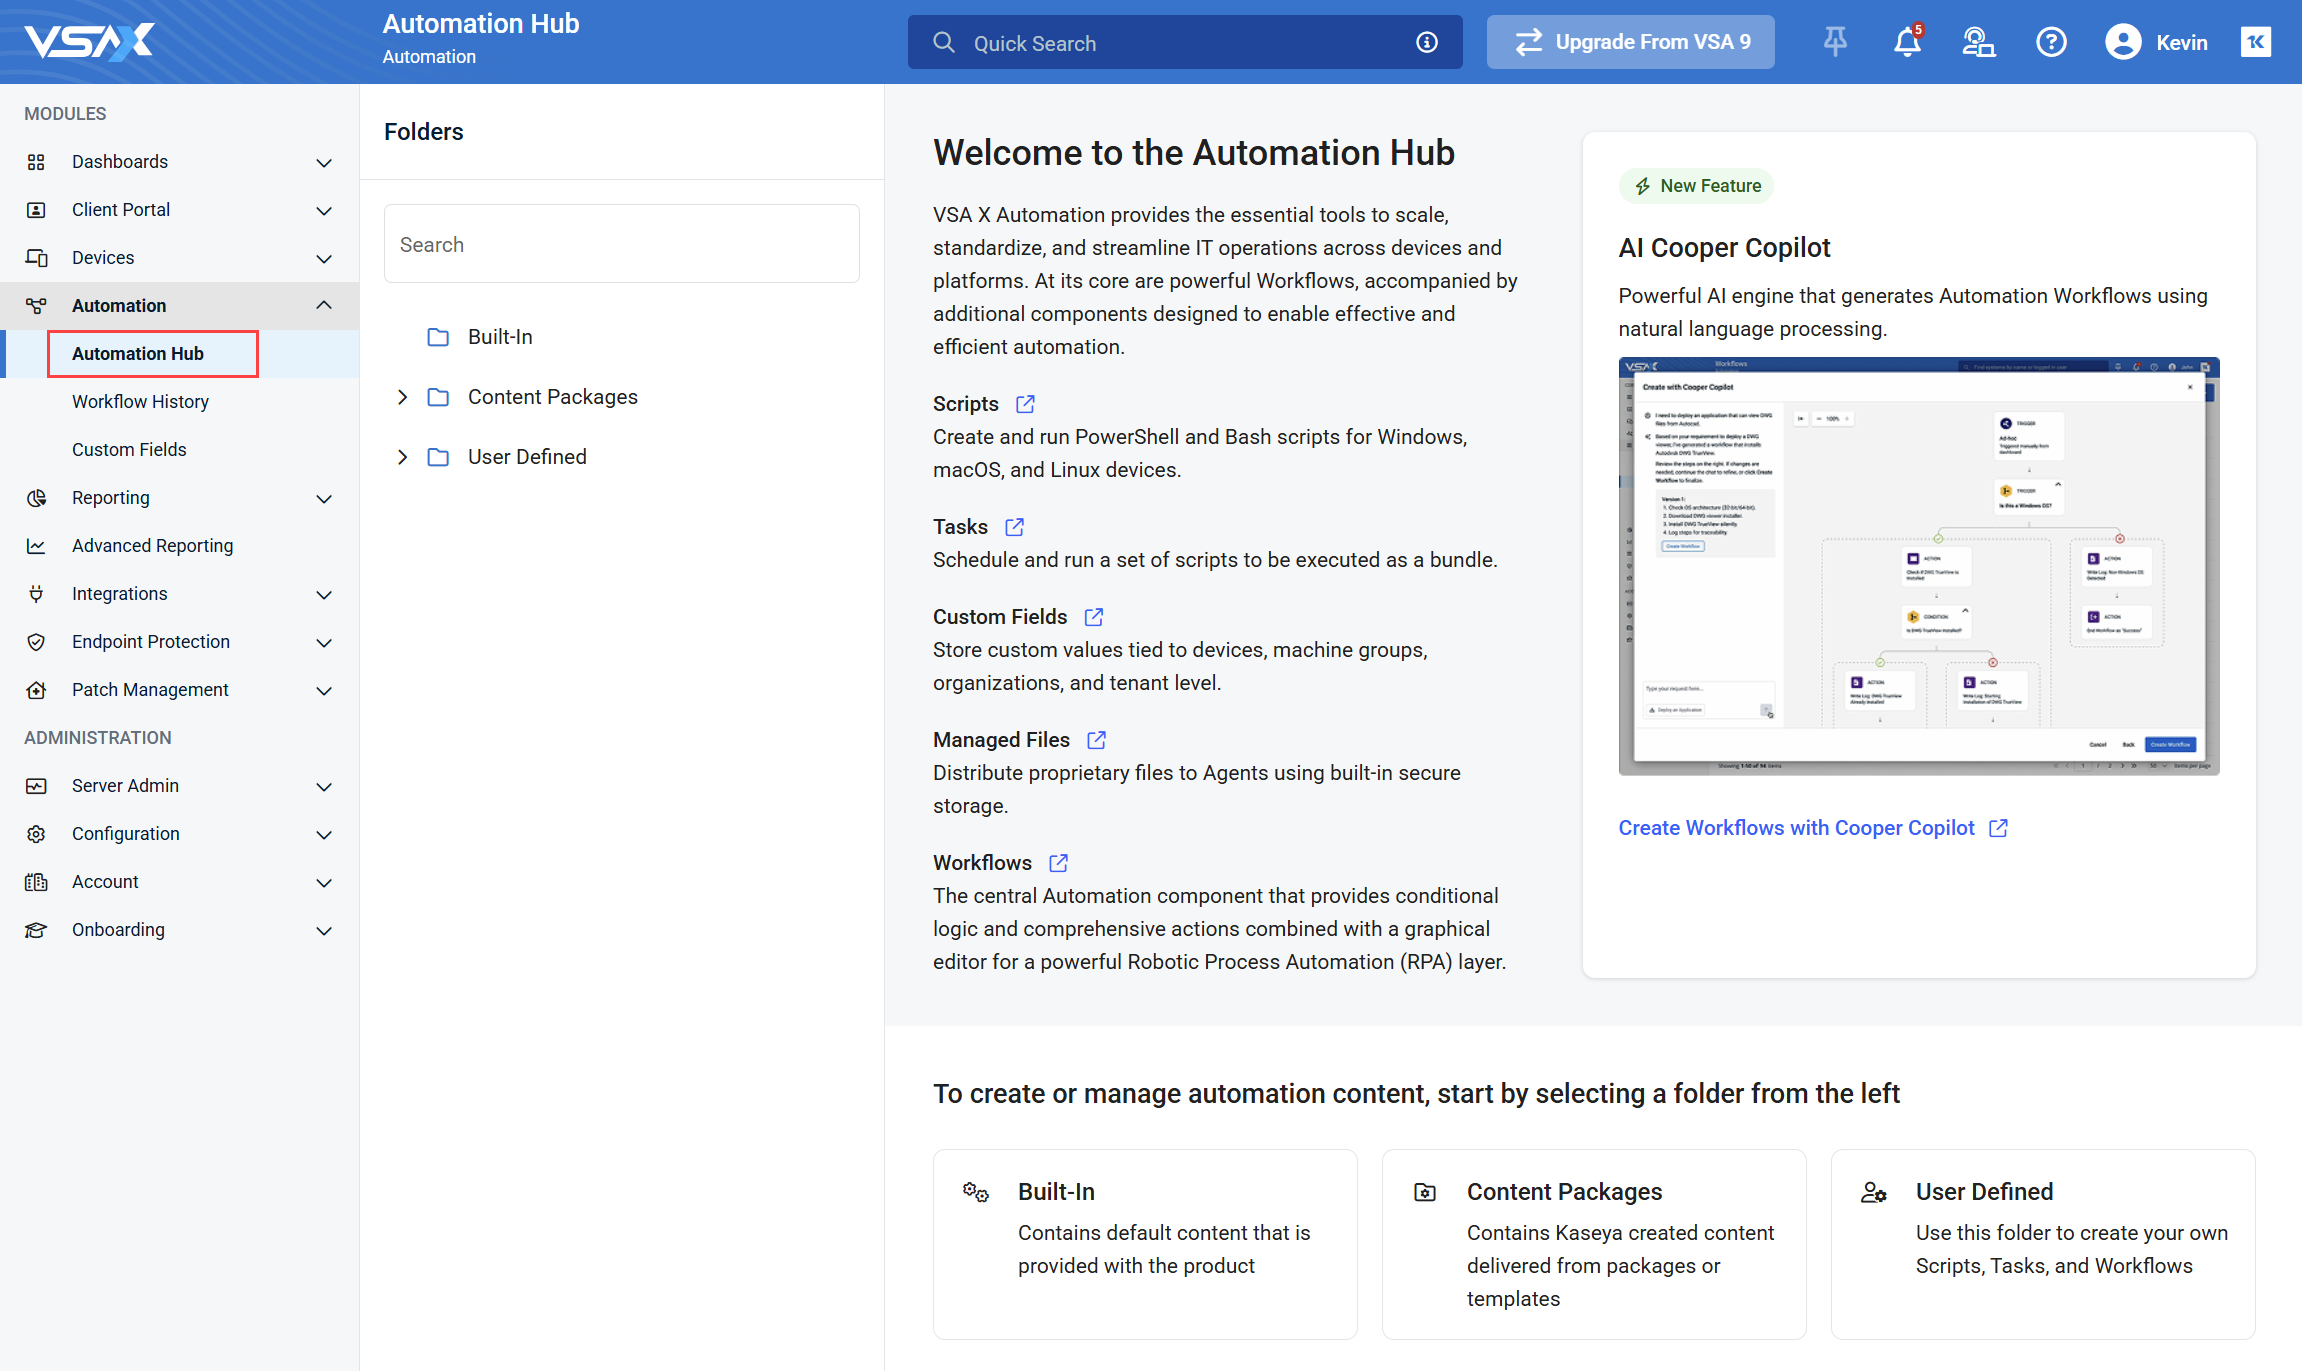
The Automation Hub contains all scripts, tasks, workflows, and managed files in one location, and organized into three folders:
- Built-In (read-only): Contains default content that is provided with the product.
- Content Packages (read-only): Contains Kaseya created content delivered from packages or templates.
- User Defined: Contains custom content created by product users.
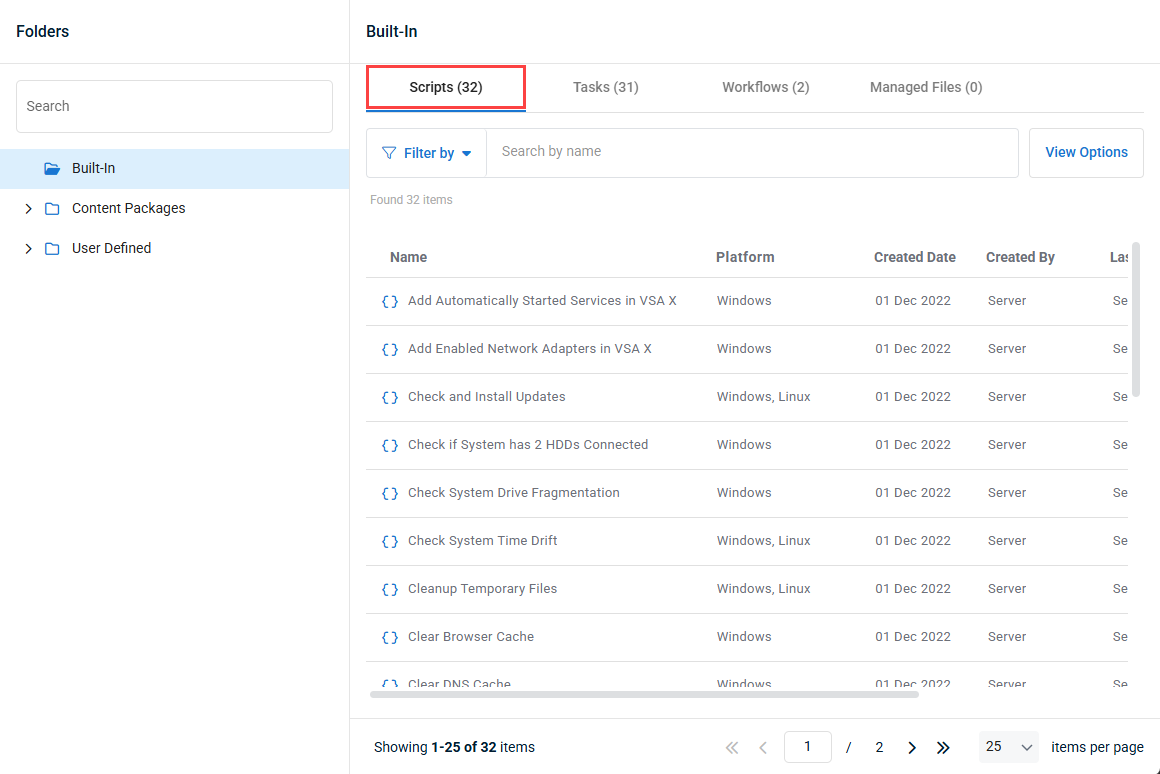
To access scripts in the Automation Hub, click a folder to view it's contents, and select the Scripts tab to show all scripts within that folder. You can also use the Search function to search for a script by name.
For more information on the Automation Hub, including folder management, refer to Navigating the Automation Hub.
Scripts content packs
VSA 10 includes a set of standard script content for feature enhancements, templates, and best practices for automating IT operations and device management. This content is updated regularly based on industry standards and customer feedback.
This content is located in the following folders:
- Built-in: Scripts for general automation and troubleshooting, such as creating a system restore point.
- Content Packages > VSAX_Starter_Pack > VSAX Starter Pack: Additional scripts to automate common tasks, such as setting the VSA X Manager password.
Navigating the Scripts tab
Click any header to sort the displayed records in ascending or descending order by the column's value.
| Field | Description |
|---|---|
| Name | Name of the task. |
| Platform | Displays the platform or platforms that the script can run on (Windows, Linux, macOS). |
| Created Date | Displays the date the script was created. |
| Created By | Displays the name of the user that created the script. |
| Last Modified By | Displays the name of the last user that modified the script. |
| Last Modified Date | Displays the date on which the task was last modified by a user. |
Hover over any item in the list to access its management options.
| Feature | Definition |
|
Click the Create Script button begin the script creation workflow; refer to Creating and editing scripts to learn more. |
|
|
Clones the script, creating a copy of it in the same folder. |
|
|
Move the script to a new folder within the User Defined folder. |
|
|
Create a copy of the script and choose where you want to save the copy within the User Defined folder. |
|
|
|
Begin the script editing workflow; refer to Creating and editing scripts to learn more. |
|
|
Deletes the script. |
NOTE Scripts can only be created or edited from within the User Defined folder and it's subfolders.
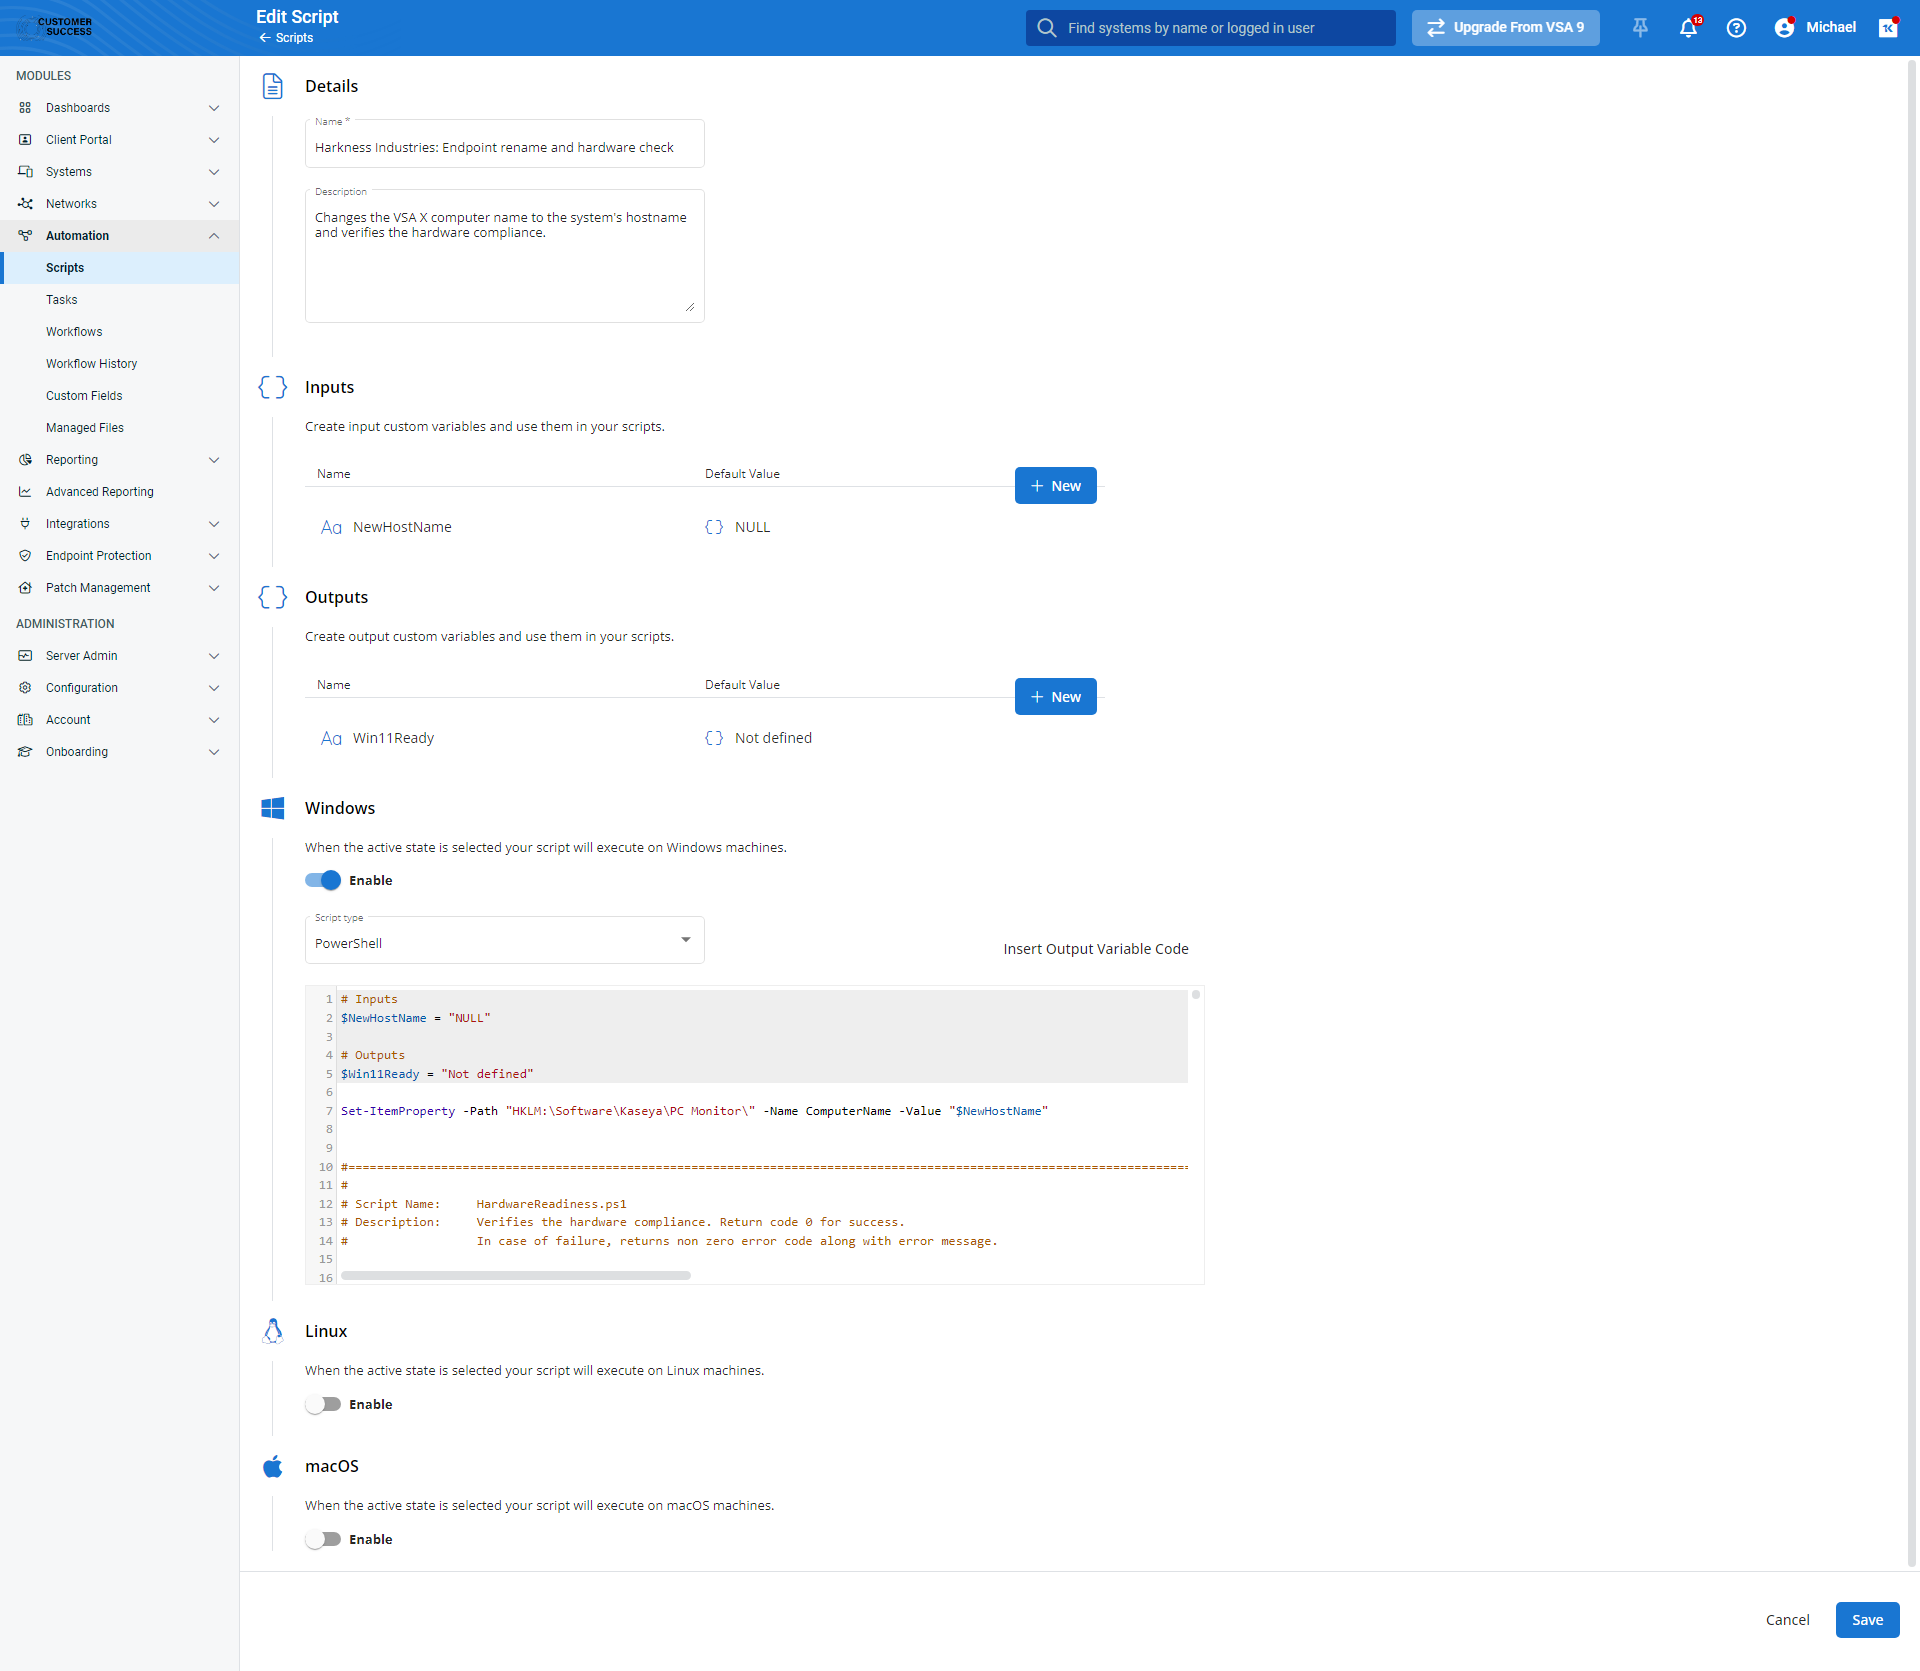
In the Automation Hub, in any location within the User Defined folder, navigate to the Scripts tab, and click Create Script. Alternately, you can hover over an existing script and click the Edit icon ![]() , or click the name of the script to edit it. Populate or change the following fields, and then click Save.
, or click the name of the script to edit it. Populate or change the following fields, and then click Save.
| Page section | Field or feature name | Definition | ||||||||||
| Details | Name |
The script's name. |
||||||||||
| Description |
A brief description of the script's purpose. |
|||||||||||
| Inputs | + New |
Click to create a variable based on a text, number, boolean, date, or VSA 10 field value to use as a variable in your scripts; when adding a variable, provide the following details and click Save Variable:
|
||||||||||
| Outputs | + New |
Click to create a variable that can capture script elements for use in other places within VSA 10, including instructing the platform to write the values to associated custom fields; when adding a variable, provide the following details and click Save Variable:
|
||||||||||
| Windows, Linux, macOS | Enable |
When enabled, the script will execute on the selected operating system. |
||||||||||
| Script type |
Instructs the endpoint to use Bash, PowerShell, or VBScript protocol when executing the script. |
|||||||||||
| Code editor |
Free-text field enabling customization of the script payload for each selected operating system. |
|||||||||||
| Insert Output Variable Code |
Paste code at the cursor's location from variables defined in the Outputs section of the page. |
NOTE This guide is for running a script ad-hoc against devices. If you want to schedule a script to run on a recurring basis, refer to Tasks.
If you need to run a script against one or more devices as a one-time action, follow the guide below.
- Navigate to Devices > Device Management.
- Select one or more devices.
- In the Actions menu, select Run Script.
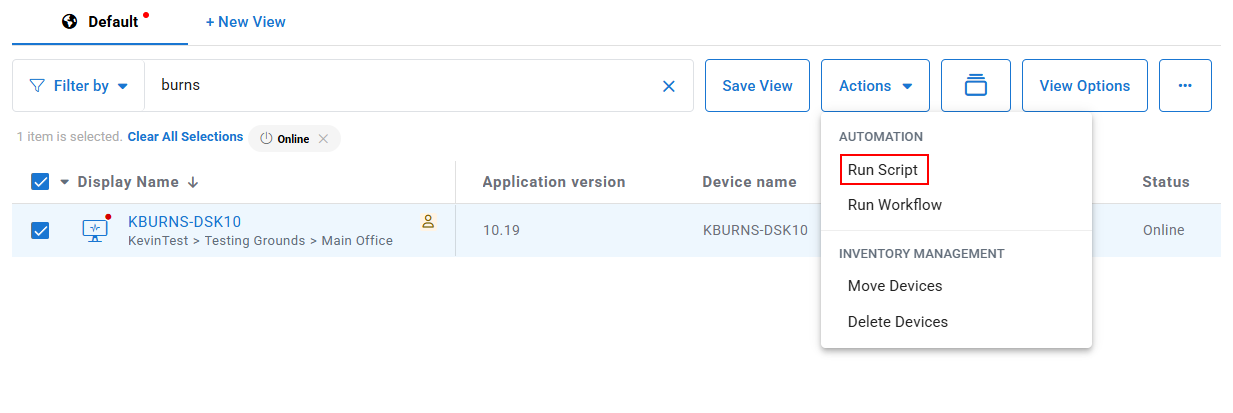
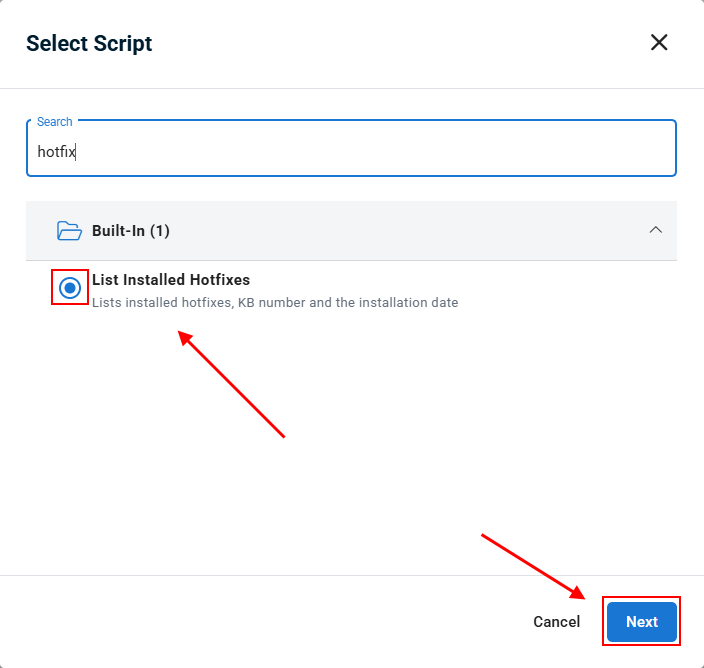
- Select the script to run from the pop-up window. Use the search bar at the top of the window to filter the list. Click Next.
- In the next window, select Run now or Run later.
- If Run Now is selected, the script will trigger immediately after you click Run in the next step.
- If Run later is selected, select the Timezone, Start Date, Start Time, and Distribution Window for the script.
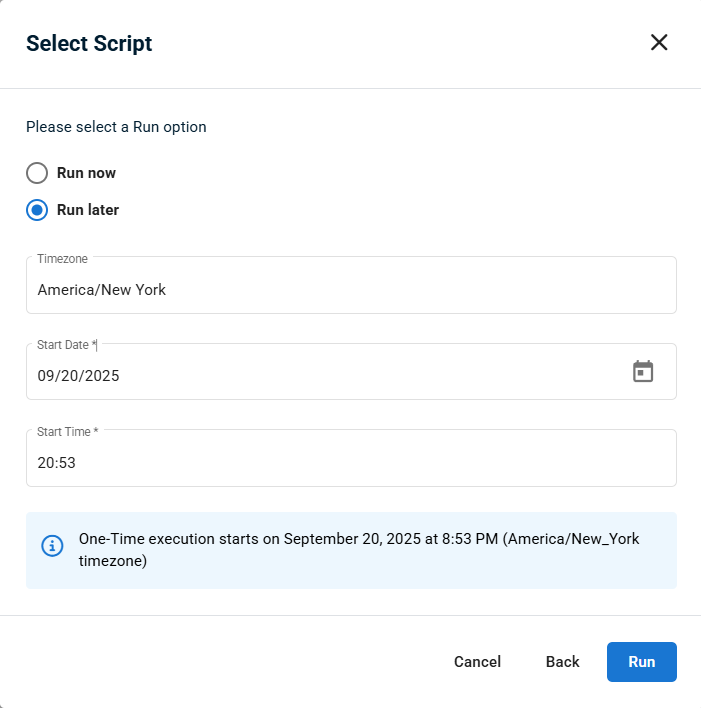
- Click Run.
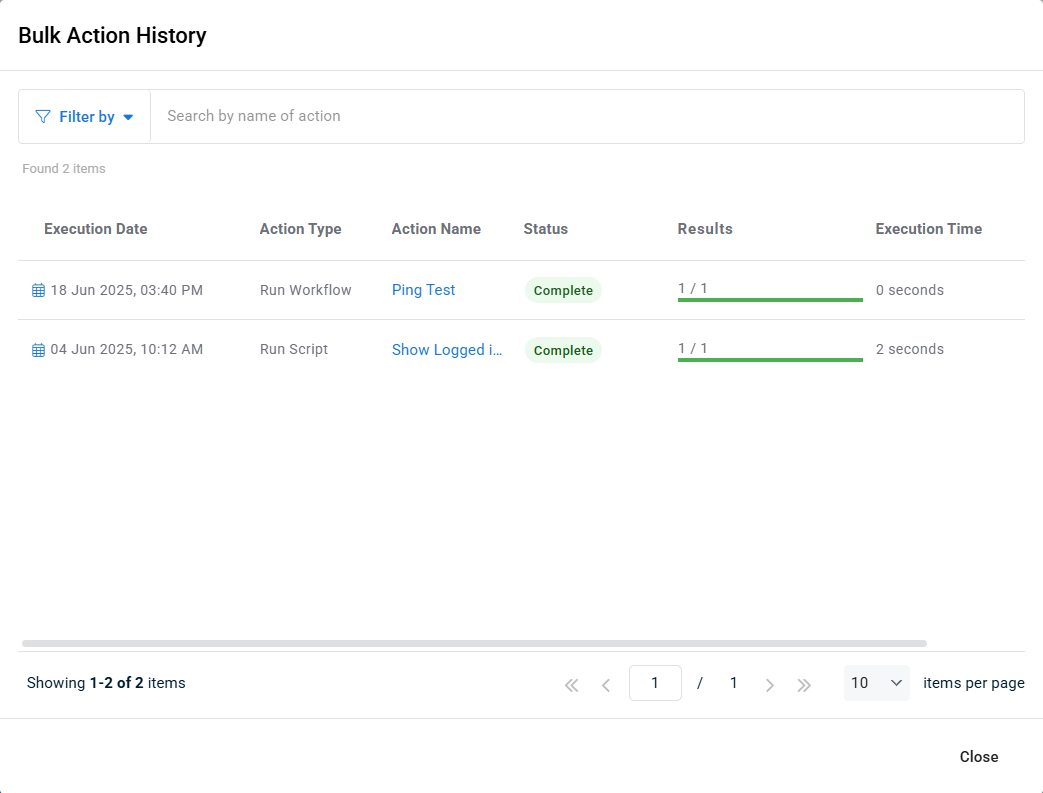
To check the status of scripts executed from the Actions menu, click the Bulk Action History button at the top of the page:
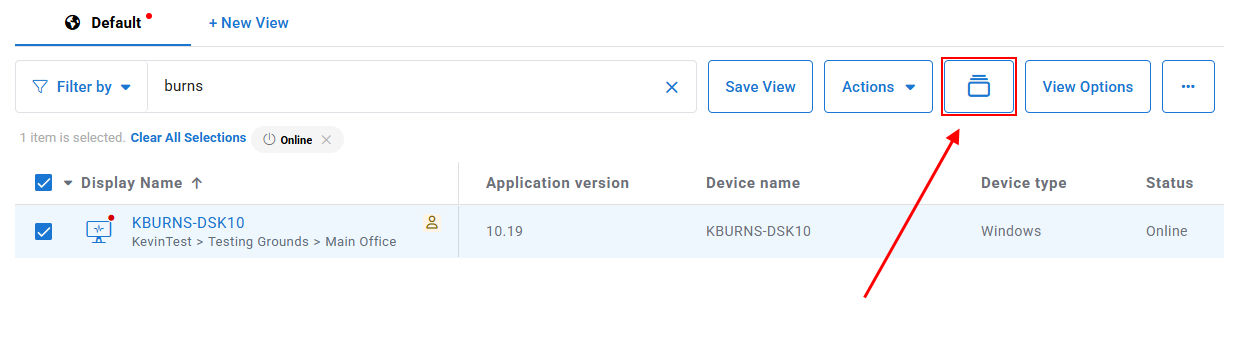
This will pop open the Bulk Action History window, which tracks the status of automations triggered via the Actions menu.