Creating and editing dashboards
NAVIGATION Modules > Dashboards > Manage > Create Dashboard
NAVIGATION Modules > Dashboards > Manage > select a dashboard to edit
PERMISSIONS Administrator
Administrators can create dashboards to share with all or certain users in the account, which they can populate with customizable widgets.
When creating or editing dashboards, administrators configure the dashboard details.
Dashboard details
| Field | Required? | Description |
|---|---|---|
| Name |
|
Enter a name for the dashboard. |
| Team Access Level |
|
From the drop-down menu, select the check boxes for the teams that should have access to view this dashboard. The Administrators team is selected by default and cannot be removed, as all administrators have access to view all dashboards. |
| Default Dashboard | Turn on the toggle to set this dashboard as the default dashboard in the account. Only one dashboard can be set as the default. If a different dashboard is already set as the default, the Default Dashboard toggle in that dashboard must be turned off before the toggle for a different dashboard can be turned on. The default dashboard opens upon navigating to Dashboards > View. Refer to Viewing dashboards. |
|
| Public Link | Turn on this toggle to generate a public-facing link to a web page that features a view-only version of the dashboard, which you can share with customers, staff members, and so forth. The URL will be available after saving the dashboard. Click the copy icon |
Configuration page indicators
At the bottom of configuration pages, the indicators display the configuration statuses, as follows:
How to...
- From the left navigation menu, navigate to Dashboards > Manage.
- In the upper-right corner of the page, click Create Dashboard.
- The Details configuration page will open. To learn about these settings, refer to Dashboard details.
- Once you finish configuring the details, click Next or the Widgets indicator to proceed to the Widgets configuration page, or click Cancel to delete your progress and return to the list of dashboards.
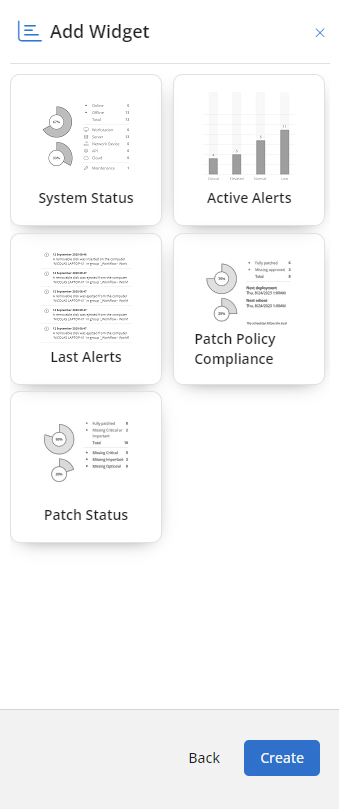
- On the Widgets configuration page, click Add Widget in any of the placeholders to open the Widget Library.
- Select one of the widgets available from the Widget Library. Refer to Dashboard widgets to learn about the types of widgets available, how to configure them, and the data they feature. You can add up to eight widgets to a dashboard in the Add Widget placeholders.

- Click Back or the Details indicator if you need to return to Details configuration page. When you're ready to save the new dashboard, click Create in the lower-right corner of the Widgets configuration page.
NOTE When viewing a completed dashboard, the widgets will appear in the exact placement configured on this page. For example, if you add a widget to the placeholder in the lower-right corner, that widget will appear in that spot when viewing the dashboard. Refer to Viewing dashboards.
NOTE Individual widgets cannot be saved if the Details configuration page is incomplete.
To learn about viewing dashboards once created, refer to Dashboards.
- From the left navigation menu, navigate to Dashboards > Manage.
- Click anywhere in a dashboard row or the Edit icon
 at the end of the row.
 - The Widgets configuration page will open. Edit the page as required. Refer to Dashboard widgets. To edit the Details configuration page, click Back or the Details indicator. Refer to Dashboard details.
- When finished editing, click Save in the lower-right corner of the Widgets page.


