Custom fields
NAVIGATION Modules > Automation > Custom Fields
PERMISSIONS Automation > View Tasks & Scripts
PERMISSIONS Automation > Edit Tasks & Scripts
The Custom Fields page enables you to configure and use custom fields in your workflow conditions rules to create robust execution paths.
This article describes the process to create, edit, and manage your custom fields.
Overview
From the left navigation menu in VSA 10, navigate to Automation > Custom Fields.
The Custom Fields page displays a list of all custom fields in your environment, sorted alphabetically by name.
Click any header to sort the displayed records in ascending or descending order by the column's value.
| Field | Description |
|---|---|
| Name | Name of the custom field. |
| Context | The context(s) the custom field can be assigned to: Global, Organization, Site, Agent Group and/or System. EXAMPLE System implies that the custom field captures values on a device level. |
| Type | The type of the input variable: Text, Number, Boolean, or Date. |
| Default Value | The default value set for the variable. If no value was set, this field displays Empty. |
| Value | Scripts are used to populate the value of the custom field. Refer to Scripts. Click the external link icon 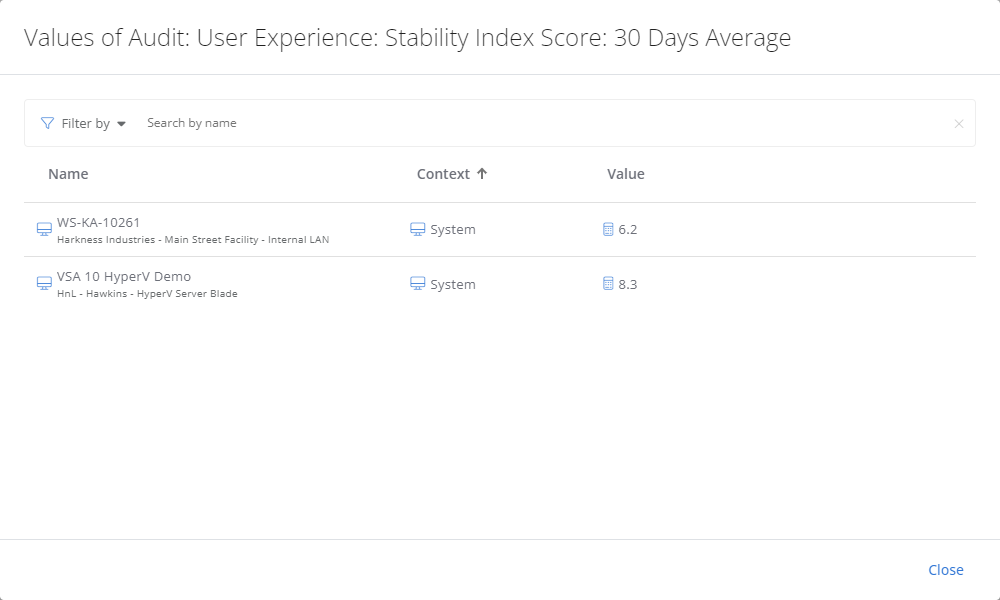 |
| Last Modified | Displays when the custom field was last modified by a user. |
Page features
Hover over any item in the list to access its management options.
| Action | Description |
|---|---|
| Filter by | Enables you to filter the list by context. NOTE Any contexts not in use will not appear as a filter option. |
| Search by name | You can also enter keywords in the search bar to search for specific custom fields by their name. Press Enter on your keyboard to execute the search and narrow the list of results. |
| Create Custom Field | Click Create Custom Field to create a new custom field. Refer to Create or edit a custom field. |
|
|
The Edit icon opens the custom field configuration page. Refer to Create or edit a custom field. |
|
|
The Delete icon deletes the custom field. Refer to Delete a custom field. |
How to...
Complete the following steps:
- On the Custom Fields page, click Create Custom Field. Or, click an existing custom field to open the editor.
- Enter the Display Name for the custom field.
- Optionally, enter a description.
- Enter information in the Variable Details section. This displays the kind of information the custom field will store. The Type field refers to the character format the value supports.
- In the Contexts section, select any contexts the custom field can be assigned to. If you select System, the variable will be leveraged only in the context of the endpoint, whereas Global will allow you to reference it in things like Endpoint policies.
- Turn on the Expires toggle if the custom field should expire after a set amount of time.
- Click Save to create the custom field or Cancel to close out of the dialog box.
Hover over an existing custom field in the list and click the Delete icon ![]() .
.
The Delete Custom Field dialog box is displayed.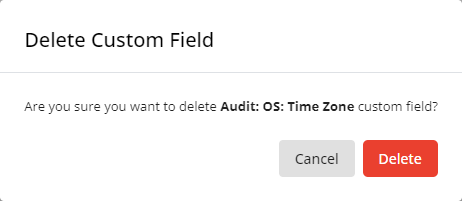
Click Delete to execute the action or Cancel to close out of the dialog box.
Using custom fields in workflows
Refer to Using a custom field in workflows.


