Datto EDR and Datto AV Integration
NAVIGATION Modules > Integrations > Datto EDR/AV
PERMISSIONS Administrator
Configuring the integration
The VSA 10 integration with Datto EDR/AV must first be enabled from the Datto EDR portal. Refer to In Datto EDR in the Datto EDR Help system.
With the integration active, your VSA 10 organizations and sites will be automatically synchronized with Datto EDR. Any endpoints protected by the Endpoint Security agent will be synced as devices and assigned to their corresponding locations. Synchronization happens every 4 hours.
Following the initial sync, Datto EDR will continue to check in with VSA 10 every four hours and continue to replicate any new changes to organizations, locations, and devices it discovers. The X icon will precede the names of all entities synced from VSA 10.
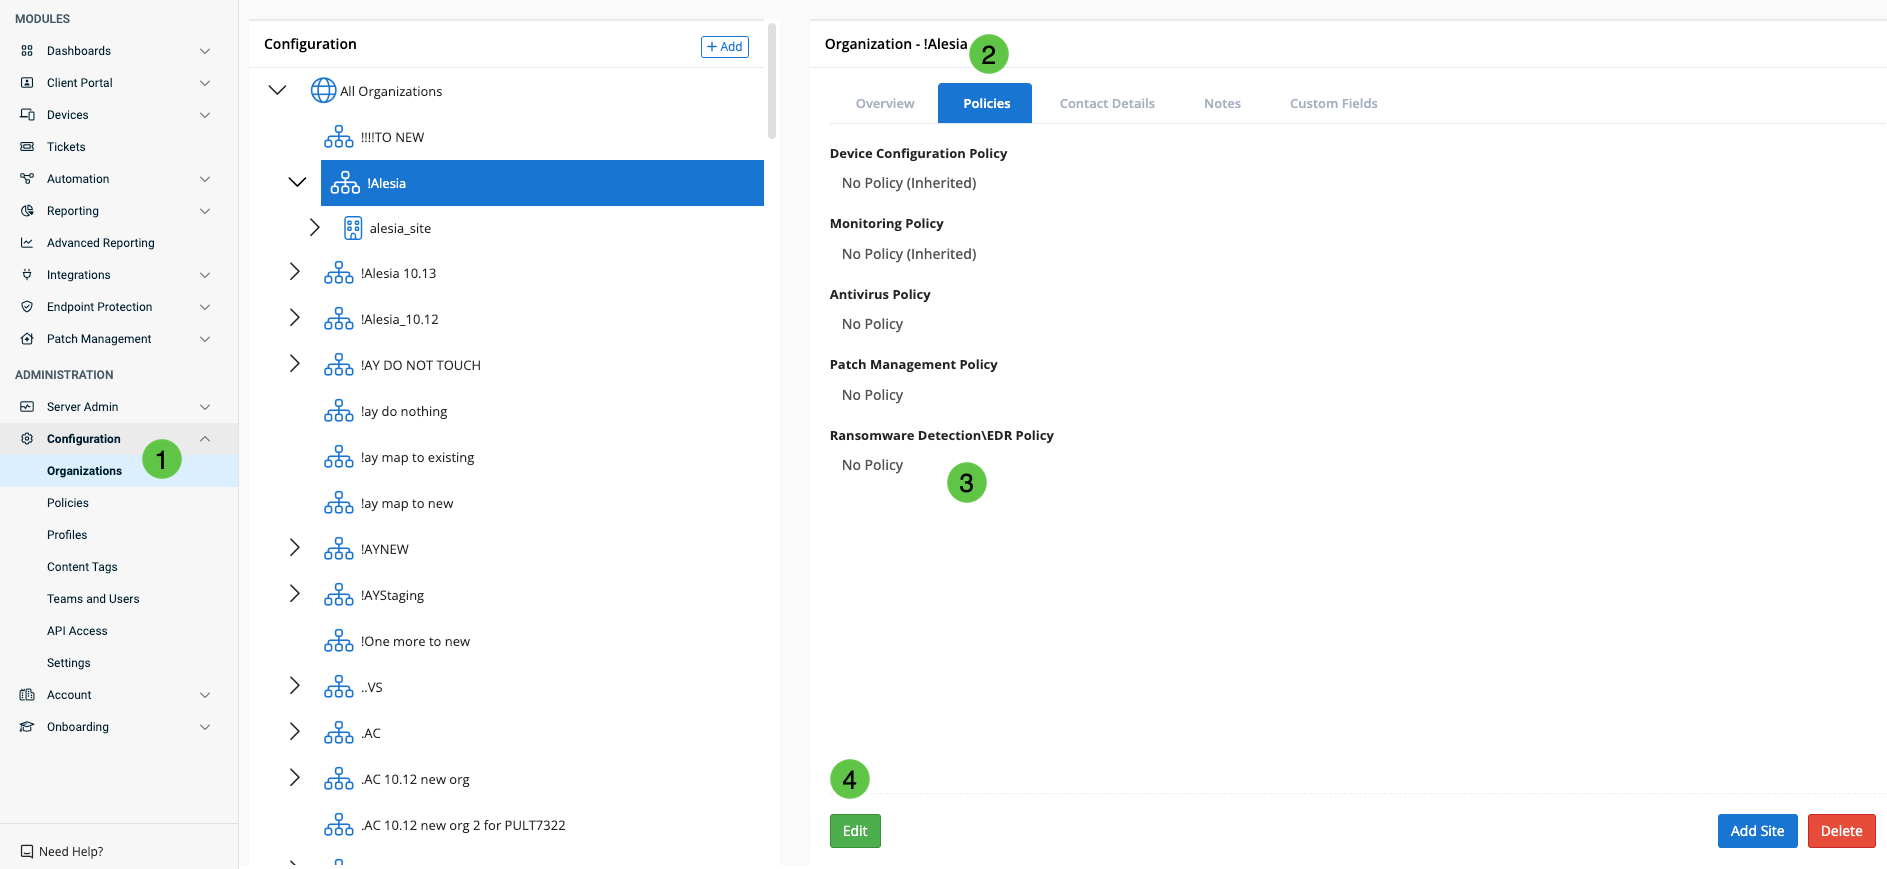
- From the left navigation menu in VSA 10, navigate to Configuration > Organizations.
- Select the organization, site, or group to which you want to assign the Datto EDR/AV Deployment policy.
- Click the Policies tab, and then click Edit.
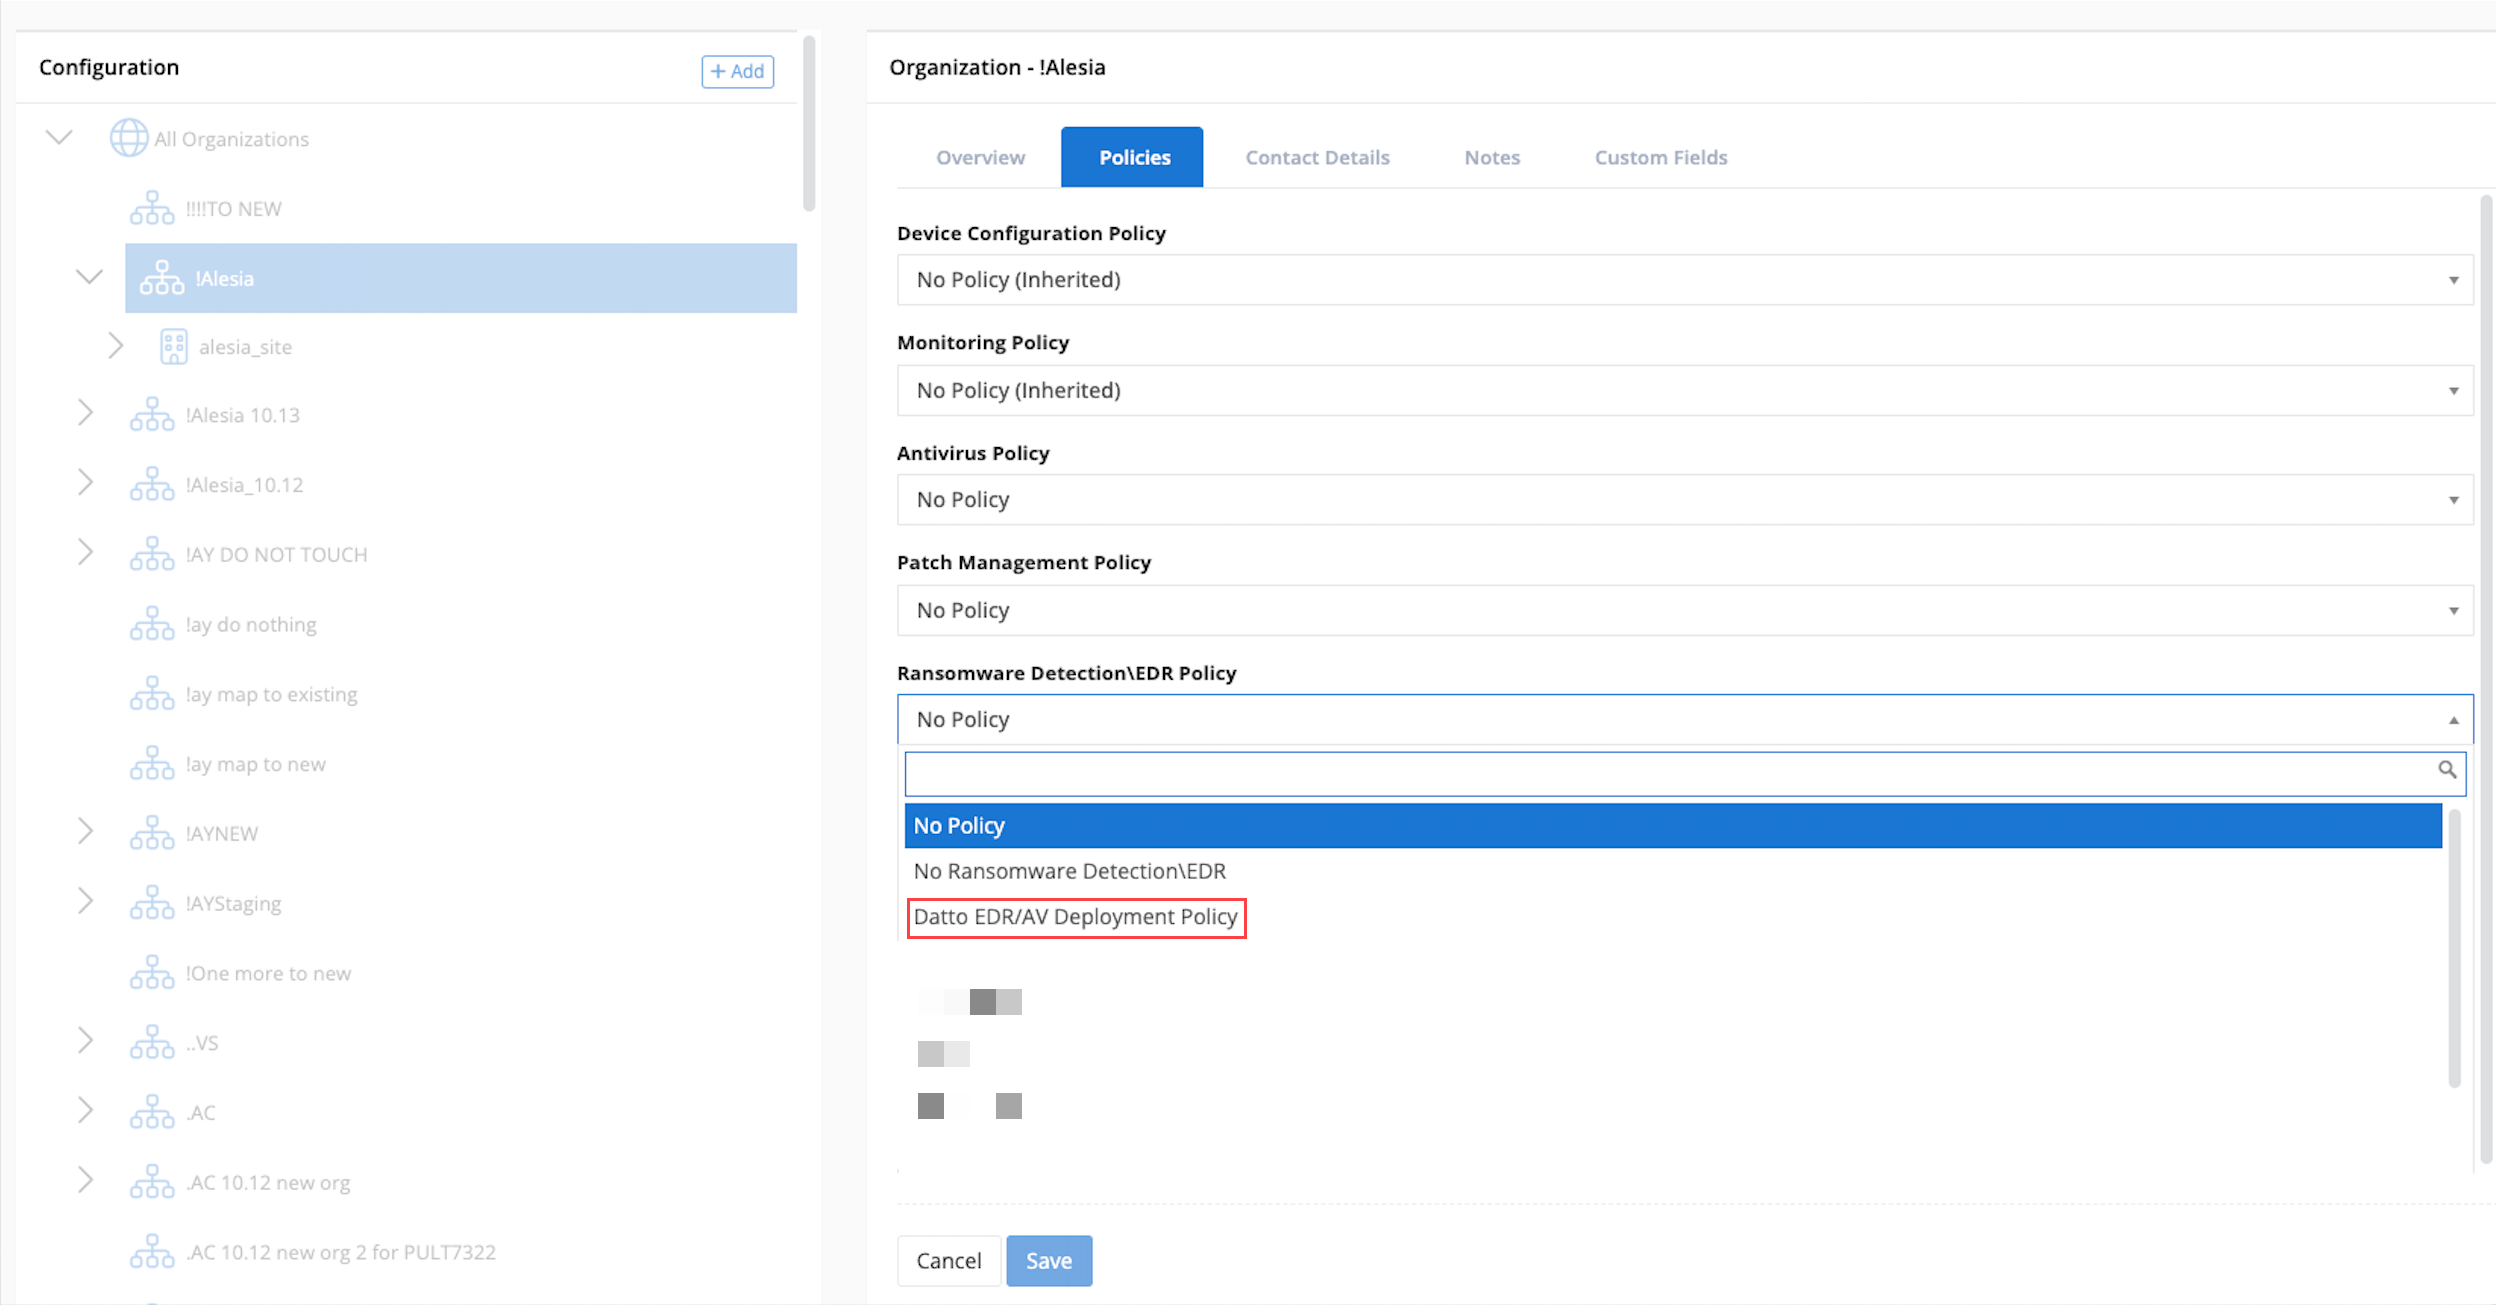
- In the Ransomware Detection\EDR Policy section, assign the Datto EDR/AV Deployment policy and save changes.
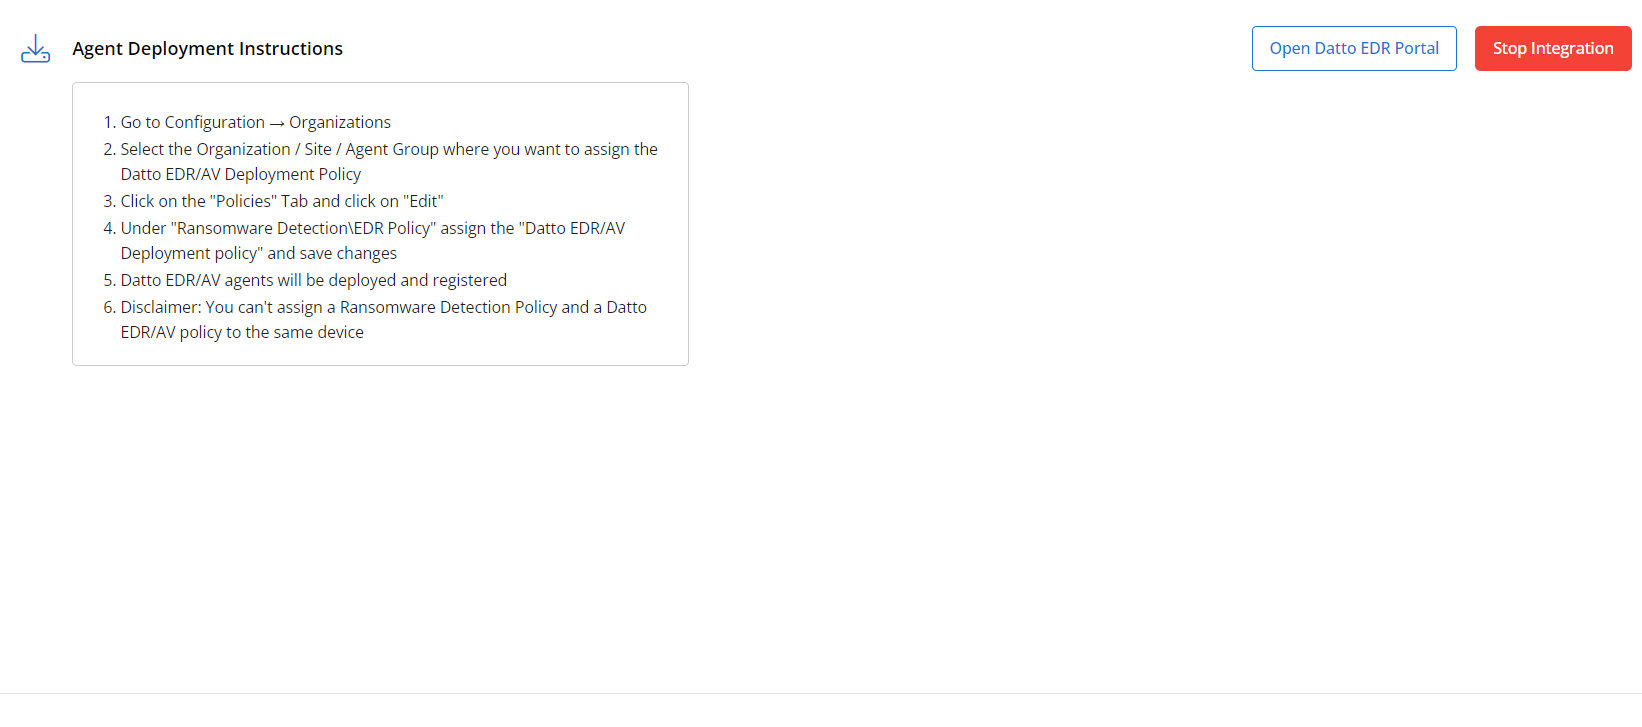
- Datto EDR/AV Windows agents will be deployed and registered to all targeted devices.
Datto EDR/AV deployment will not be initiated on a system in the following cases:
- The Ransomware Detection agent is installed or was not fully uninstalled.
- The VSA 10 Agent is out of date and does not support EDR (Agent version less than 10.13).
- This endpoint already has EDR installed.
- There is no Datto EDR/AV URL configured.
NOTE You cannot assign a Ransomware Detection policy and a Datto EDR/AV policy to the same device.
NOTE Linux and macOS agent deployment will be supported in future version of the integration.
NOTE Only admin users will have the ability to deploy Datto EDR through VSA 10.
NOTE Removing the Datto EDR/AV policy will not remove the Datto EDR/AV agent from the endpoints.
Navigate to Devices > Device List to monitor the status of the Datto EDR/AV agent from each device.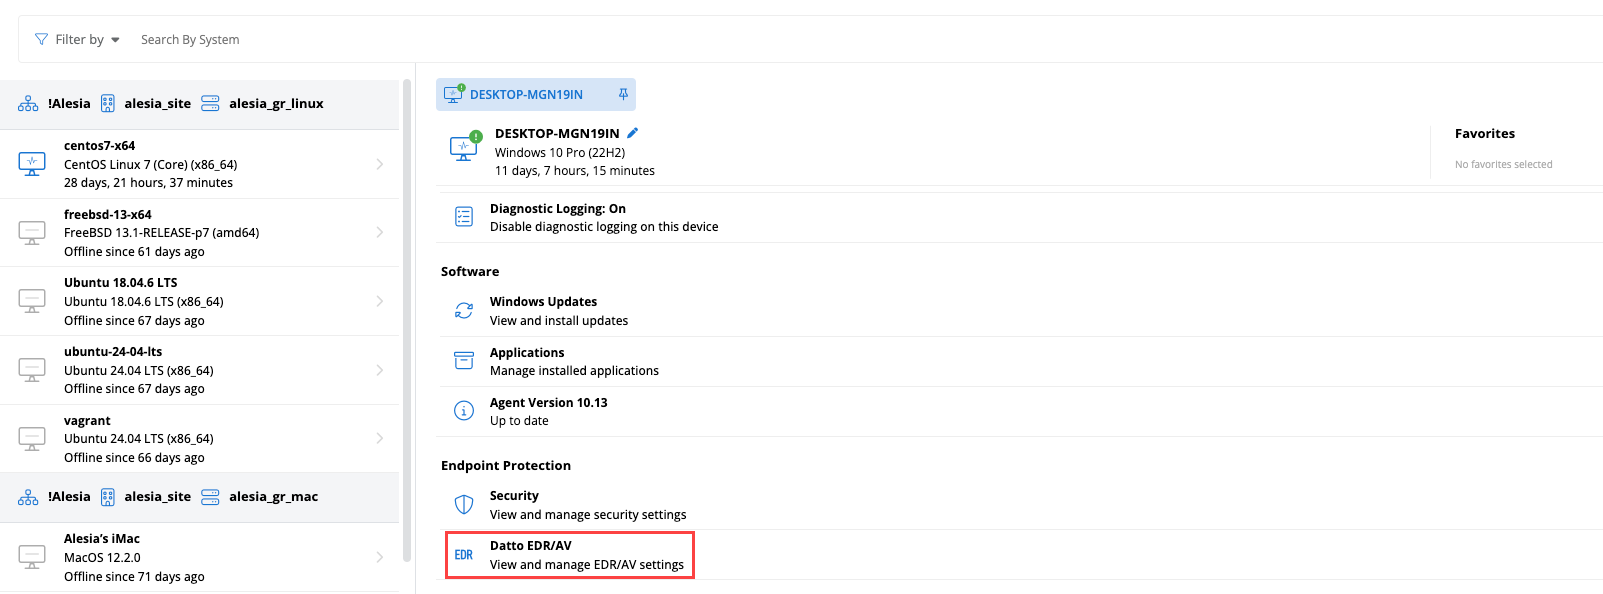
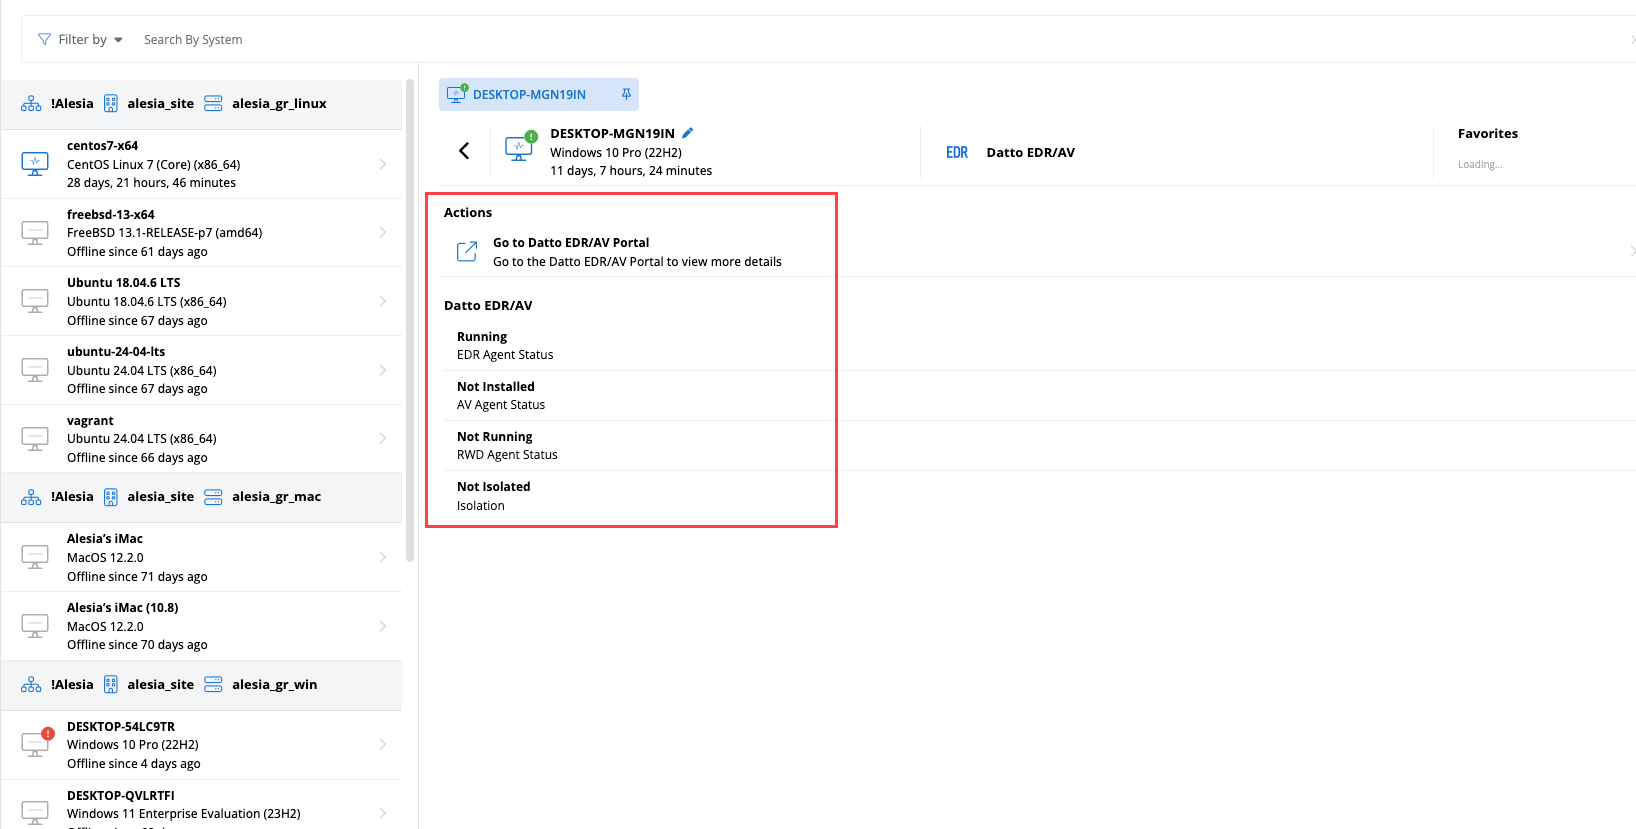
The following statuses will appear in the device details pane in the Endpoint Protection section as Datto EDR/AV, along with a link to view the device in the Datto EDR portal.
- EDR Agent Status
- AV Agent Status
- RWD Agent Status
- Isolation
Status definitions
- “-“: The status could not yet be collected from the agent, or the device is offline.
- Not Installed: The agent service could not be found on the machine.
- Not Running: The agent service is not started.
- Running: The agent service is in a running state.
- No Policy: No agent specific policy is applied for the type of protection.
Viewing Datto EDR/AV integration information on the Device Management page
With the integration enabled, the following columns can be added to the table on the Device Management page:
- Datto EDR Status
- Datto EDR/AV Status
- Datto EDR/RWD Status
- Datto EDR Isolation
- Datto EDR Alerts (number of Datto EDR alerts on that endpoint that were sent to VSA 10)
- Datto EDR Policies (Shows one policy and total applied)
Additionally, the following filters related to the integration can be applied to the device management table:
- Datto EDR Status
- Datto EDR/AV Status
- Datto EDR/RWD Status
- Datto EDR Isolation
Uninstalling the Datto EDR/AV agent is done from the Datto EDR portal.
Refer to Uninstallation in the Datto EDR Help system.
If you disconnect the VSA 10 integration, the following conditions will apply:
- Organization and Location Changes: Organizations and locations synchronized to EDR from VSA 10 will become EDR-only entities. You'll need to administer them exclusively through your EDR portal. Upon reconnection, duplicate organizations and locations will be created.
- Devices: Devices synced from VSA 10 will become EDR-only entities. All subsequent actions, including removal of the EDR agent, location reassignment, and device renaming must be performed from EDR portal.
- Synced entities: All synced VSA 10 organizations, locations, and devices will have the logo removed.
When disconnecting the integration, you'll need to perform the following steps in Datto EDR and VSA 10.
IMPORTANT You must complete both parts of this process in order or the integration will not be disconnected.
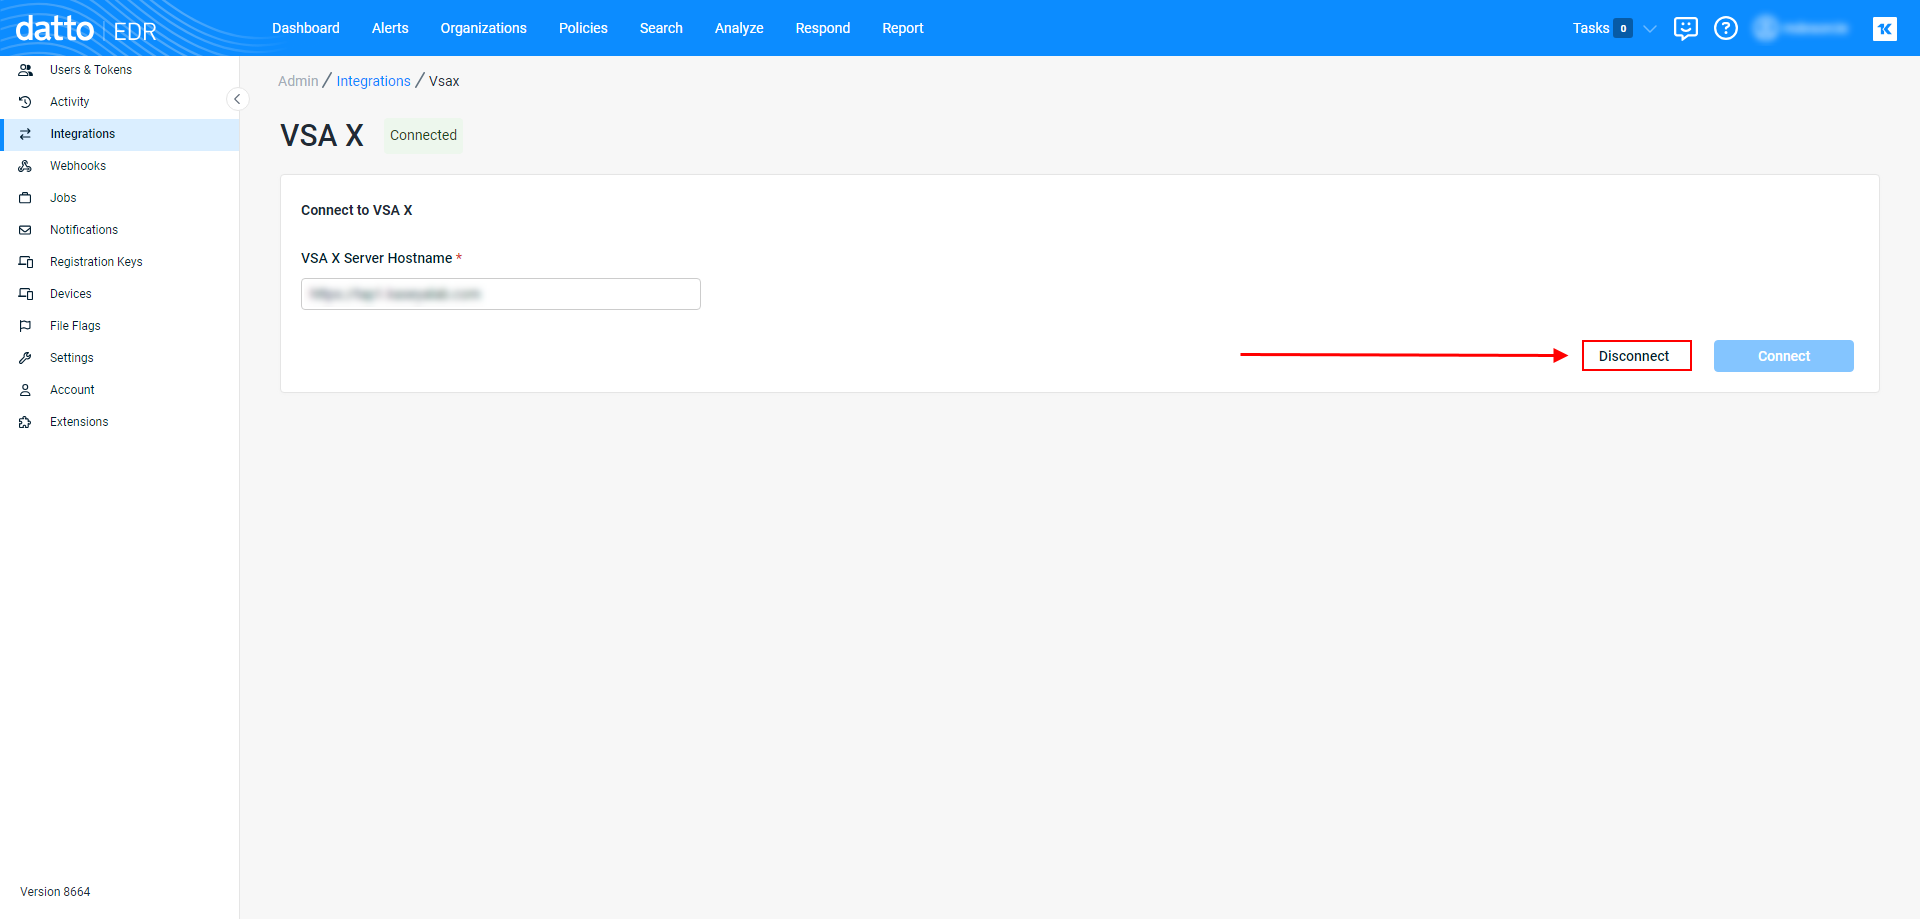
- In your EDR instance, navigate to Admin > Integrations. Then, click VSA X.
- Click Disconnect.
- Review the advisory warning. If you'd like to proceed, click Continue.
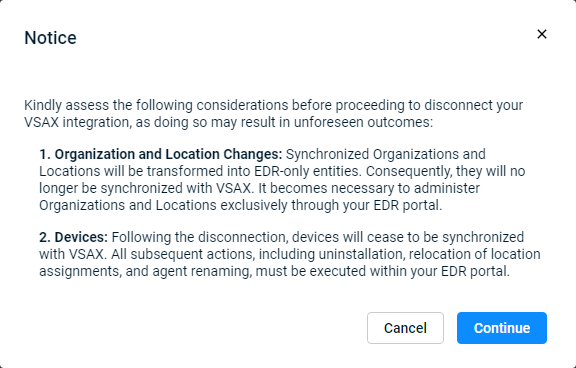
- After clicking Continue, Datto EDR will revoke VSA 10's access permissions to your instance and deactivate the integration.
- Verify that the Disconnected label appears next to the VSA X option on the Integrations page, as shown in the following image.
- Complete the steps in the next section, In VSA 10.
IMPORTANT Ensure you've completed the steps to disable the integration In Datto EDR first.
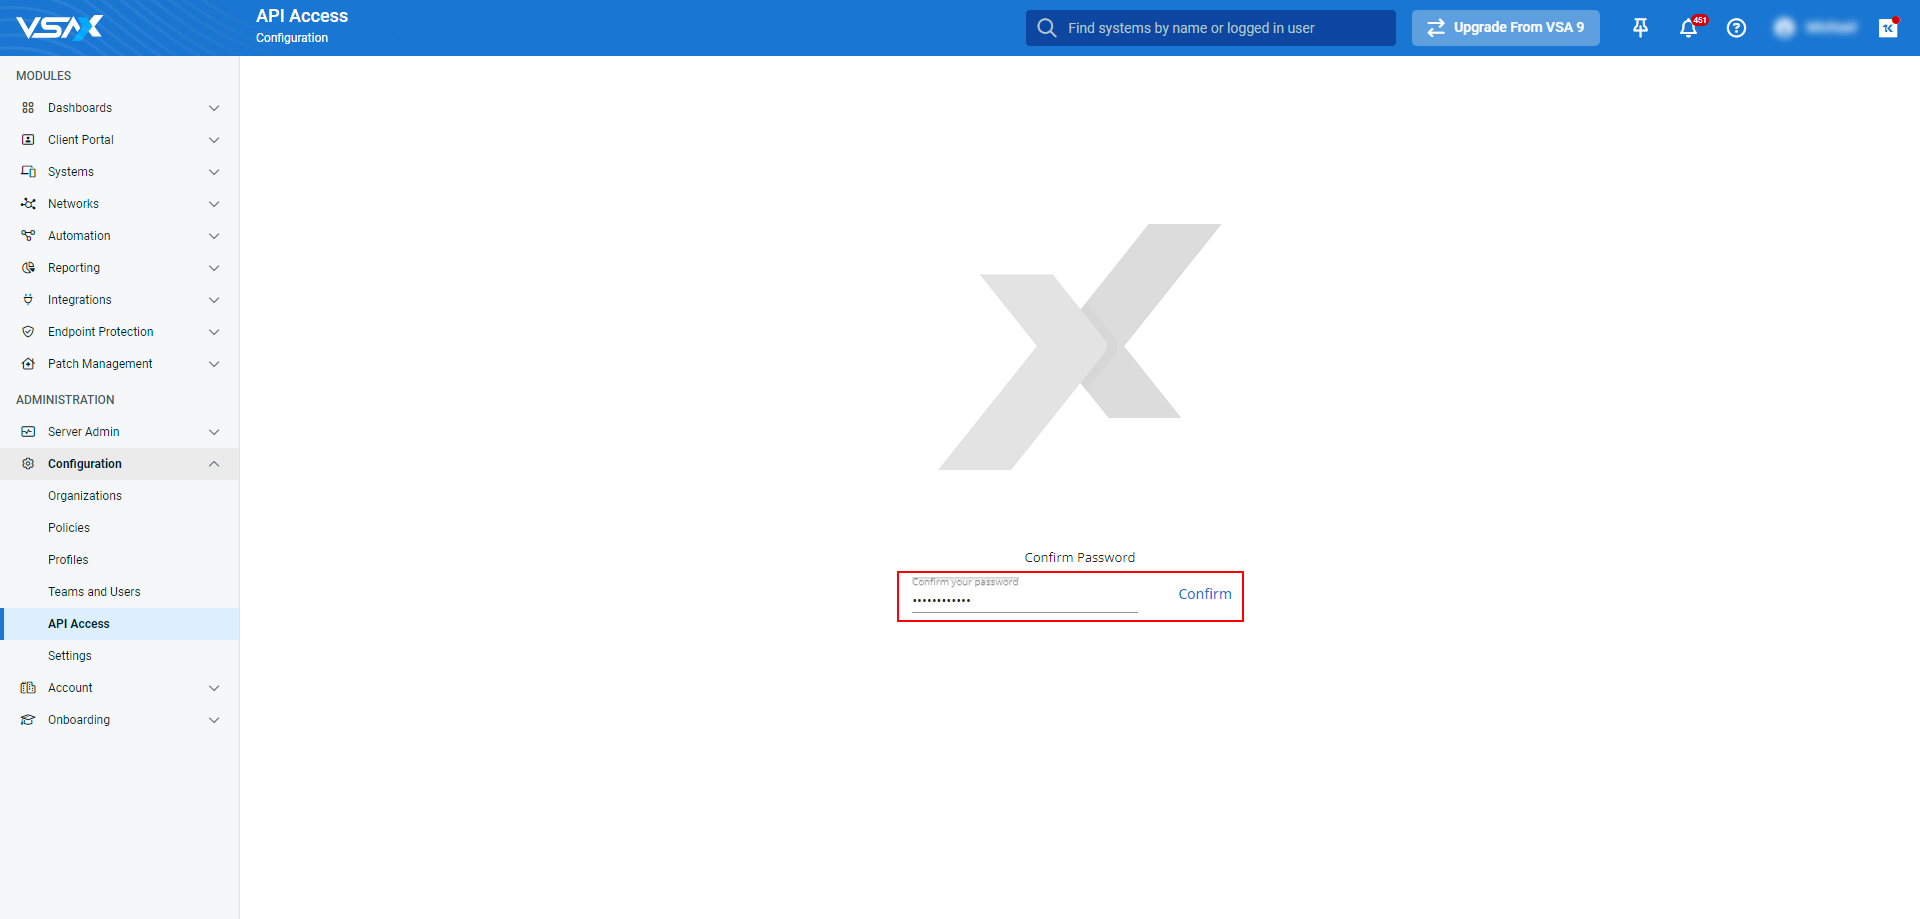
- In VSA 10, navigate to Administration > API Access.
- Input your password in the Confirm your password field, then, click Confirm.
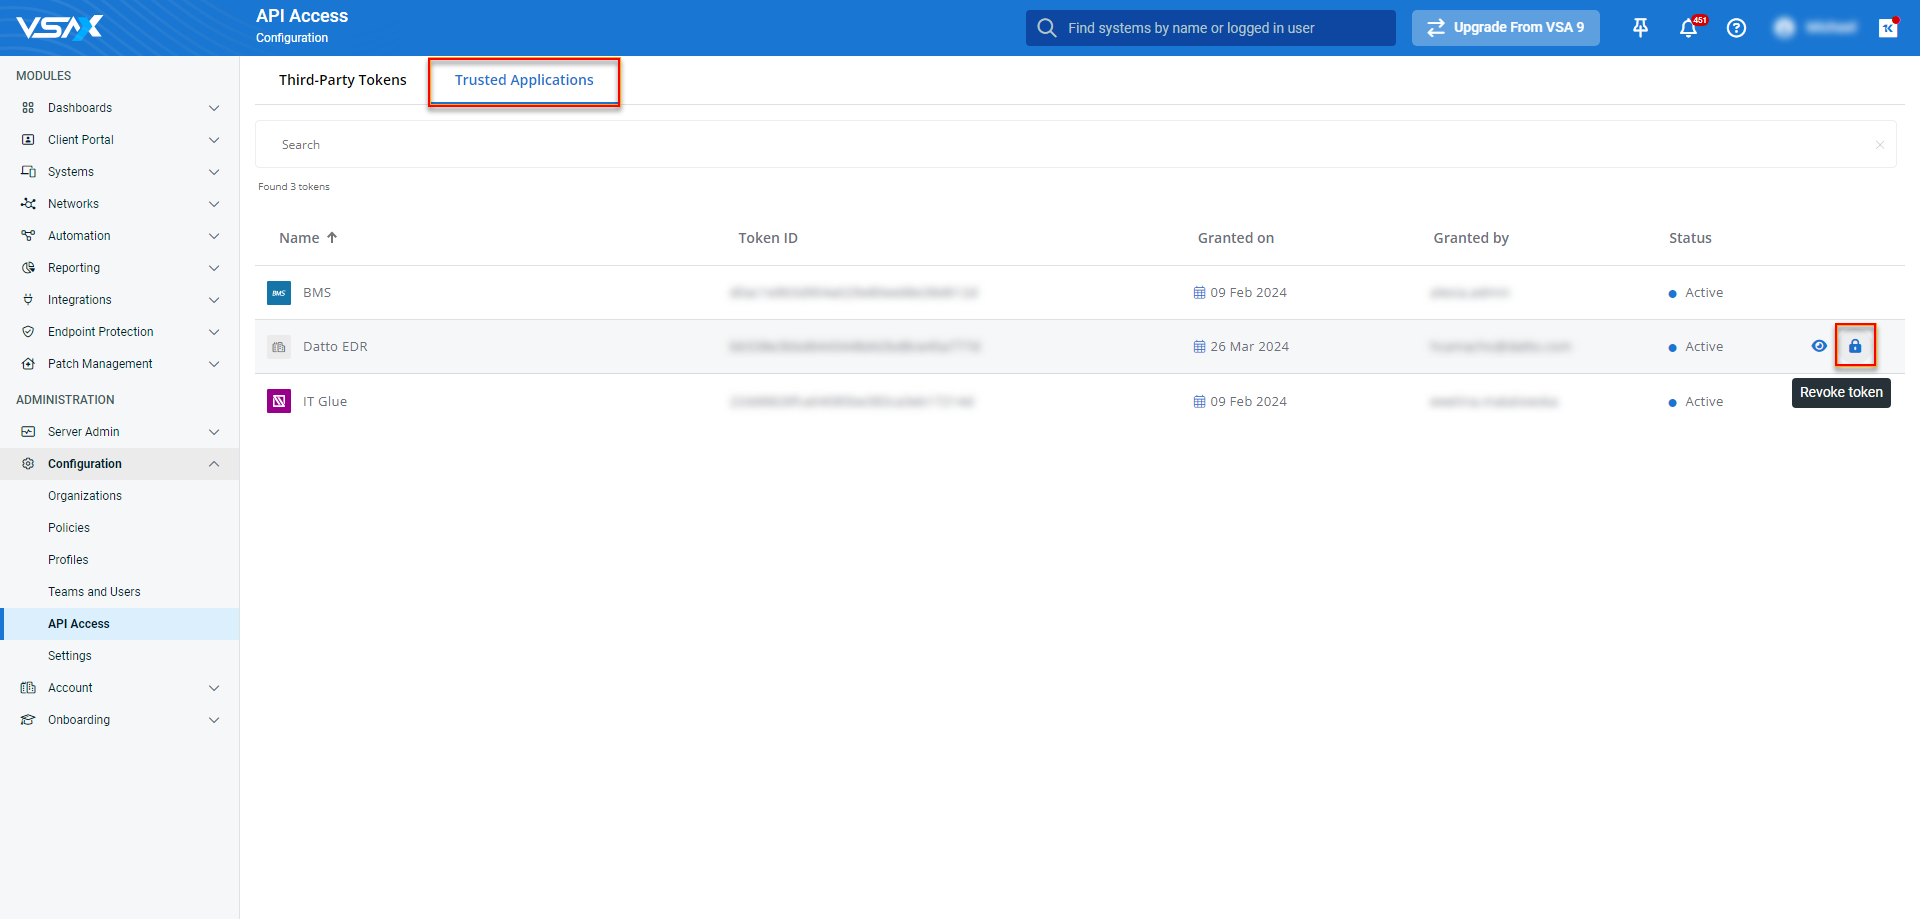
- On the API Access page, click Trusted Applications.
- Move your mouse over the Datto EDR entry in the application list. Then, click Revoke token.
- Acknowledge the Revoke Token warning by clicking Revoke.
NOTE Revoking the integration's permissions will prevent the application from being able to access authorized resources. This process cannot be undone.
-
The Datto EDR integration will be removed from the Trusted Applications list. To re-add it in the future, repeat the steps described in Datto EDR and Datto AV Integration.
When integrating Datto EDR with VSA 10, it is important to understand the flow of the data being synced and shared between the two.
The following guidelines will help you best understand and get the most out of the Datto EDR integration with VSA 10:
- Synchronization of organizations, locations, and devices is one-way, from VSA 10 to EDR.
- Locations synced from VSA 10 cannot be renamed or deleted from EDR.
- Locations and devices created in EDR will not automatically replicate to VSA 10.
- Only those devices with the Endpoint Security agent installed will sync from VSA 10.
- Devices cannot be moved between locations within EDR. You must do so in VSA 10.
- If you move a device to a new site in VSA 10, you must restart the endpoint after doing so for the new location to be reflected in EDR.
- When you remove an endpoint in VSA 10, you must uninstall the Endpoint Security agent from the host. If the Endpoint Security agent remains on the endpoint, it will repopulate the device in your EDR portal at the next check-in event.
- The EDR + VSA 10 integration does not automatically deduplicate or consolidate organizations, locations, or devices.
- If you create a location in EDR that does not exist in VSA 10, and that location is subsequently also created in VSA 10, a duplicate location will appear in EDR.
- If you install the Endpoint Security agent on an endpoint before installing the VSA 10 agent, the endpoint will not be automatically assigned to its corresponding VSA 10 location in Datto EDR until the host is rebooted.
If you plan on deploying Datto EDR and/or Datto AV without using the integration, you can follow the below instructions.
Using a workflow template, you can easily manage the deployment of Datto EDR and Datto AV agents on Windows machines. Complete the following steps:
- From the left navigation menu in VSA 10, navigate to Automation > Workflows.
- From the Actions drop-down menu in the upper-right corner of the Workflows page, click Create from Template.

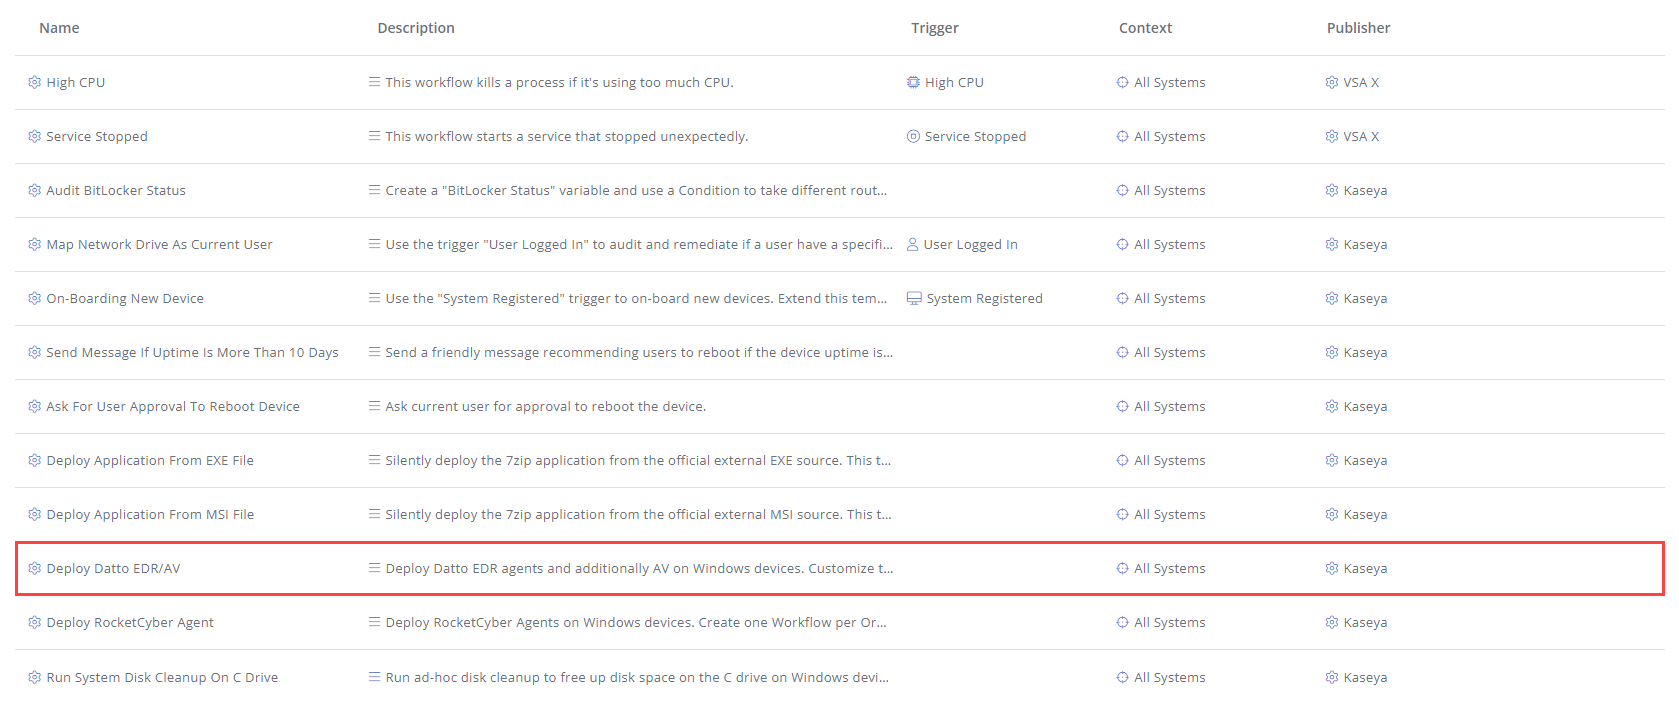
- In the list of workflow templates, click Deploy Datto EDR/AV.
- In the Status section, turn on the Active toggle to activate the workflow.
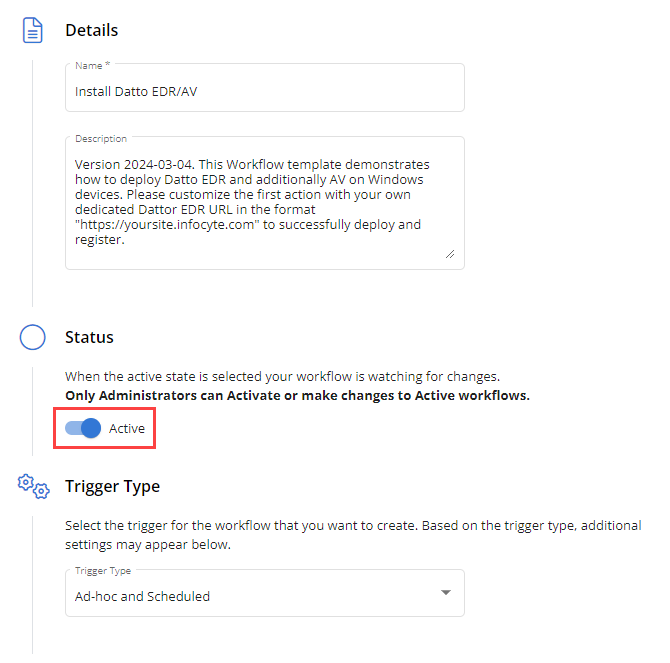
- Configure the remaining settings, including specifying the devices, organizations, and scopes the agents will be deployed to. For workflow configuration instructions, refer to Creating and editing a workflow in Workflows.
- Click Next to proceed to the workflow canvas.
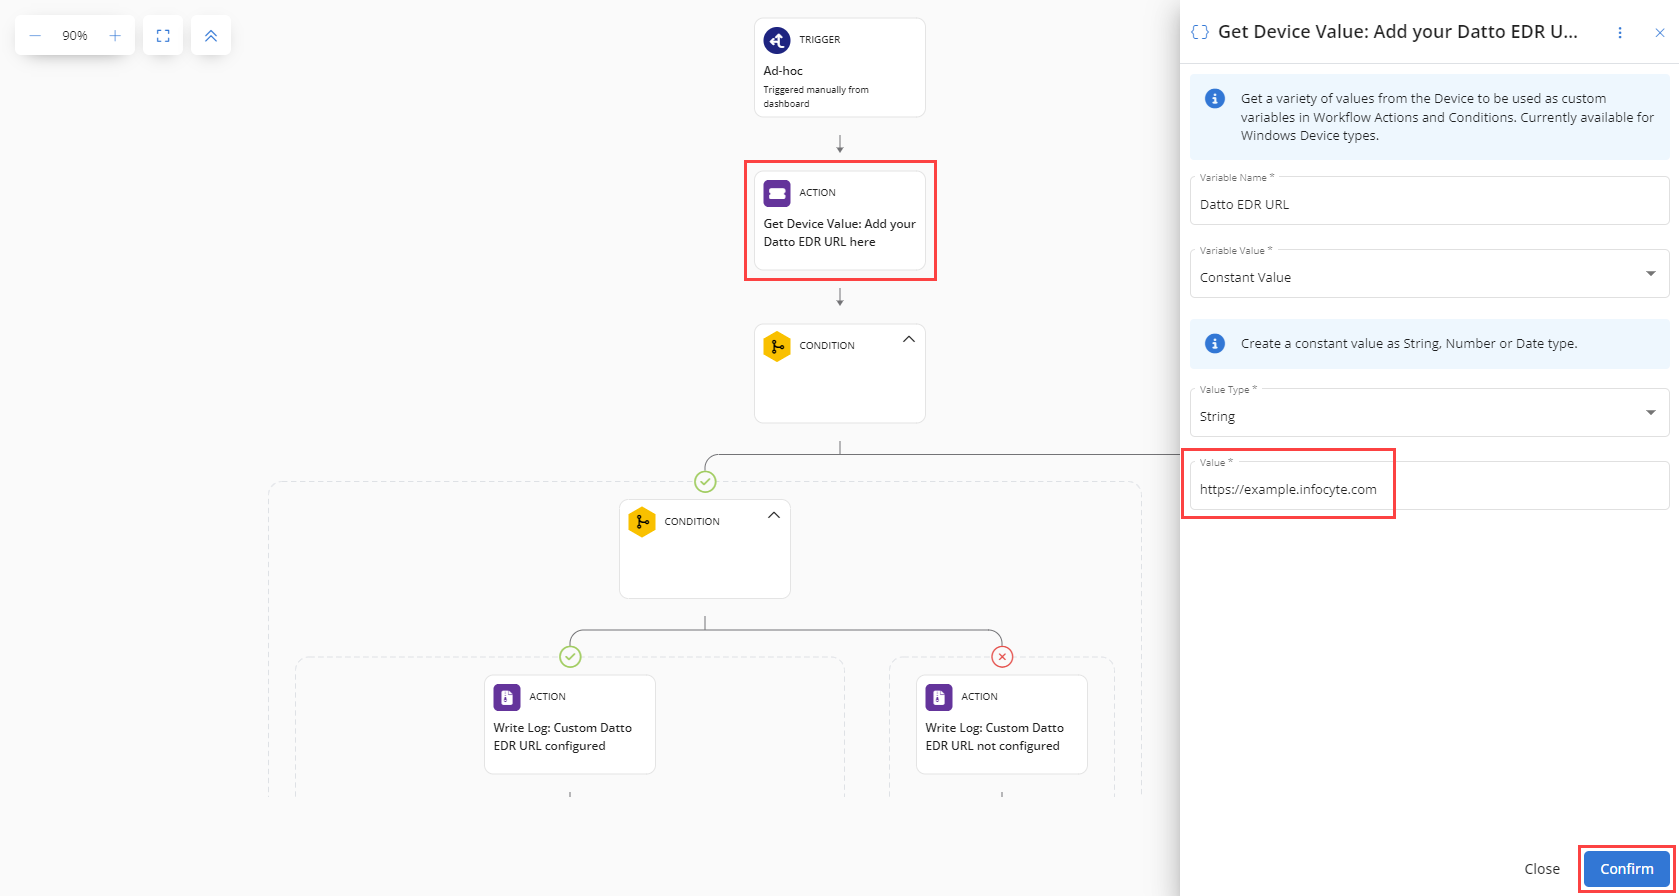
- Enter the URL of your Datto EDR instance as part of the first condition, and click Confirm.
