Single sign-on (SSO) integration using the OpenID Connect authentication protocol
NAVIGATION Administration > Configuration > Settings > OpenID Connect Login Settings
PERMISSIONS Administrator
You can now integrate VSA 10 with third-party identity providers (IdPs) using the OpenID Connect (OIDC) protocol. This allows users to log in to VSA 10 using established credentials from providers like Google and Microsoft.
IMPORTANT This feature is only available upon request. To inquire about enabling this feature, please reach out to your Account Manager.
NOTE Only one identity provider can be enrolled at a time.
NOTE Enabling login via OIDC will disable KaseyaOne SSO.
Configuring the OIDC connection
-
From the left navigation menu, navigate to Configuration > Settings > OpenID Connect Login Settings.
-
In the OpenID Connect Login Settings section, turn on the Active toggle.
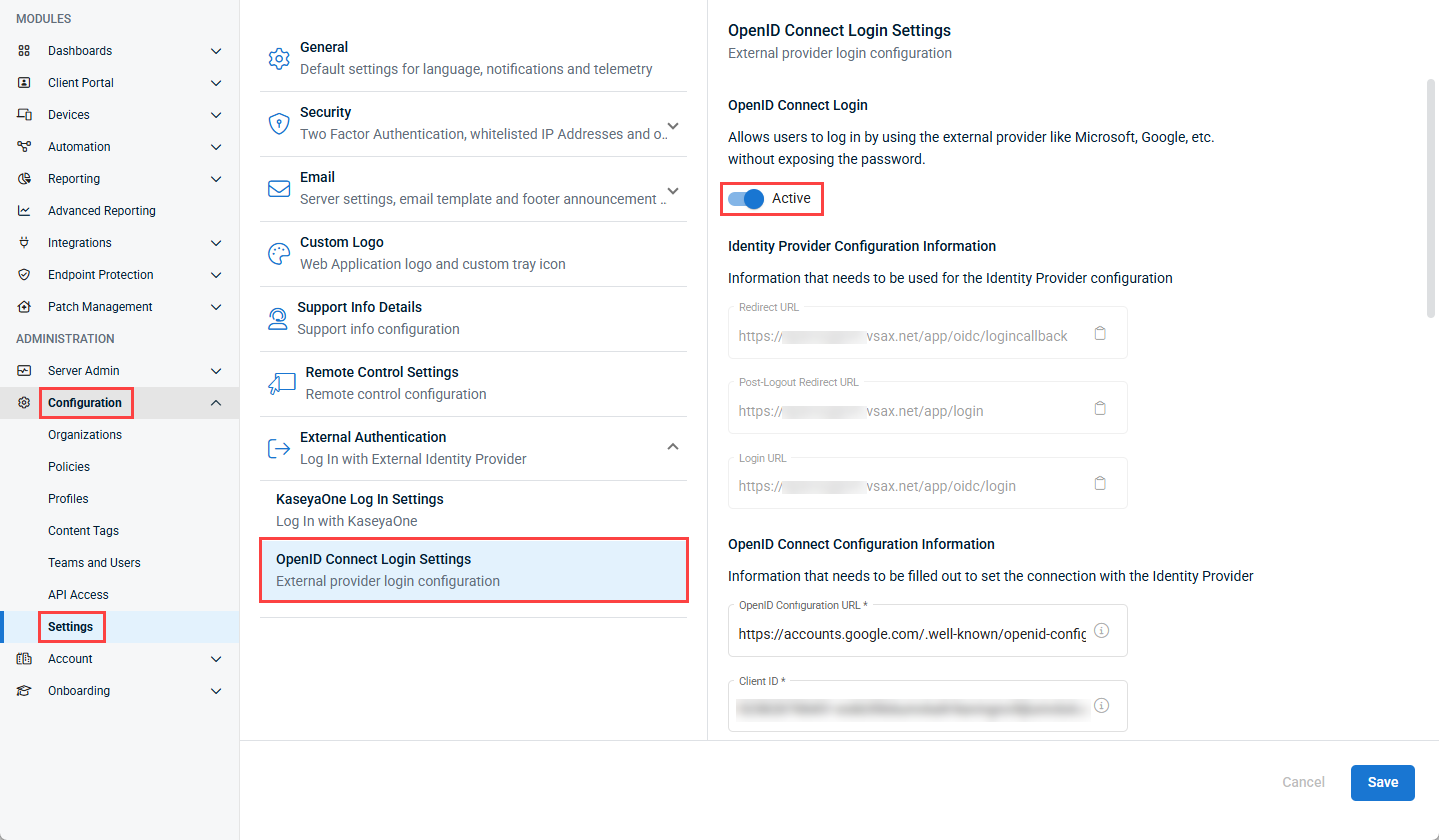
Turning on this toggle and configuring the other required settings enables the Log In with SSO button on the login page. This option allows users to securely log in to VSA 10 using an external provider, such as Google or Microsoft. To be fully enabled, the connection must be set up by configuring both the IdP and the integration within VSA 10.
To learn more about what needs to be configured for this integration to be functional, review the following configuration steps by clicking one of the below links or expanding the sections below:
- Required configurations:
- Optional configurations:
Once all required sections and any optional sections have been configured, click Save to immediately apply the OpenID Connect SSO settings.
You can review an example setup using Microsoft 365 in the Configuration example: Microsoft 365 section.
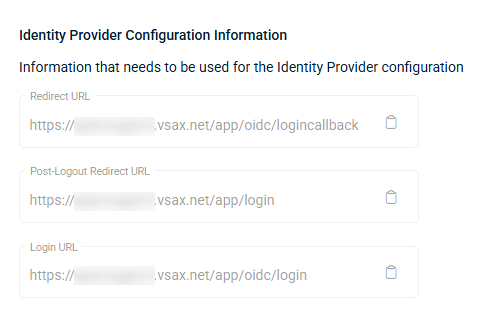
In the Identity Provider Configuration Information section, you will find the Redirect URL, the Post-Logout Redirect URL and the Login URL. These fields are not editable and are provided for you to copy and paste in the corresponding settings of your IdP (Google, Microsoft, and so forth).
- Redirect URL: This is the page where the authentication server sends the user once they have successfully authenticated through their identity provider.
- Post-Logout Redirect URL: This is the page where you want a user to land after logging out of VSA 10.
- Login URL: This link is an alternate login page that redirects users to log in via SSO, typically used as a redirect URL when configuring the IdP. Users can still log in using the default VSA 10 login URL.
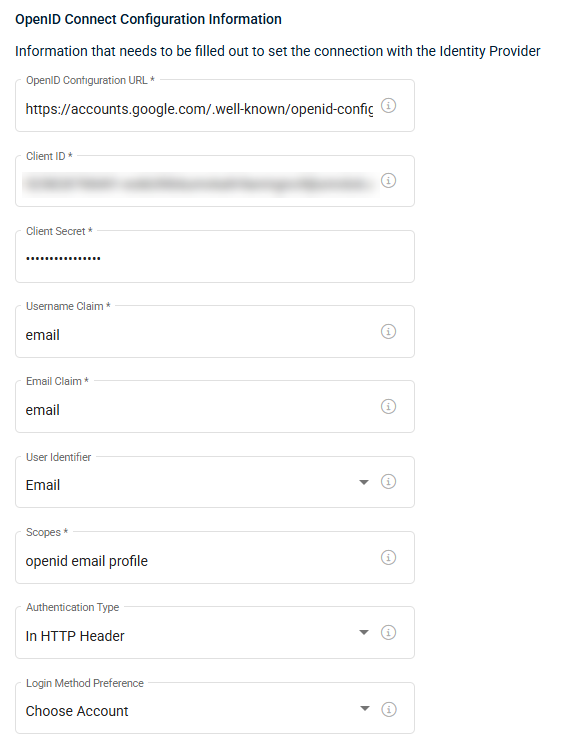
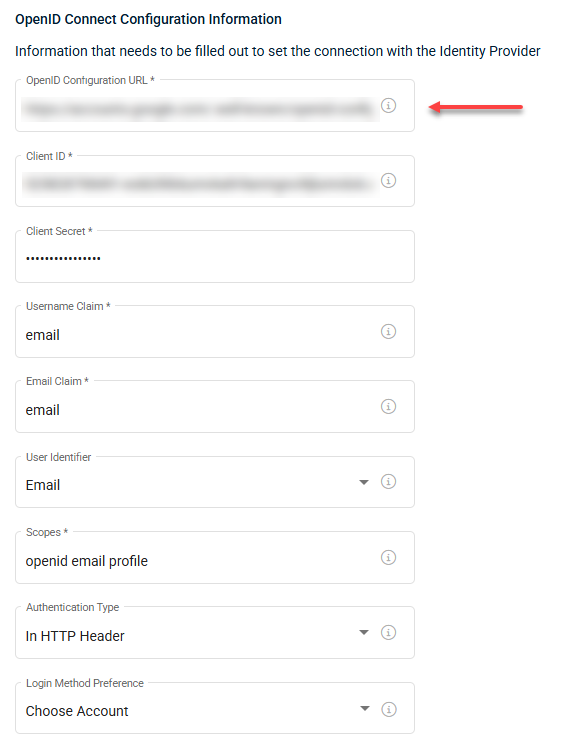
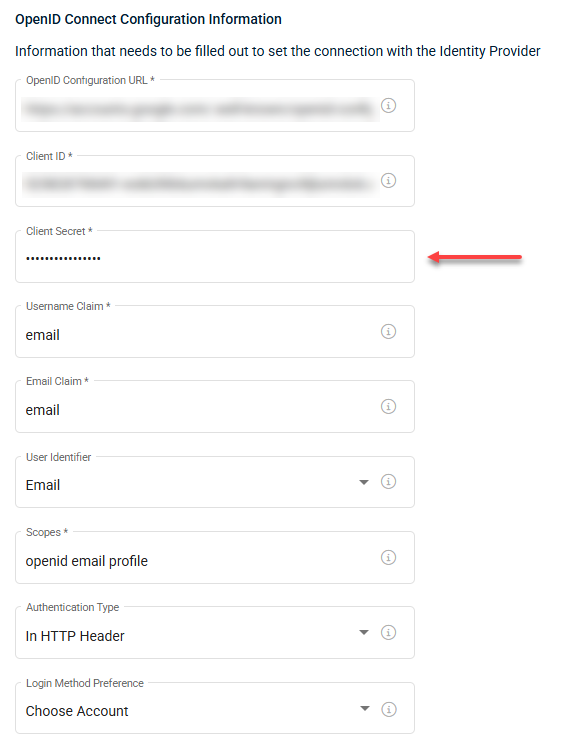
In the OpenID Connect Configuration Information section, you will configure the connection between VSA 10 and your OIDC IdP of choice (Google, Microsoft, and so forth) using the following fields:
- OpenID Configuration URL: Enter the URL provided by your identity provider to configure secure login. This URL allows the system to fetch the necessary details for authentication.
- Client ID: Enter the public identifier of the OpenID Connect application.
- Client Secret: Enter the private identifier of the OpenID Connect application. This field is hidden.
- Username Claim: VSA 10 will retrieve this value from the IdP to use as the username. Example: Entering the value email will establish the user’s email address as their username.
- Email Claim: VSA 10 will retrieve this value from the IdP to use as the email address. Typically, this field will be set to email.
- User Identifier: Identifier in the form of a claim that will be used by VSA 10 to match a local account for the authenticated user. Choose between Email or Username.
- Scopes: Scopes are required by the OpenID Connect provider to retrieve information about the authenticated user. Refer to your OpenID Connect provider documentation for more information about which scopes to use.
- Authentication Type: This value specifies how the endpoint wants the Client ID and Client Secret sent. Choose between In HTTP Header and In Request Parameters. Refer to Authentication type best practices for more information.
- Login Method Preference: This option configures what happens when a user accesses the Login URL provided in the Identity Provider Configuration Information section. and they already have an active session. The following options are available in the drop-down:
- Choose Account: Allows the user to choose an account to log in with, even if already logged in.
- Force Login: Requires the user to re-enter their credentials, even if already logged in.
- Silent Login: Automatically logs in if the user has an active session, without showing any prompts
In the optional Enforce SSO section, you can choose to enforce SSO authentication when users log in to VSA 10.
NOTE This setting can only be enabled by an administrator logged in via SSO.
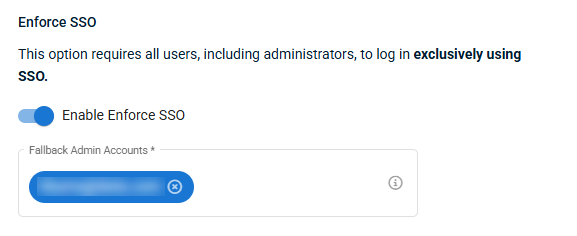
When this setting is enabled, you must select one or more VSA 10 administrator users in the Fallback Admin Accounts section. Any administrators you add to this section will be able to bypass SSO settings, and log in to VSA 10 with their VSA 10 username and password. This is to allow redundant access for administrators so they can change SSO settings if SSO authentication is unavailable.
In the optional Team Mapping section, you can choose to enable the mapping of VSA 10 teams to third party IdP groups. This configures which team a user accessing VSA 10 through SSO is assigned to, based on their group assignment in the third party IdP (Google, Microsoft, and so forth). When a user logs in for the first time via SSO, they are assigned team access in VSA 10 based on their group access. Users that already exist in VSA 10 will not be affected.
NOTE This setting can only be enabled by an administrator logged in via SSO.

When this setting is enabled, you will need to configure the below areas:
- Claim Name: This is the entity from the IdP that VSA 10 will map to teams. By default, this is set to groups. Refer to your IdP's documentation for which entity to use.
- Team Mapping: This is where you will configure what access users in your IdP will get to VSA 10 when they log in to VSA 10 via SSO for the first time.
- Click Edit Teams to choose which IdP groups are mapped to teams in VSA 10.
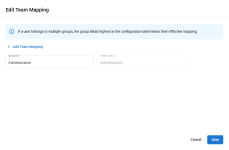
NOTE You can map multiple IdP groups to one VSA 10 team, but you can only map one VSA 10 team to an IdP group.
- Click Edit Teams to choose which IdP groups are mapped to teams in VSA 10.

The below steps go through a typical setup that enables SSO into VSA 10 via Microsoft 365.
Enabling the integration in VSA 10
- From the left navigation menu, navigate to Configuration > Settings > OpenID Connect Login Settings.
- In the OpenID Connect Login Settings section, enable the Active toggle.
Add VSA 10 to your Microsoft Entra Applications
Before you can generate the necessary tokens and URLS needed to log into VSA 10 using Open ID Connect via Microsoft 365, you’ll need to add the application to the list of Microsoft Entra applications.
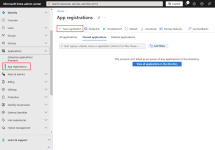
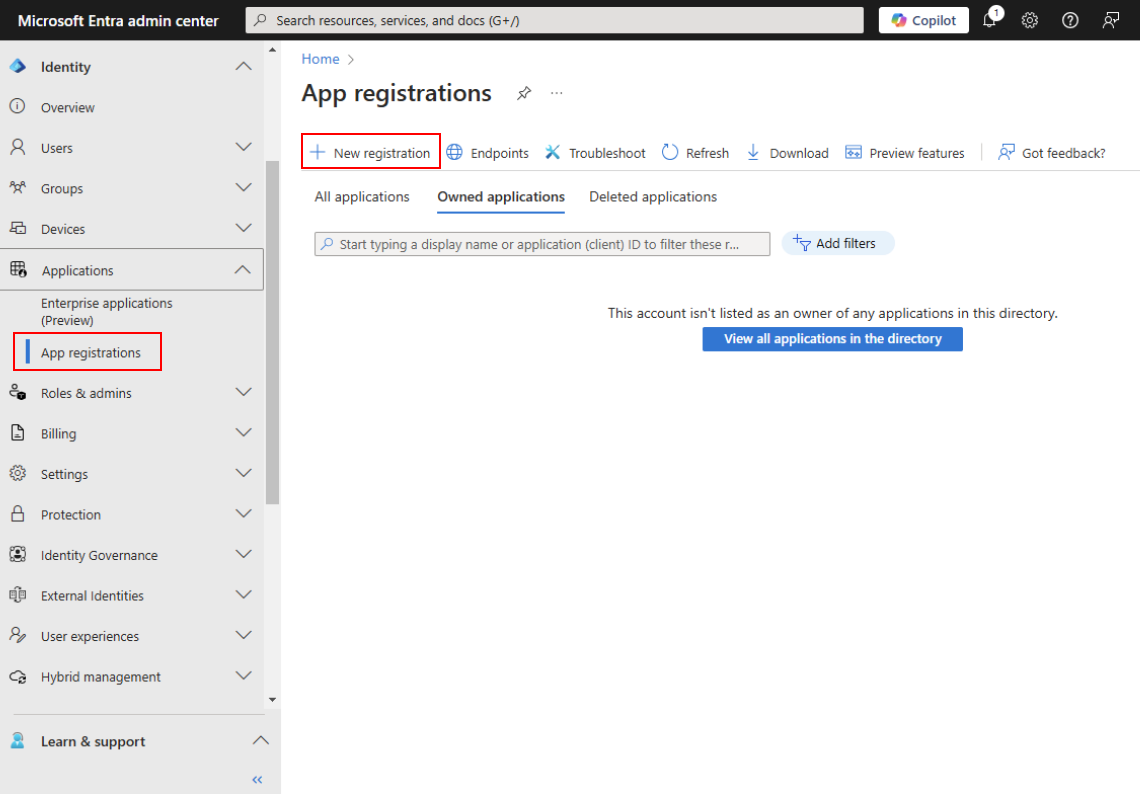
- Sign in to the Microsoft Entra admin center.
- Go to Applications > App registrations.
- Click New registration.
-
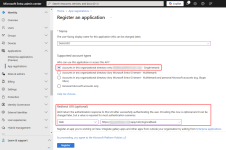
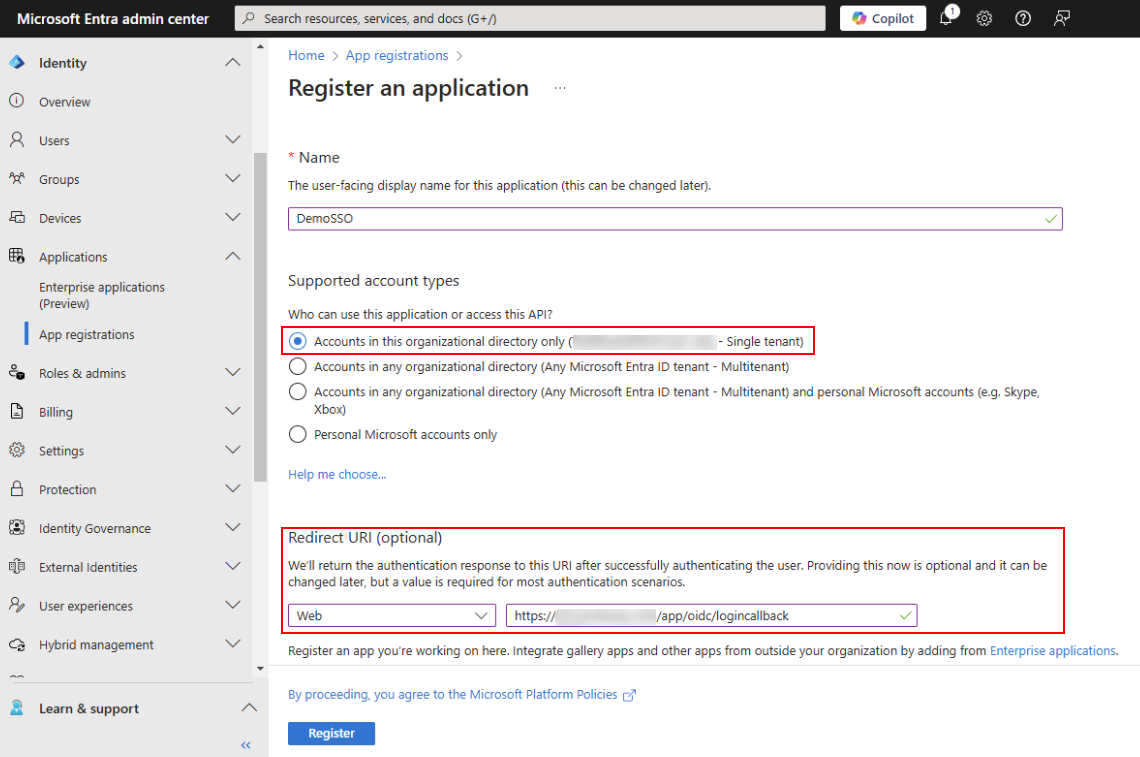
Give the app registration a name such as "VSA10_SSO", and make sure to fill in the Redirect URI with the Redirect URL from the OpenID Connect Login Settings page in your VSA 10 account.
-
Click Register to complete the app registration.
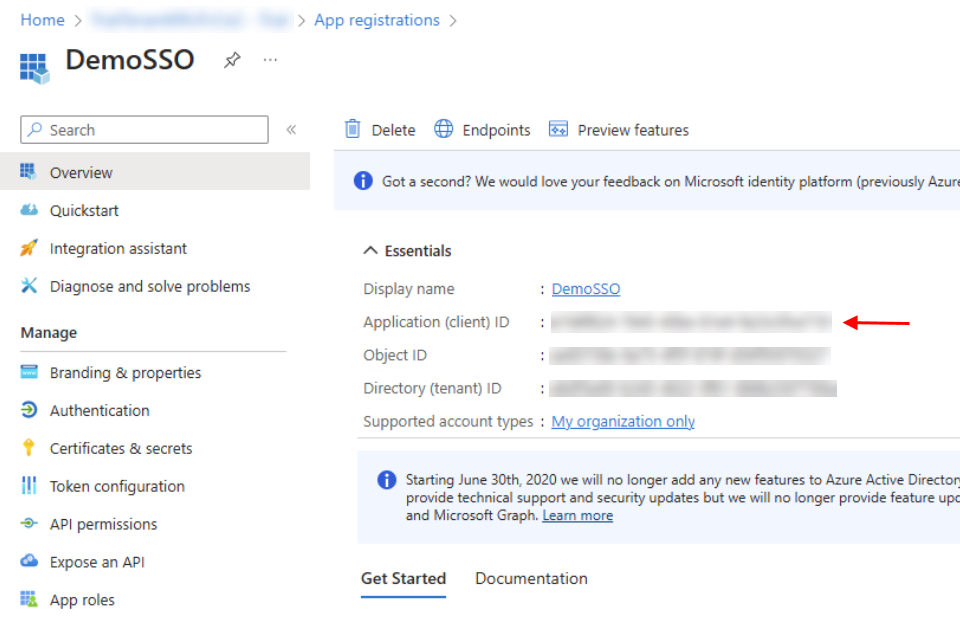
After you add or create a Microsoft Entra application, you can return to the Microsoft Entra applications tab and select the application name to review settings for the application, including the Tenant ID, Client ID, Reply URL, and App ID URI.
Find and configure the OpenID Configuration URL
To find the OIDC configuration URL in the Microsoft Entra admin center, sign in to the Microsoft Entra admin center and then:
- Browse to Identity > Applications > App registrations and select the application you created for VSA 10 SSO.
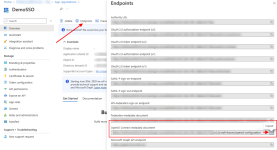
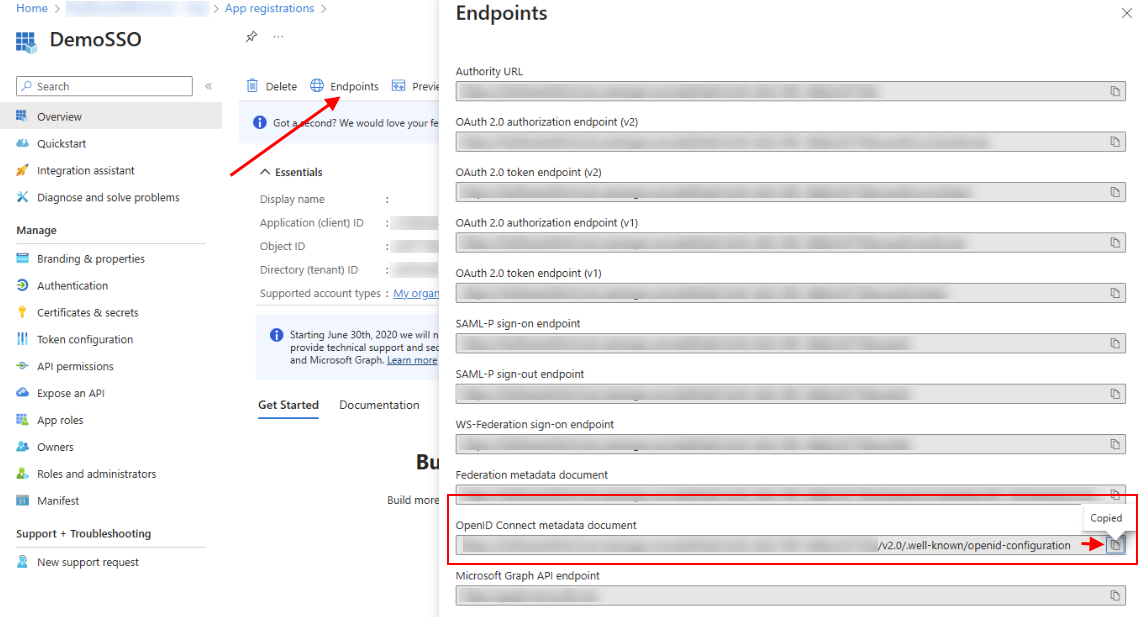
- Under Manage > Overview, click Endpoints.
- Locate and copy the URI under OpenID Connect metadata document.
-
Enter the copied OpenID Connect metadata document URL into the OpenID Configuration URL field in the OpenID Connect Login Settings.
Find and configure the Client ID
To find the VSA 10 application ClientID in the Microsoft Entra admin center, sign in to the Microsoft Entra admin center and then:
-
Browse to Identity > Applications > App registrations and select the application you created for VSA 10 SSO.
-
Under Manage > Overview, copy the Application (client) ID.

-
Enter the copied Application ID into the Client ID field in the OpenID Connect Login Settings.
Find and configure the Client Secret
To find the VSA 10 application client secret in the Microsoft Entra admin center, sign in to the Microsoft Entra admin center and then:
-
Browse to Identity > Applications > App registrations and select the application you created for VSA 10 SSO.
-
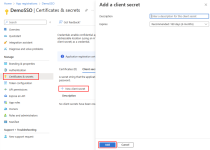
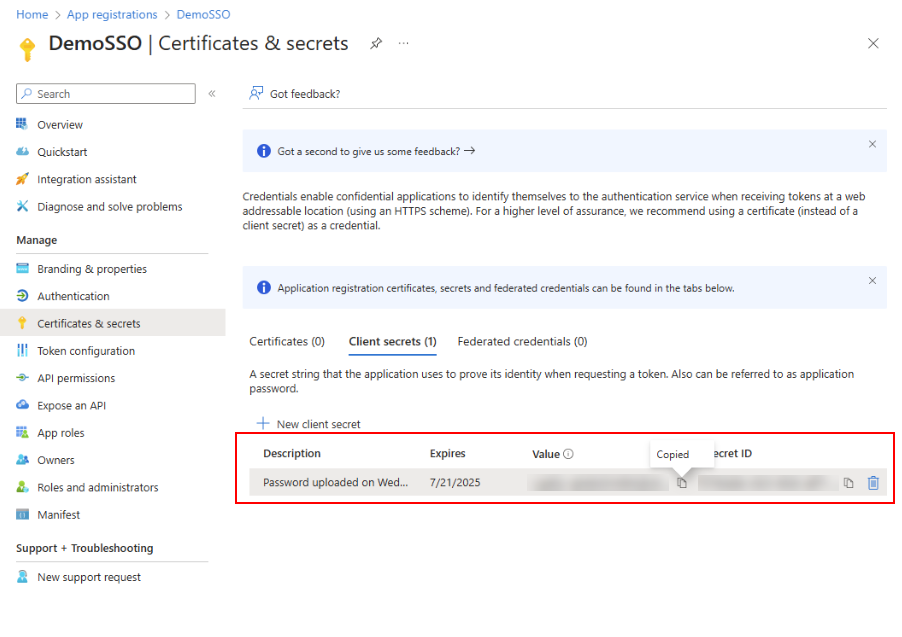
Under Manage > Certificates & secrets, click New client secret, enter a description and expiration date, then click Add.
-
Copy the Value from the newly generated client secret.
-
Enter the copied client secret value into the Client Secret field in the OpenID Connect Login Settings.

Once all required fields have been properly configured, click Save to save your configuration.
In OpenID Connect (OIDC), the standard supports sending the Client ID and Client Secret primarily in the HTTP headers using basic authentication. This method is preferred and aligns with best practices for securing these credentials.
- HTTP Header (preferred method)
- Basic authentication: The Client ID and Client Secret are concatenated with a colon (:) and then base64-encoded. The resulting string is sent in the Authorization header of the HTTP request:
- Authorization: Basic base64(ClientID:ClientSecret)
- Request Parameters (deprecated method)
- While OIDC also allows the Client ID and Client Secret to be sent as parameters in the request body (especially for POST requests), this method is less secure and is generally discouraged:
- client_id=your_client_id&client_secret=your_client_secret
The use of HTTP headers is recommended because it prevents sensitive credentials from appearing in URL-encoded logs or being easily captured in network traces.
Best practice
It is recommended to use HTTP headers (basic authentication) to transmit the Client ID and Client Secret securely in OIDC requests. This is done in the integration by selecting the In HTTP Header authentication type.


