ConnectWise Integration
NAVIGATION Modules > Integrations > ConnectWise
PERMISSIONS PSA > Read-only access to all PSA Integration pages
PERMISSIONS PSA > Full access to all PSA Integration pages
Overview
VSA 10's integration with the ConnectWise Manage ticketing platform enables you to create tickets in your ConnectWise Service Desk board based on the notifications that are triggered by your monitored devices.
This article describes the steps to set up the integration.
NOTE You can only have one PSA integration active in VSA 10 at the same time.
Features
- Automated ticket creation: Tickets will be automatically generated in the ConnectWise when VSA 10 device notifications are triggered, such as monitoring alerts. These tickets will include all relevant system details and direct links to the device in VSA 10.
- Priority mapping: As part of ticket mapping, tickets created in ConnectWise via the integration will have their priority set based on the VSA 10 notification priority. This mapping needs to be configured as part of the integration setup. Refer to Configure the integration in VSA 10.
- Automated device mapping: Automatically match devices to ConnectWise configurations based on device name and/or serial number.
Limitations
- One-way sync: VSA 10 pushes information to ConnectWise, but does not receive any data from Connectwise.
- No asset sync: Existing devices in VSA 10 are not automatically created in ConnectWise as assets. Devices that exist in both systems, however, can be mapped together.
- No two-way ticket sync: Tickets created from VSA 10 notifications will not resolve the corresponding notification in VSA 10 when closed. Likewise, resolving VSA 10 notifications does not close the corresponding ticket in ConnectWise.
How to...
Before ConnectWise and VSA 10 can communicate, you'll need to create an API user in ConnectWise. To do so, perform the following steps:
- In ConnectWise Manage, navigate to System > Members.
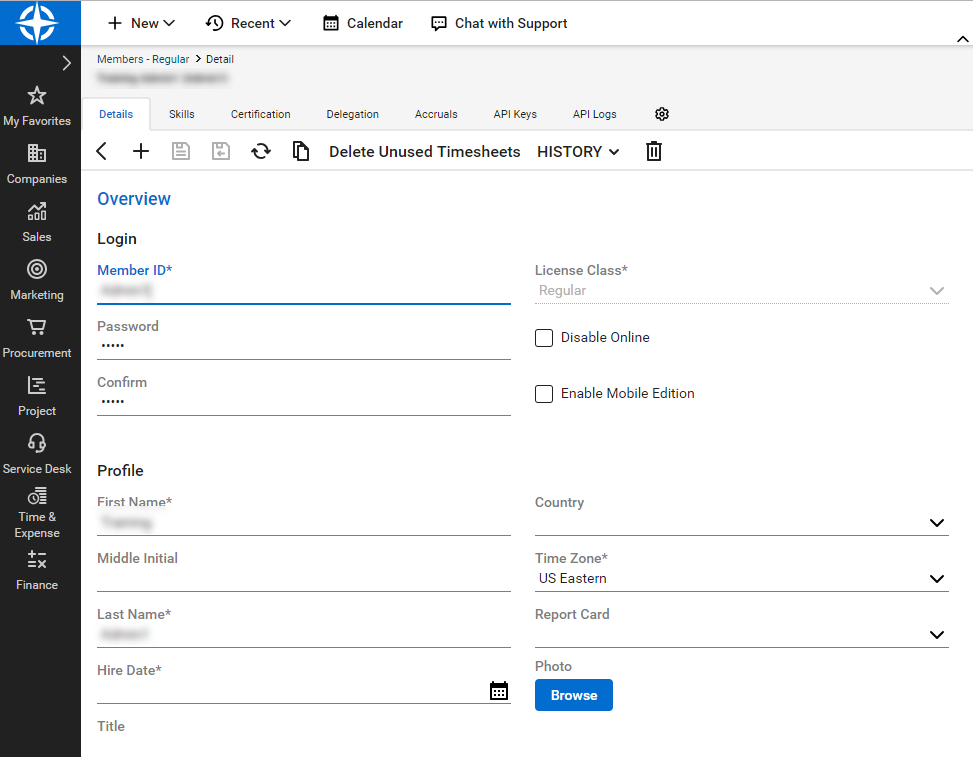
- Click New and select the option to create a Regular member.
- The member creation screen will appear. Complete all required details.
- Save your changes.
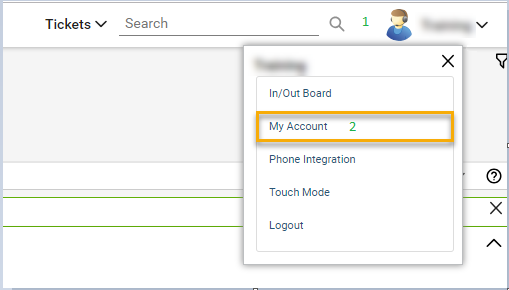
- Next, in the top navigation menu, click your profile name and click My Account.
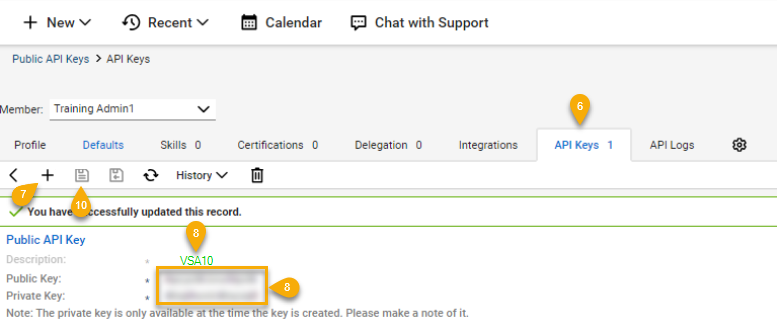
- Click API Keys. Refer to the below image for all numbered steps.
- Click the
 icon to create a new API key.
 - In the Description field, enter a name that clearly conveys this API key's purpose.
- Make a note of your Public Key and Private Key values. You won't be able to view the private key again after you complete the creation process.
- Click the Save icon. Then, proceed to the next section of this article.
Next, you'll set up the integration in VSA 10 with the API user details you created in the previous section of this article by performing the following steps.
NOTE If you are using a technician account in VSA 10 that is not an administrator and you need to configure the ConnectWise Manage integration, you will need to first create an API key in ConnectWise Manage and then set up the integration in VSA 10 with the new key.
- From the left navigation menu in VSA 10, navigate to Integrations > ConnectWise.
- The ConnectWise configuration page will load.
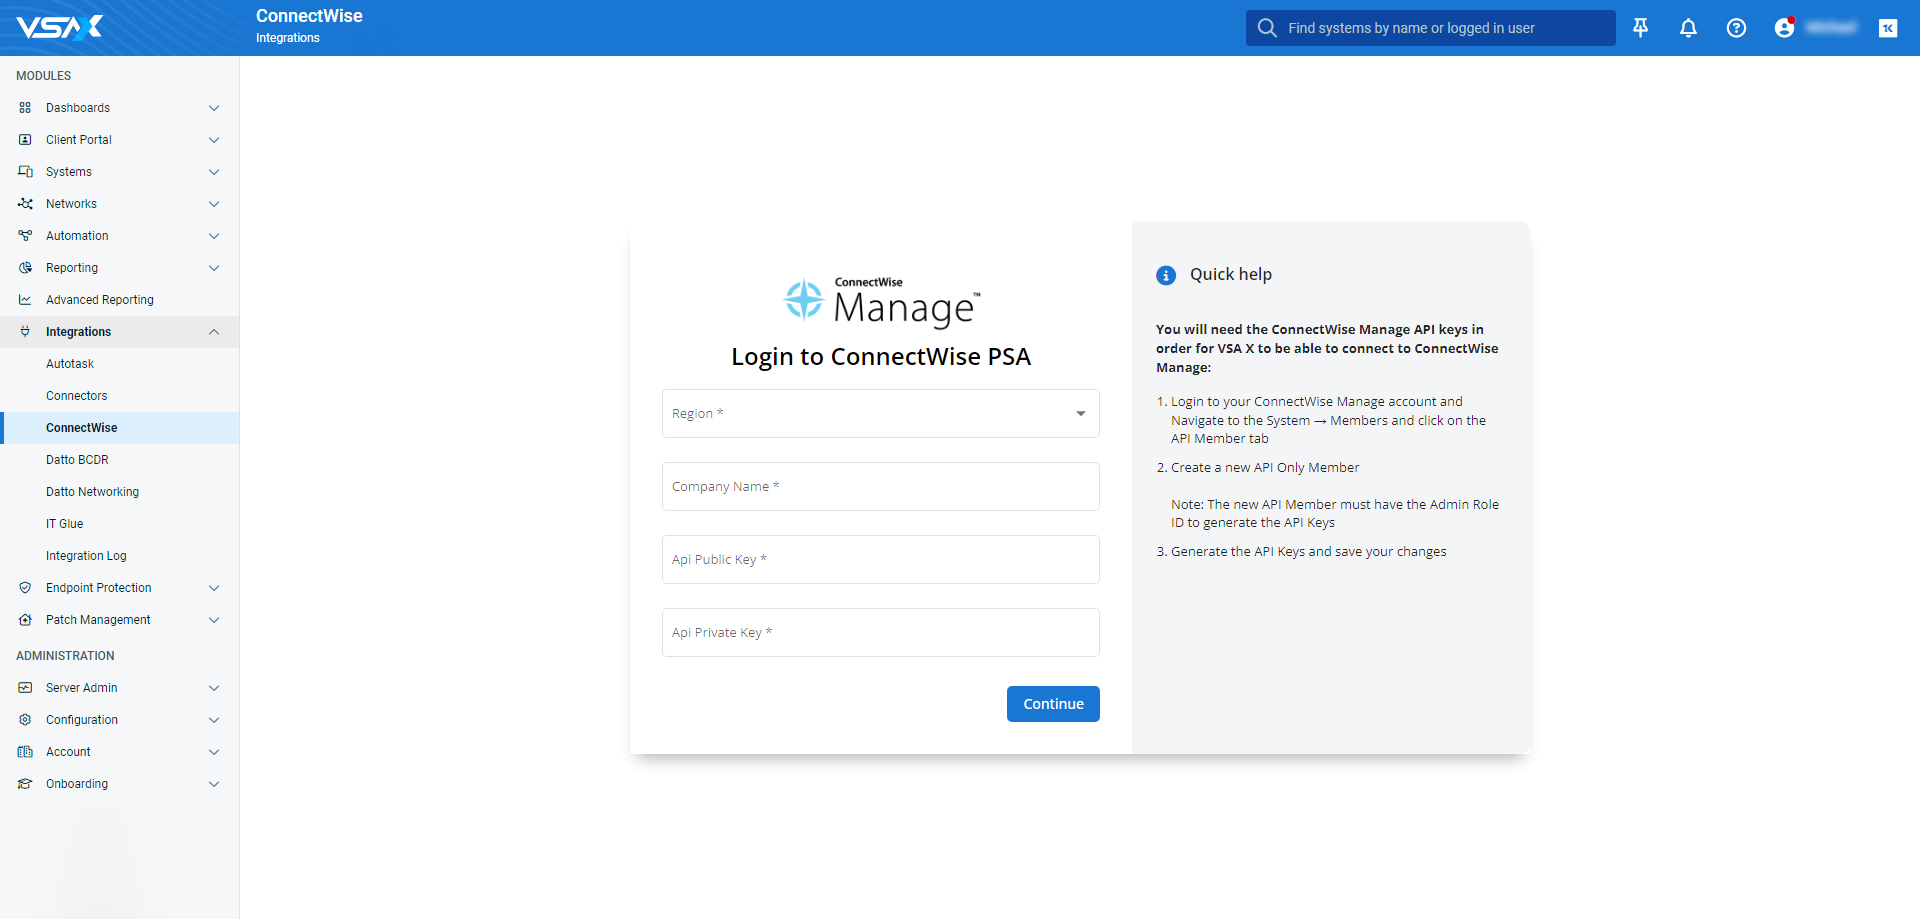
- Select your ConnectWise hosting region from the Region drop-down menu.
- Complete the Company Name, Api Public Key, and API Private Key fields.
- Click Continue to continue to the ConnectWise integration configuration Settings page.
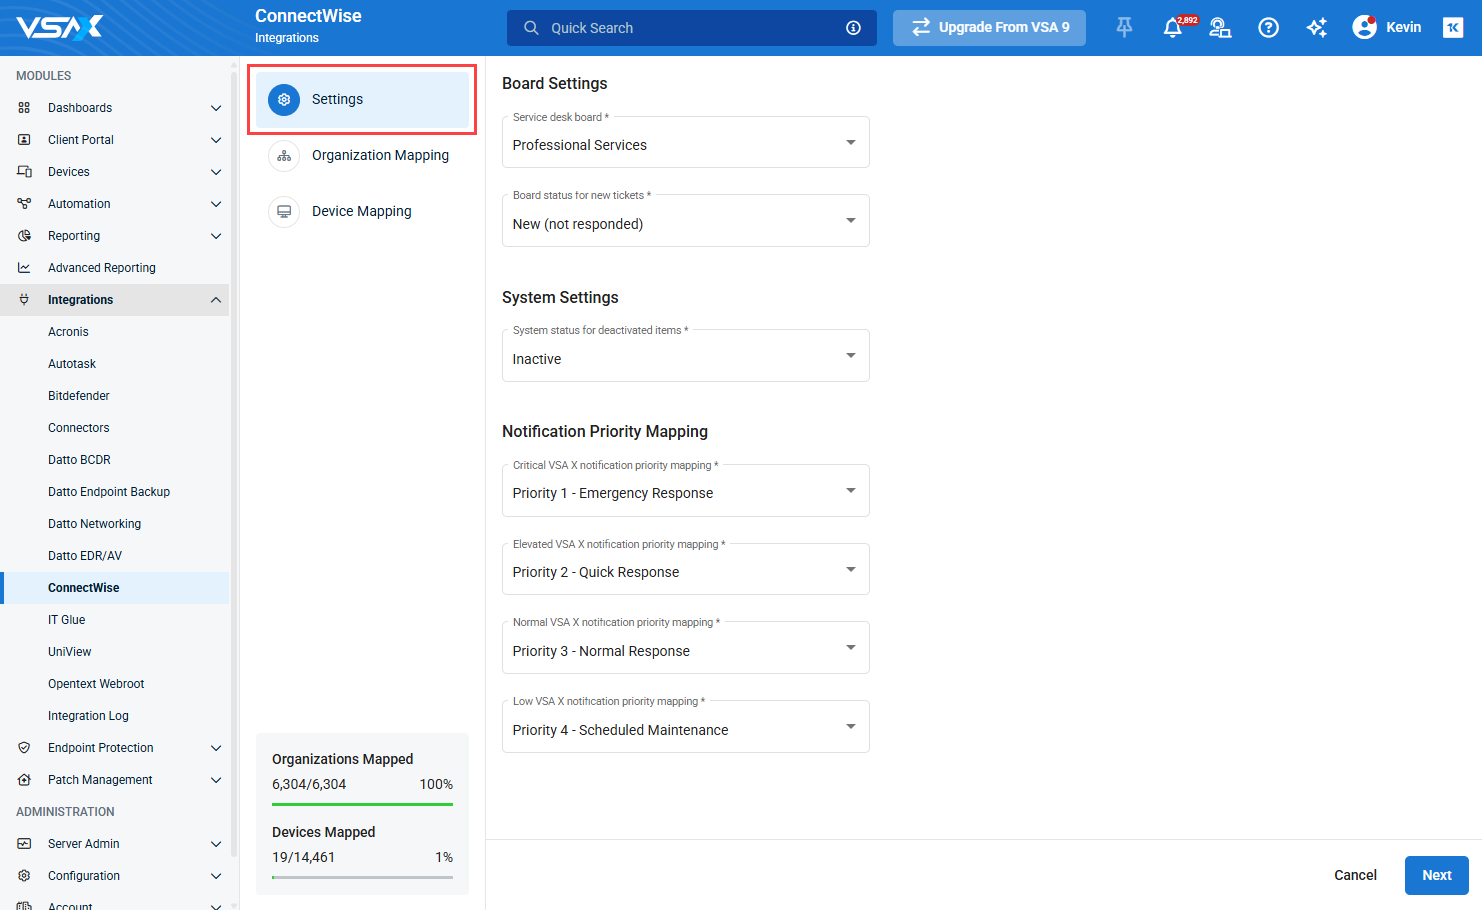
- In Board Settings, configure the Service desk board and the Board status for new tickets. New tickets created by VSA 10 will be created in the selected board with the selected status.
- Next, configure the System status for deactivated items. Devices deleted from VSA 10 will remain as configurations within ConnectWise, but their status will change to what you select.
- In the Notification Priority Mapping section, map your VSA 10 notification priorities to the relevant ConnectWise ticket priorities. This sets the priority of the tickets created in ConnectWise based on the priority of the notification raised in VSA 10.
- When finished, click Next at the bottom of the page to save your settings and open the Organization Mapping section.
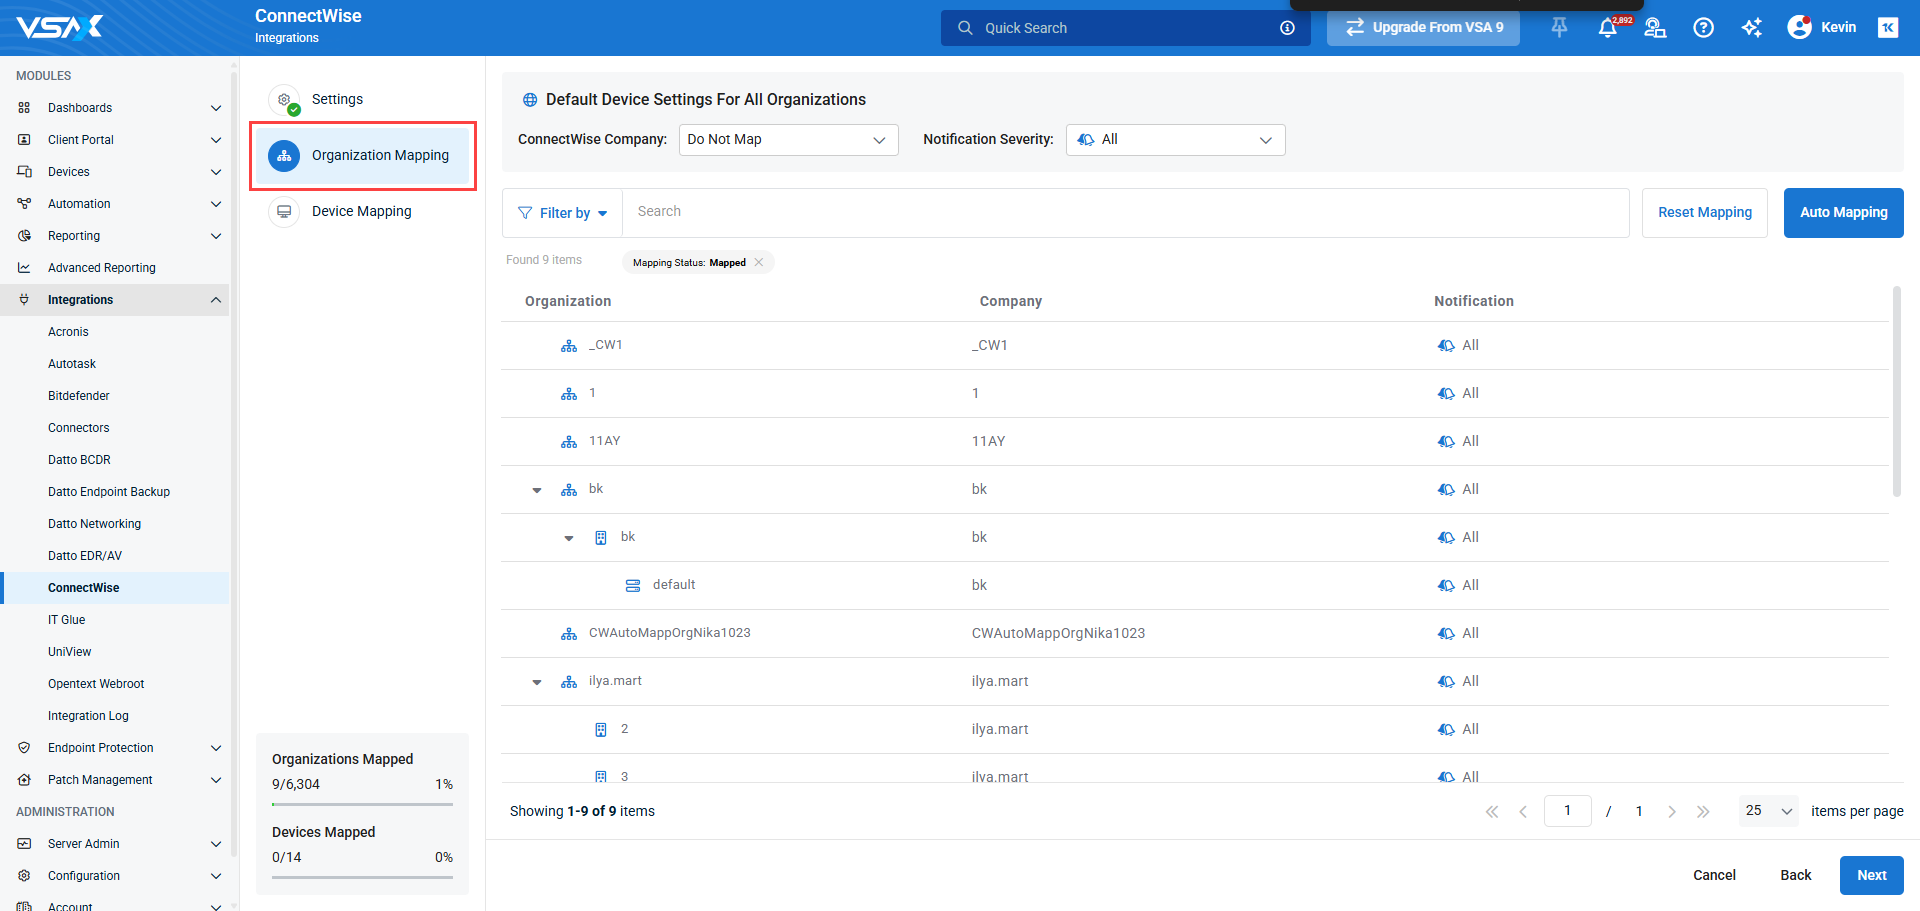
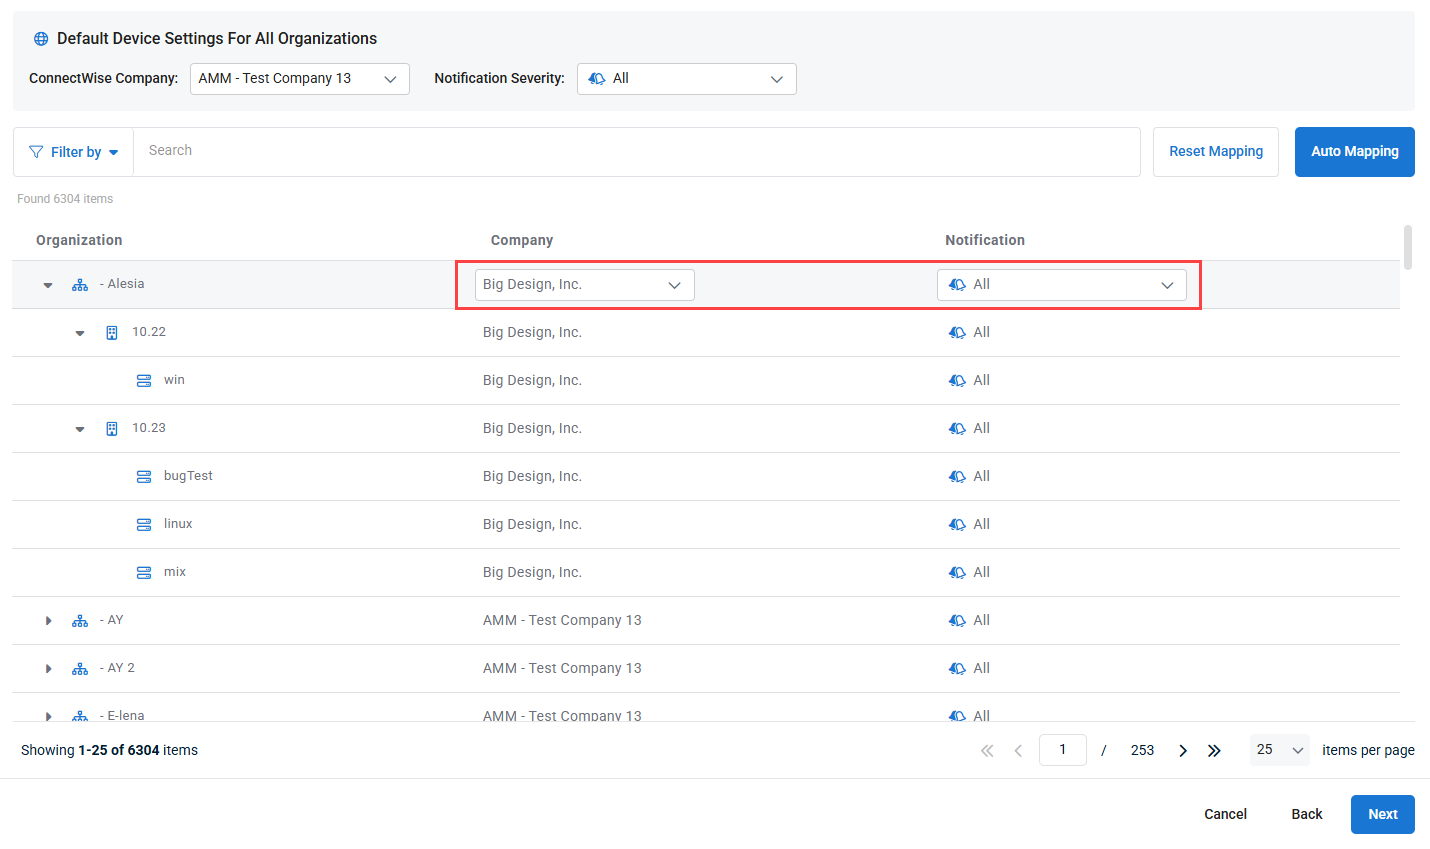
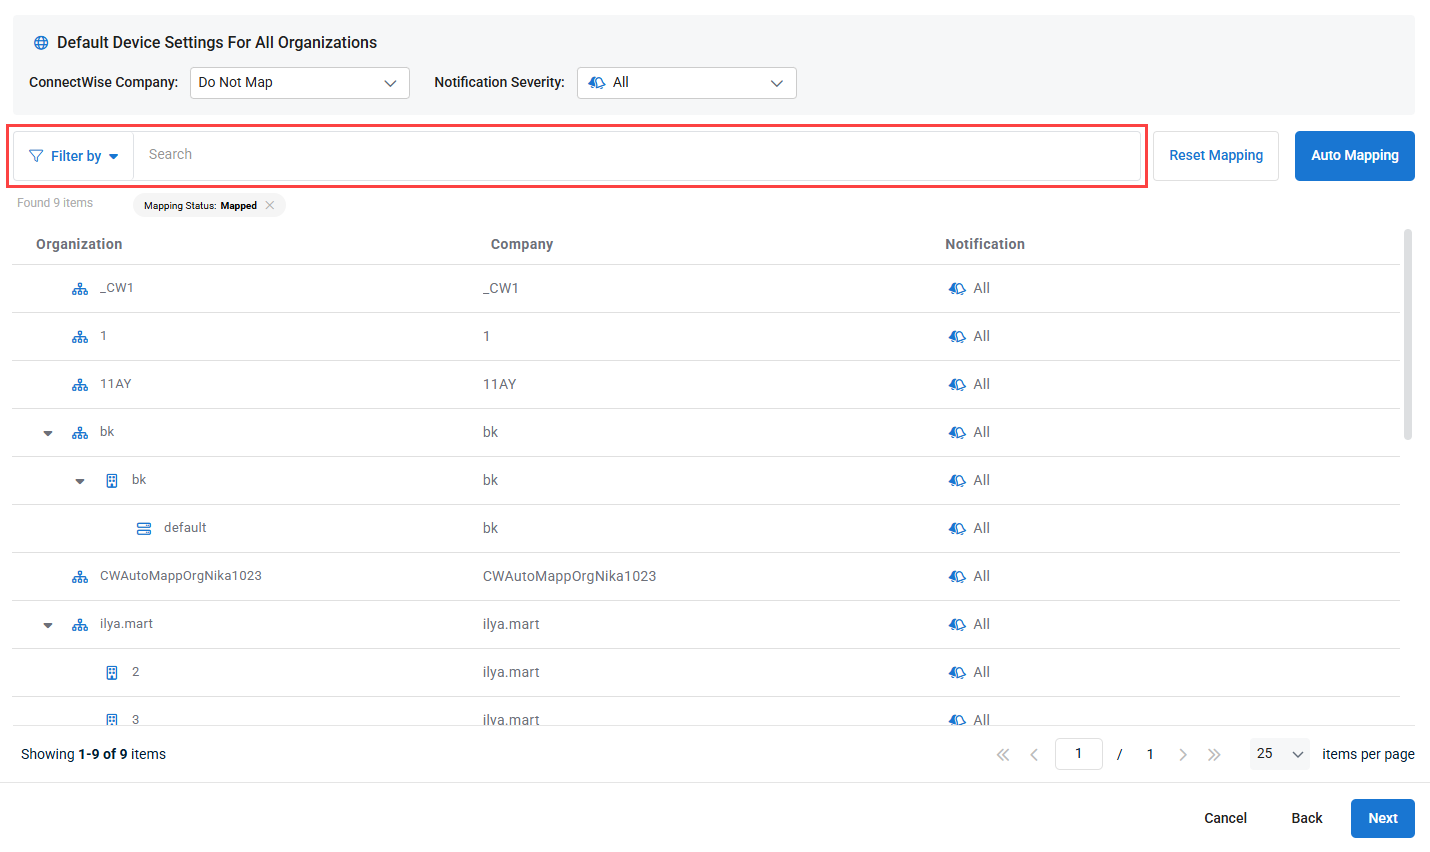
- In the Organization Mapping section, first configure the Default Device Settings For All Organizations to select the default ConnectWise company mapping and notification severity. By default, these settings will apply to all organizations and their children sites and groups.

- To override the default settings per organization, site, or agent group, you can use the drop-down in the Company and Notification columns to manually configure these mappings. For any organizations you don't want mapped to ConnectWise, select the Do Not Map option. These settings will be inherited by all child items in the context.
 `
` - To expedite organization mapping, you can click the Auto Mapping button. This will attempt to automatically map your VSA 10 organizations with ConnectWise companies based on name similarity. If using this option, you will be able to review and revise the mappings before applying them.
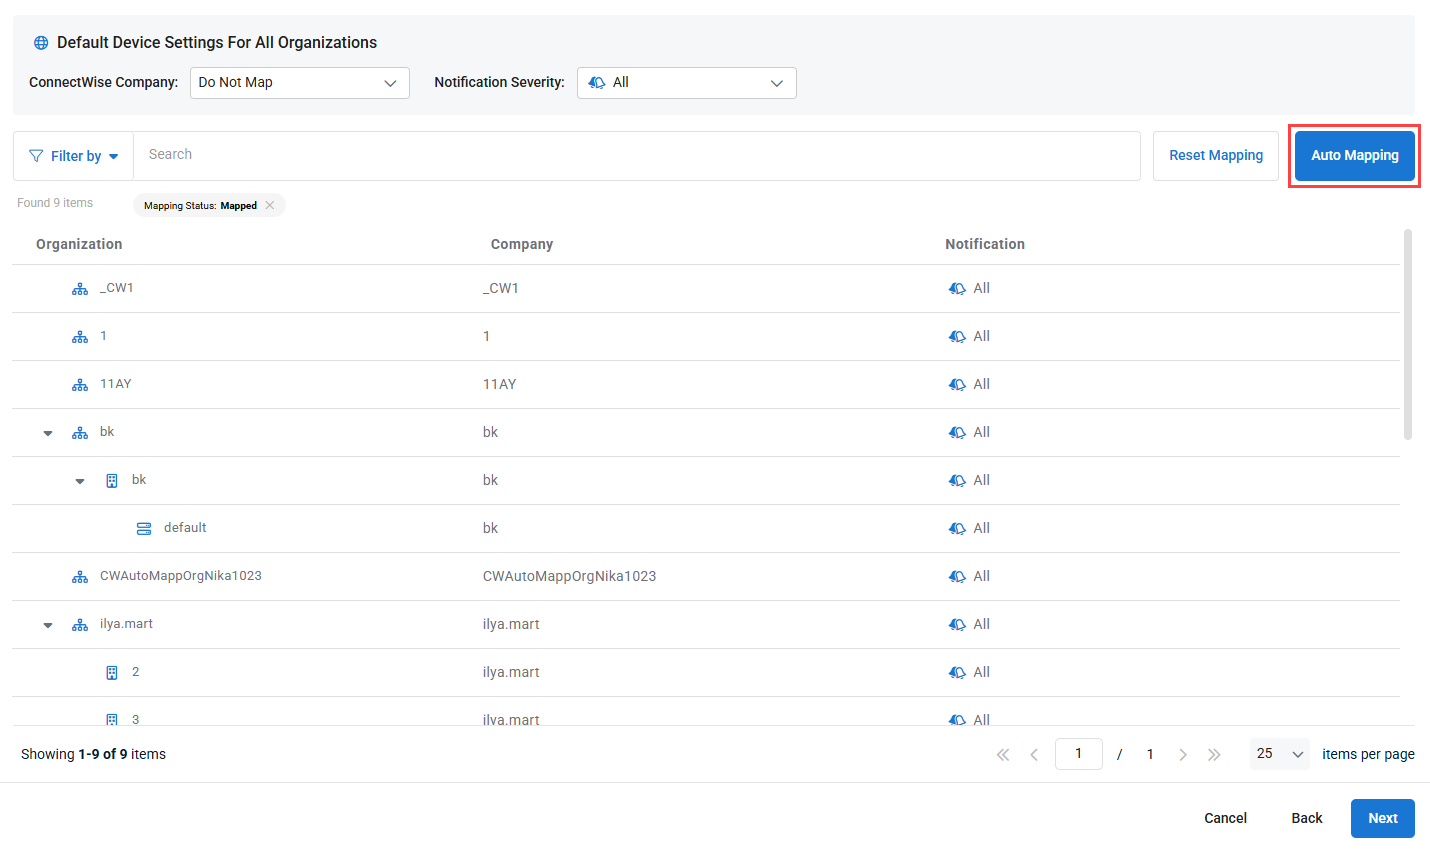
- Before moving to the next step, confirm that the mapping settings are correct. You can filter by mapping status using the Filter by option, or search your organizations using the search bar, both located at the top of the page. If you need to reset all mapping and notification severity settings for organizations, sites, and device groups to their default values, click the Reset Mapping button.
- When finished, click Next to save your organization mapping settings and open the Device Mapping section.

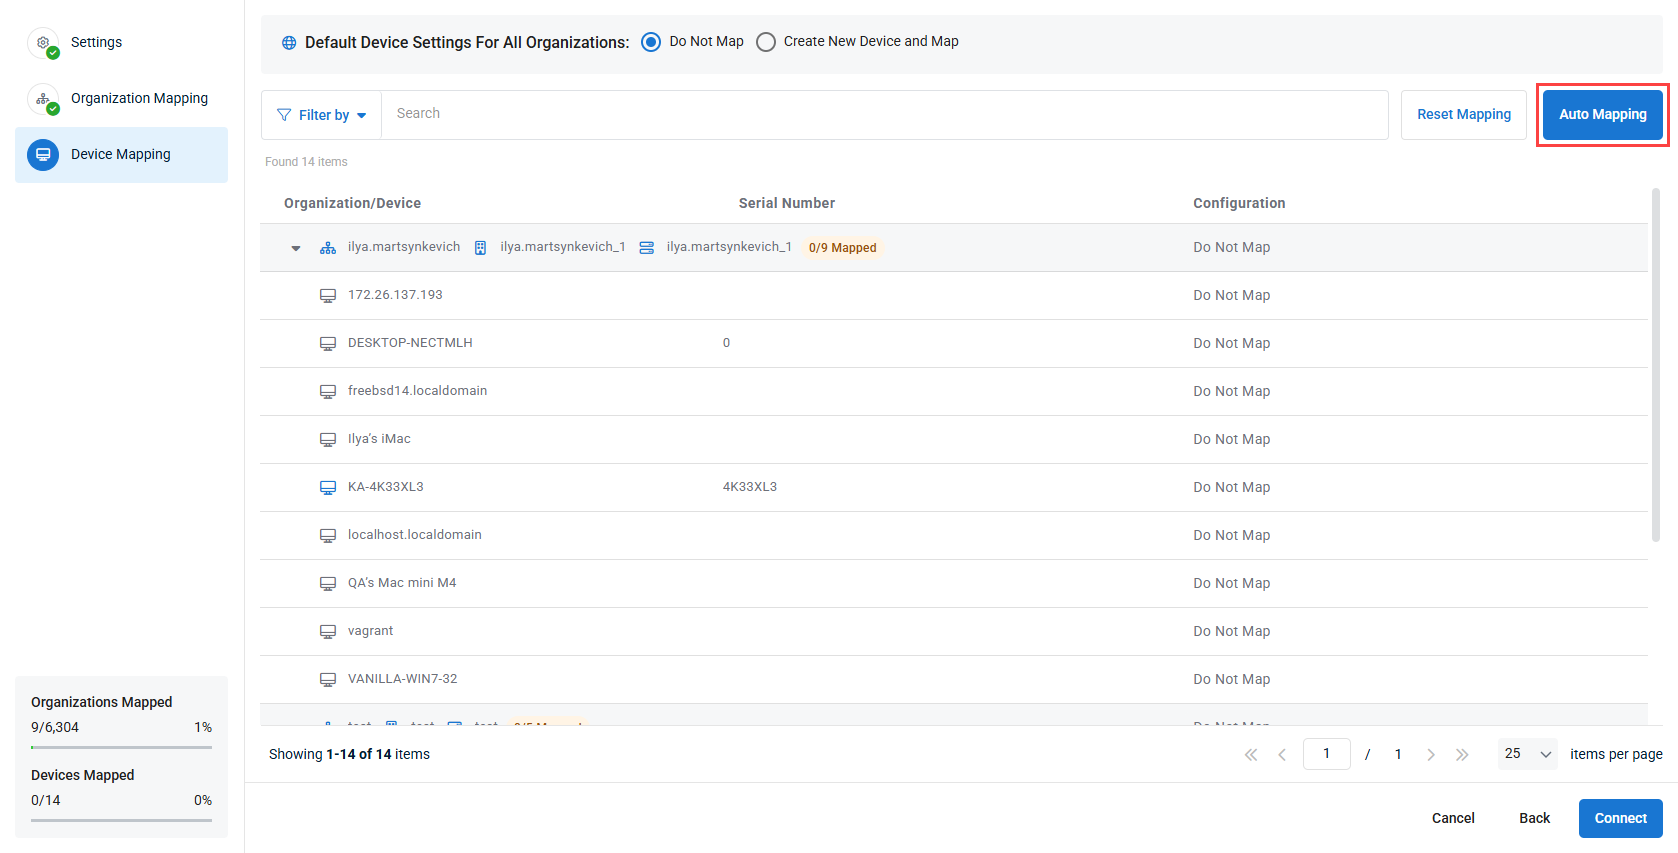
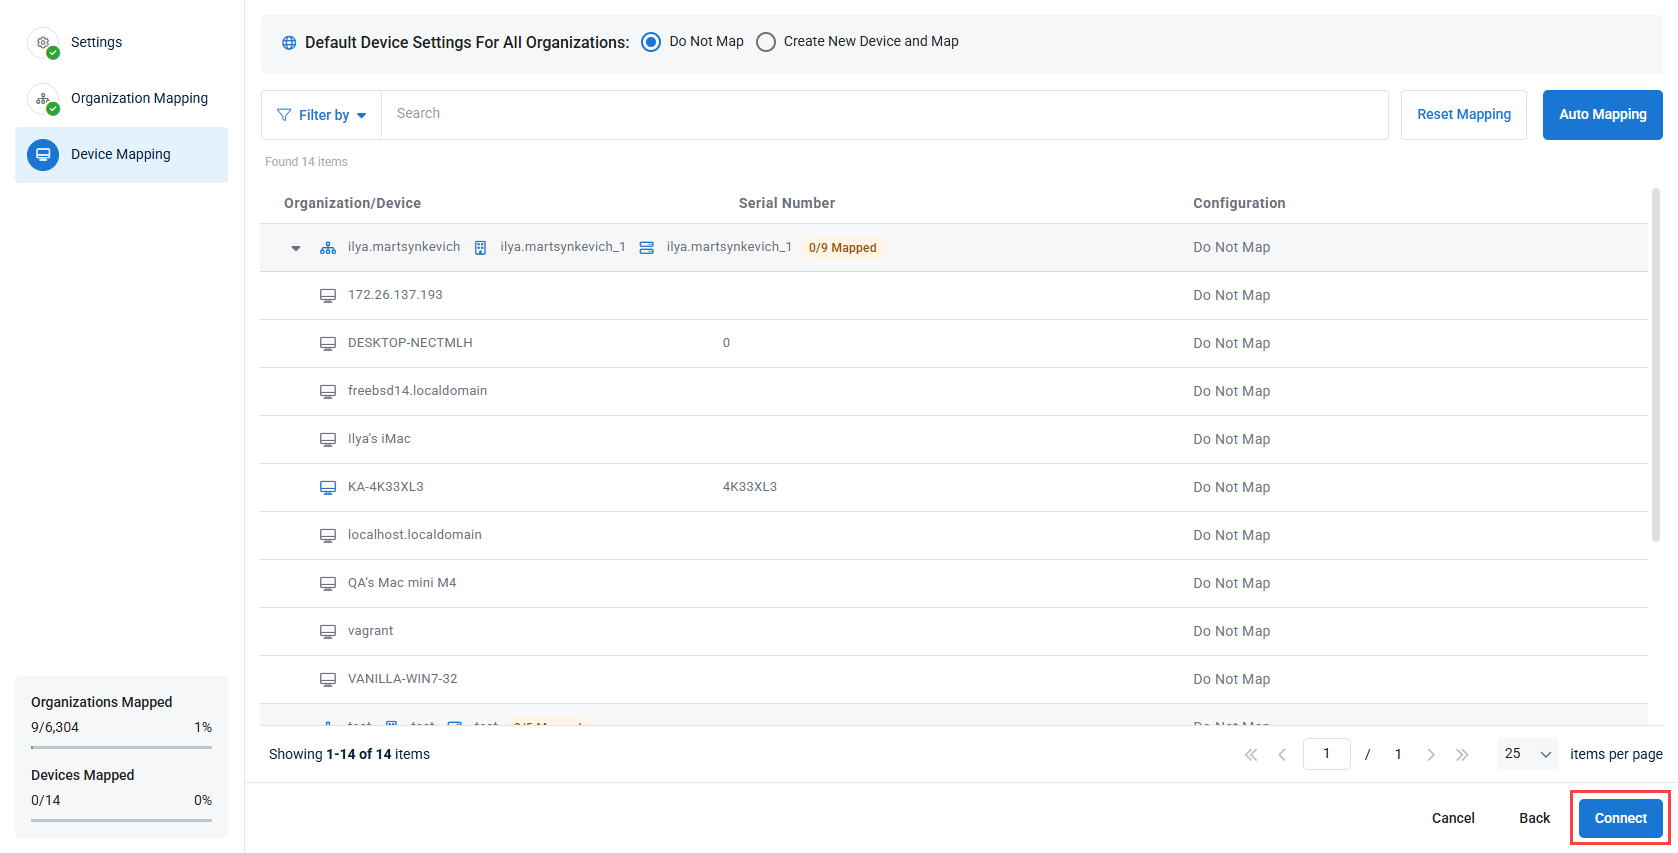
- In the Device Mapping section, first configure the Default Device Settings for All Organizations at the top of the page to choose whether unmapped devices will remain unmapped, or a have a new configuration created and mapped to them in ConnectWise. By default, these settings will apply to all devices in mapped organizations, sites, and agent groups.

- To configure device mapping on a per organization and/or per device basis, use the drop-down in the Configuration column. Using this drop-down, you can select the device configuration you want to map a device to in ConnectWise for individual devices. For organizations and devices, you can also choose to not map devices, or create a new device configuration in ConnectWise and map it to the relevant device in VSA 10.

- To expedite device mapping, you can click the Auto Mapping button. This will attempt to automatically map your VSA 10 devices with ConnectWise configurations based on device name and/or serial number.
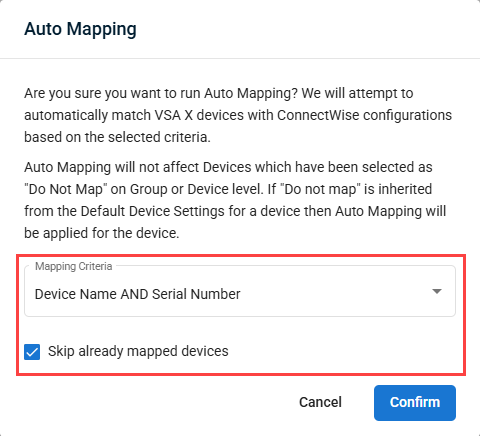
- When defining your mapping criteria, you will be able to choose from the following options:
- Device Name
- Serial Number
- Device Name OR Serial Number
- Device Name AND Serial Number
- In addition, you can select whether you want to skip already mapped devices, which is handy if you've already manually mapped a few devices and don't want the auto mapping to override those settings. Click Confirm once configured to automatically map devices based on your configured criteria.
- When defining your mapping criteria, you will be able to choose from the following options:
- Before saving your configuration, confirm that the mapping settings are correct. You can filter by scope, context, device type, tag, and/or mapping status using the Filter by option, or search your devices using the search bar, both located at the top of the page. If you need to reset all device mapping settings to their default values, click the Reset Mapping button.
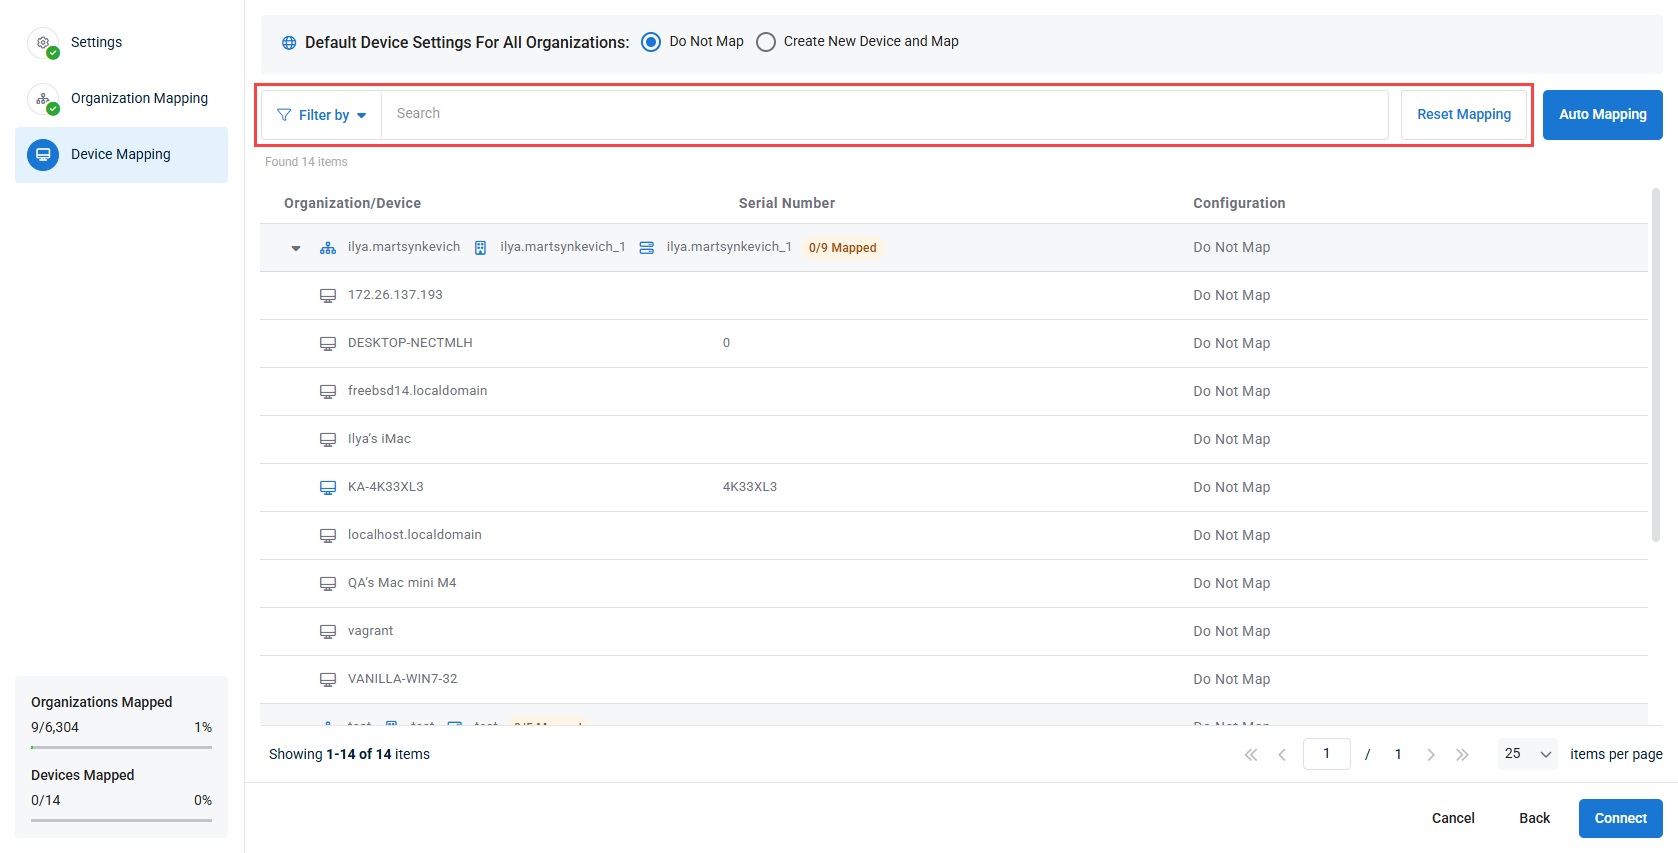
- When finished, click Connect at the bottom right of the page. A pop-up showing a summary of your configured organization and device mappings will show, and you can click Confirm to finish configuration, or Cancel to go back and revise your settings.
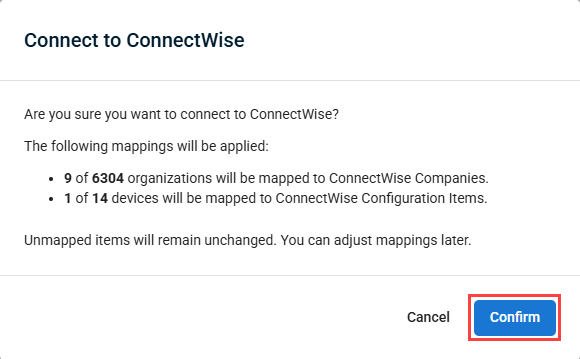
- Once you click Confirm, the mapping settings you configured will take effect, and VSA 10 will be integrated with ConnectWise.
To test out the ConnectWise integration, you can send a test ticket by navigating to Integrations > ConnectWise and selecting Test Ticket.
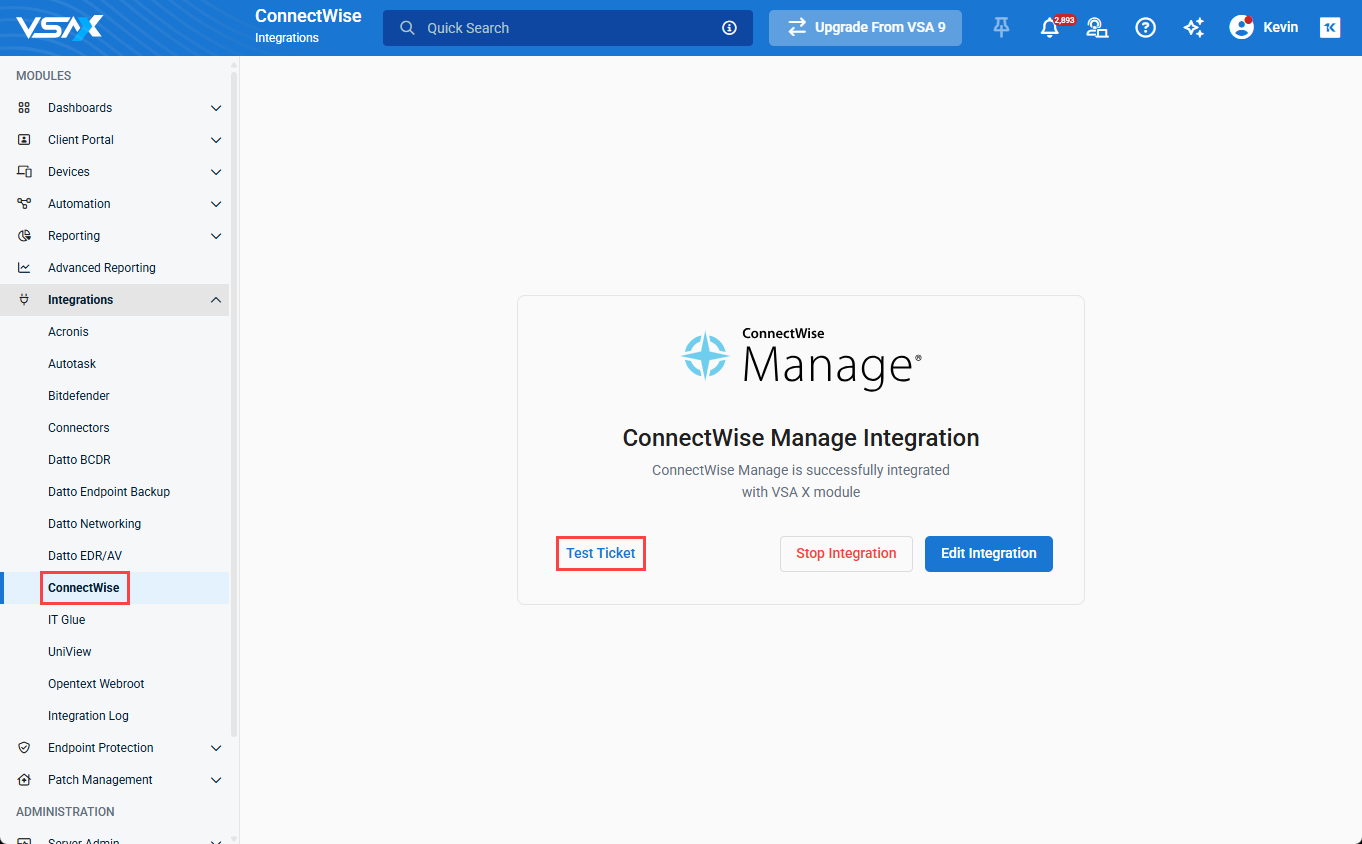
If you need to change any of the settings you configured while setting up your ConnectWise integration, navigate to Integrations > ConnectWise, and click the Edit Integration button.

This will send create a ticket in the service desk board you specified in the Settings section of your integration. If the ticket fails, confirm your API configuration is correct.
If you want to stop the ConnectWise integration with VSA 10, halting all ticket creation and breaking the organization and device mapping, navigate to Integrations > ConnectWise and click the Stop Integration button.
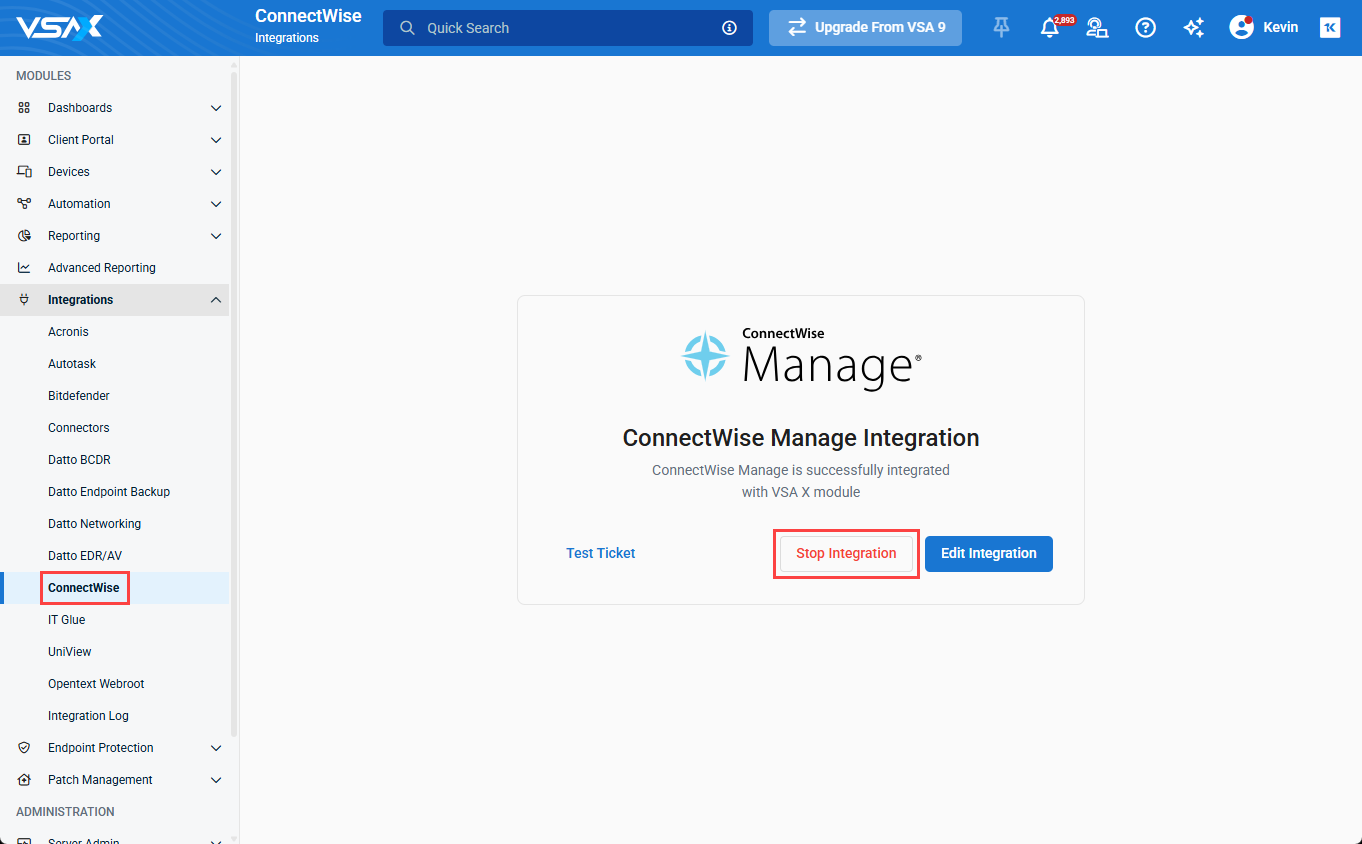
IMPORTANT Stopping the ConnectWise integration will remove all of your configured settings for the integration. In order to reconnect ConnectWise to VSA 10, you will need to go through the full configuration wizard from the beginning.


