Working Directory
When using various workflow actions involving file download, management, and execution you have the convenience of referring to a pre-set Working Directory. This directory is created automatically by the VSA 10 Agent and will act as your temporary folder.
Working Directory path on the target device:
- Windows: C:\ProgramData\Kaseya\VSAX\Working
- Mac: Currently not available
- Linux: Currently not available
Workflow Actions supporting the Working Directory feature:
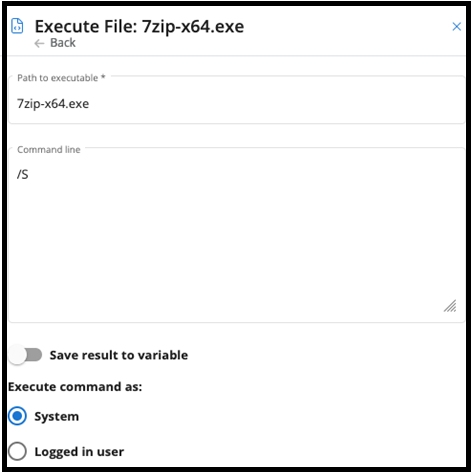
- Execute File
- Write File
- Get URL
- Unzip File
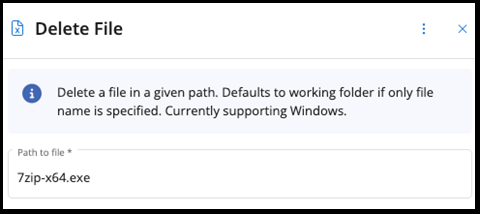
- Delete File
How to use Working Directory in your Workflows
Preconditions
In this practical example, we deploy the 7zip application. We are using the Write File, Execute File, and Delete File Workflow Actions to download and install 7zip from Managed Files.
Steps to download and install 7zip from Managed Files:
- Upload the 7zip-x64.exe installer from www.7zip.org to your Managed Files area.
- Create a new Ad-Hoc Workflow.
- In Workflows, add a new step and select the Write File Workflow Action.
- Select the file 7zip-x64.exe. Notice that you do not need to reference any path. The file automatically defaults to the Working Directory. Copy the 7zip-x64.exe file name to be used in the next step.
- Add a new step and select Execute File Workflow Action. Paste the file name copied from step 4 without any path specified. The installation will be executed from the Working Directory.
- Add the step Delete File Workflow Action. Paste the file name copied from Step 2 without any path. The file will be deleted from the Working Directory.